The material posted here comes from Spaceflight Simulator Forum and is the work of well-experimented user Altaïr. We must thank him for his kindness of allowing his work to be shared on the Terraforming Wiki. Spaceflight Simulator is a 2D space environment that allows players to launch rockets towards other planets and to build space stations. The game is simple, but realistic and now, with the planet editor function, it can be adapted to any real or imaginary Solar System. In this simulator, space distances are scaled 1/20, but still, the physics involved are very realistic. So, results from this simulation are very close to the real thing.
Also, please note that the source article is copyrighted. If you wish to copy and post something, please ask Altaïr for permissions. The original article can be found here.
Before everything, this article is not written in classic wiki format; it is more in a blog format. However, I decided to post it here because it it is simple to understand and very useful. We cannot go terraform other planets unless we know the basics of space flying.
Gravity assist technique[]
Altaïr made this as a succession of lessons, which are impossible to recreate using a wiki format. Therefore, the lessons will be shown here as a whole.
Overview[]
A gravity assist is a powerful space maneuver that will save a lot of fuel a space mission. It uses gravity of another celestial body to boost or lower the speed of a rocket.
First of all, I people should be familiarized with the Oberth effect.
The gravitational slingshot is a very powerful technique, but also a tricky one, whereas the Oberth maneuver is a more basic one that still allows some substancial benefit
In this text we will use the following abbreviations:
- LEO: Low Earth orbit
- SOI: Sphere of influence
What's the gravitational slingshot?
Basically, the gravitational slingshot, also known as gravity assist, consists in making a fly-by of a planet (or a moon) and let the gravity curve your trajectory so that it provides you a free speed gain.
Here is an easy example to reproduce. With a small rocket, first aim for the Moon as if you were going for a Moon mission:

Then, once the rocket enters the Moon's SOI, just let it on its trajectory until it leaves:
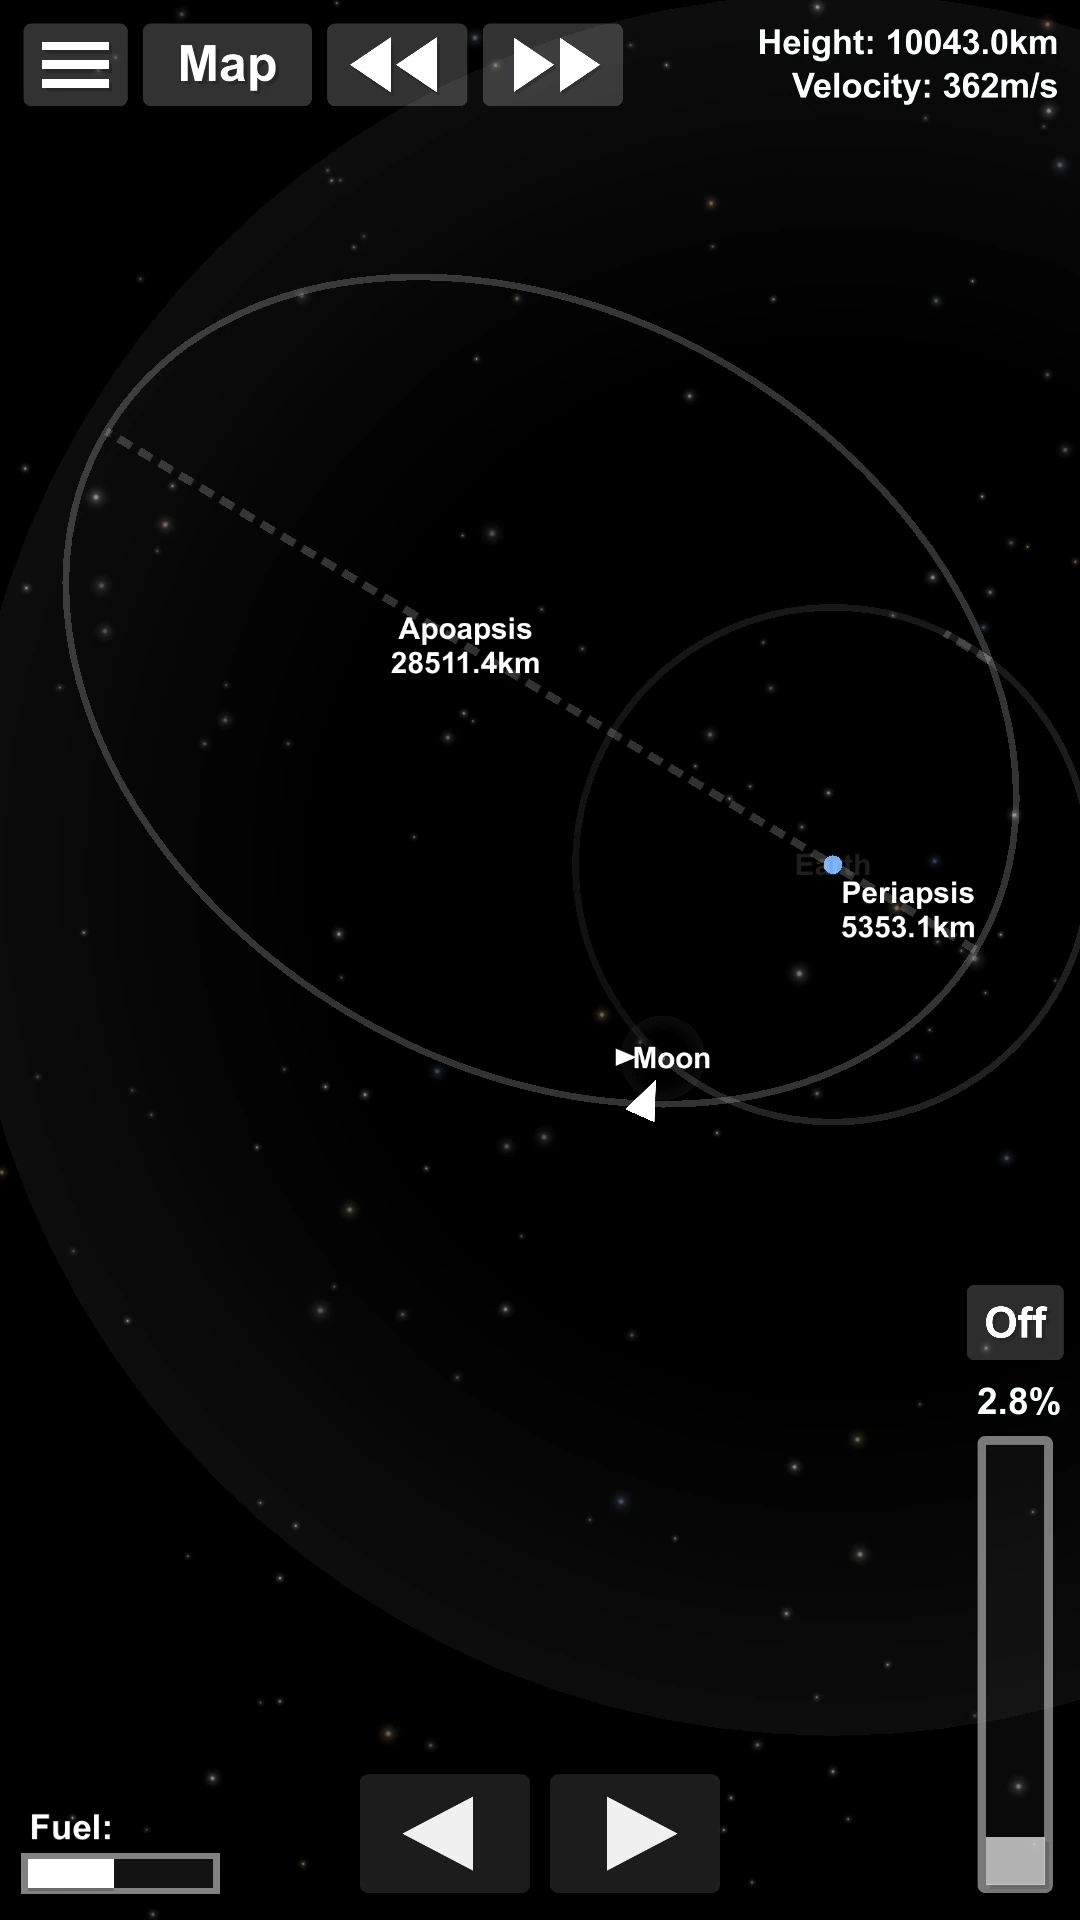
One will notice that the orbit is much higher than before now! What's interesting is that the rocket didn't spend a fuel drop to do that! That maneuver is a gravitational slingshot.
Something important to notice is that a flyby must be done over the rear side of the Moon. By "rear", it means the direction the Moon comes from. If you make a flyby over the front side, the effect will be reversed.
Now, generally speaking, maybe we could exploit this effect to our advantage... But to anticipate our future trajectory we will have to understand how it works first! What happens exactly? Isn't it weird that the rocket magically gains speed by just flying over the Moon? And why does the result depends on the side you fly over?
To explain this, let's use an analogy. This will look completely disconnected from our problem at first, but this is an easier experience to understand, and as the gravitational slingshot obeys to a similar logic it will be easier to understand.
Let's make an experience!
Now, let's forget spaceflight for a while and let's play ball for a moment. You see that truck parked in front of you? What will happen if you shoot your ball against it? You don't expect anything special to happen right? Here is the experience:
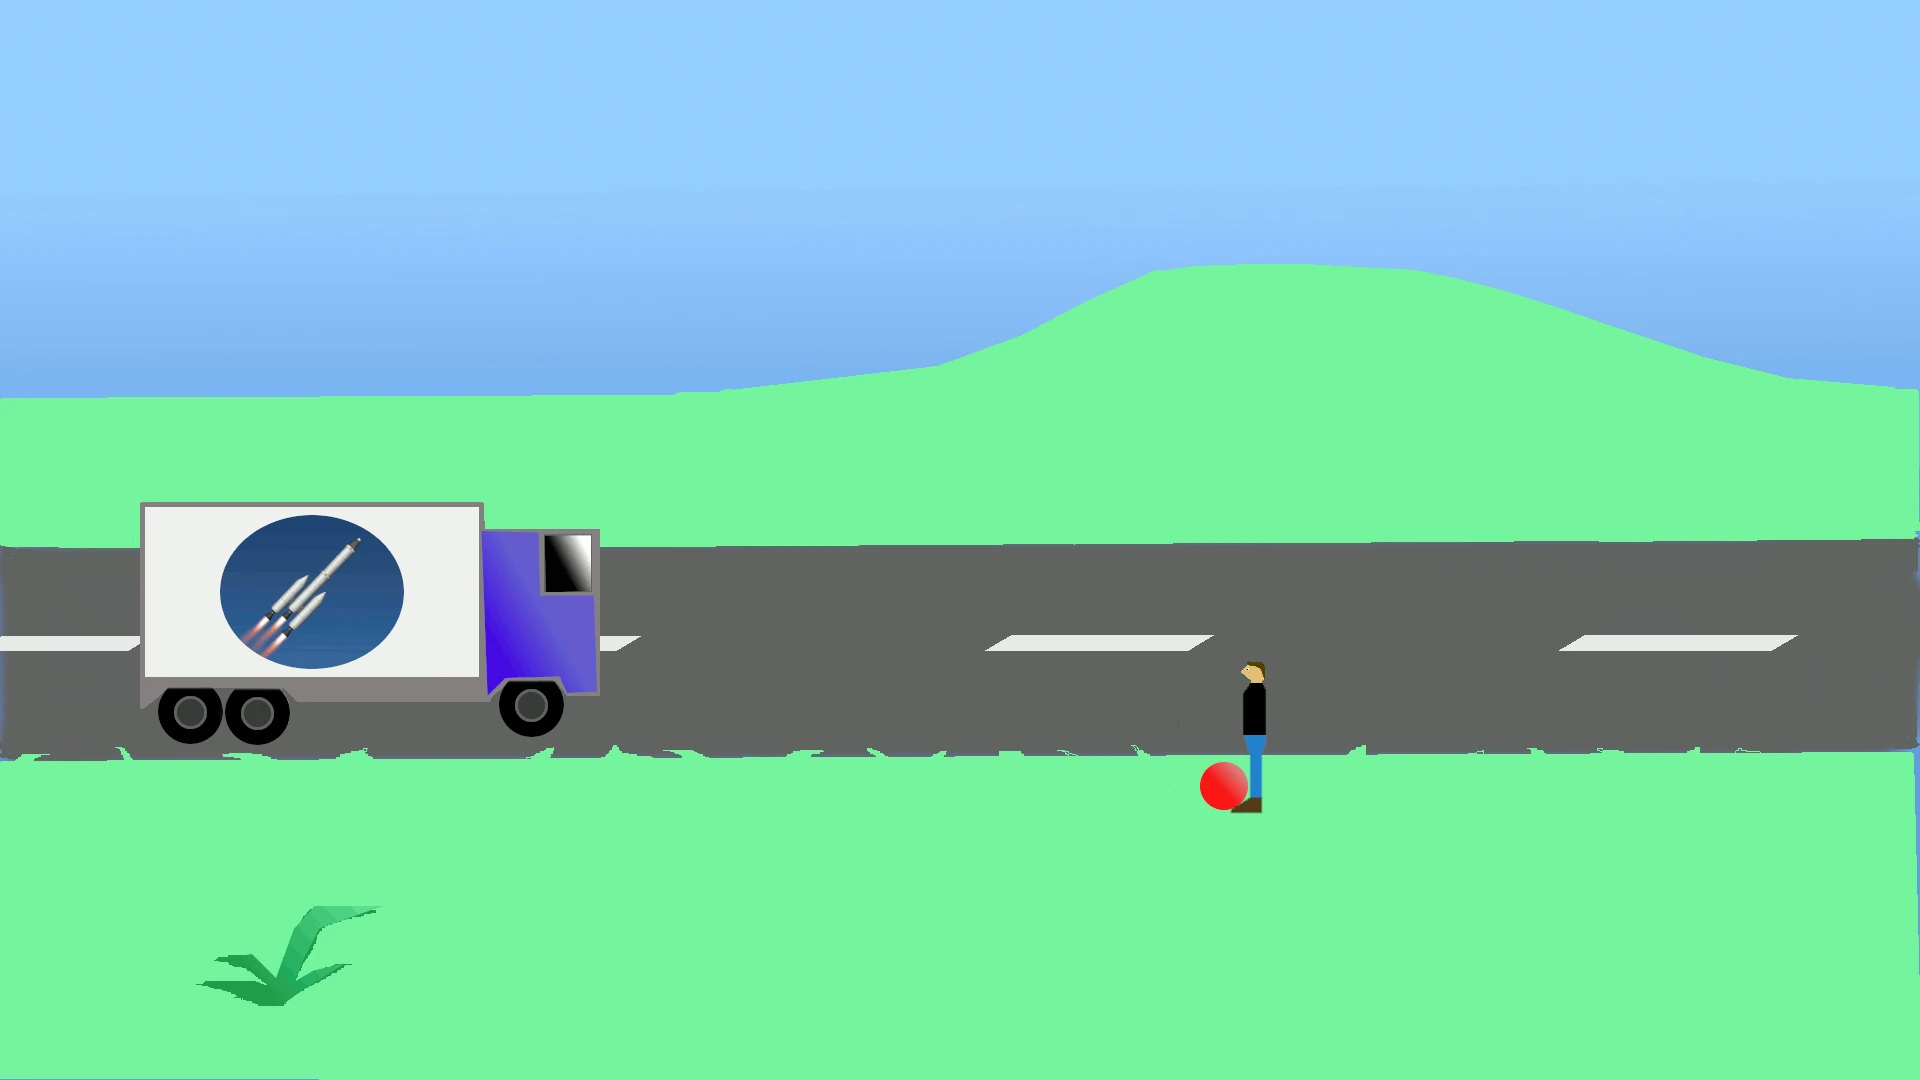
Indeed, the ball just bounces against the truck and that's all...
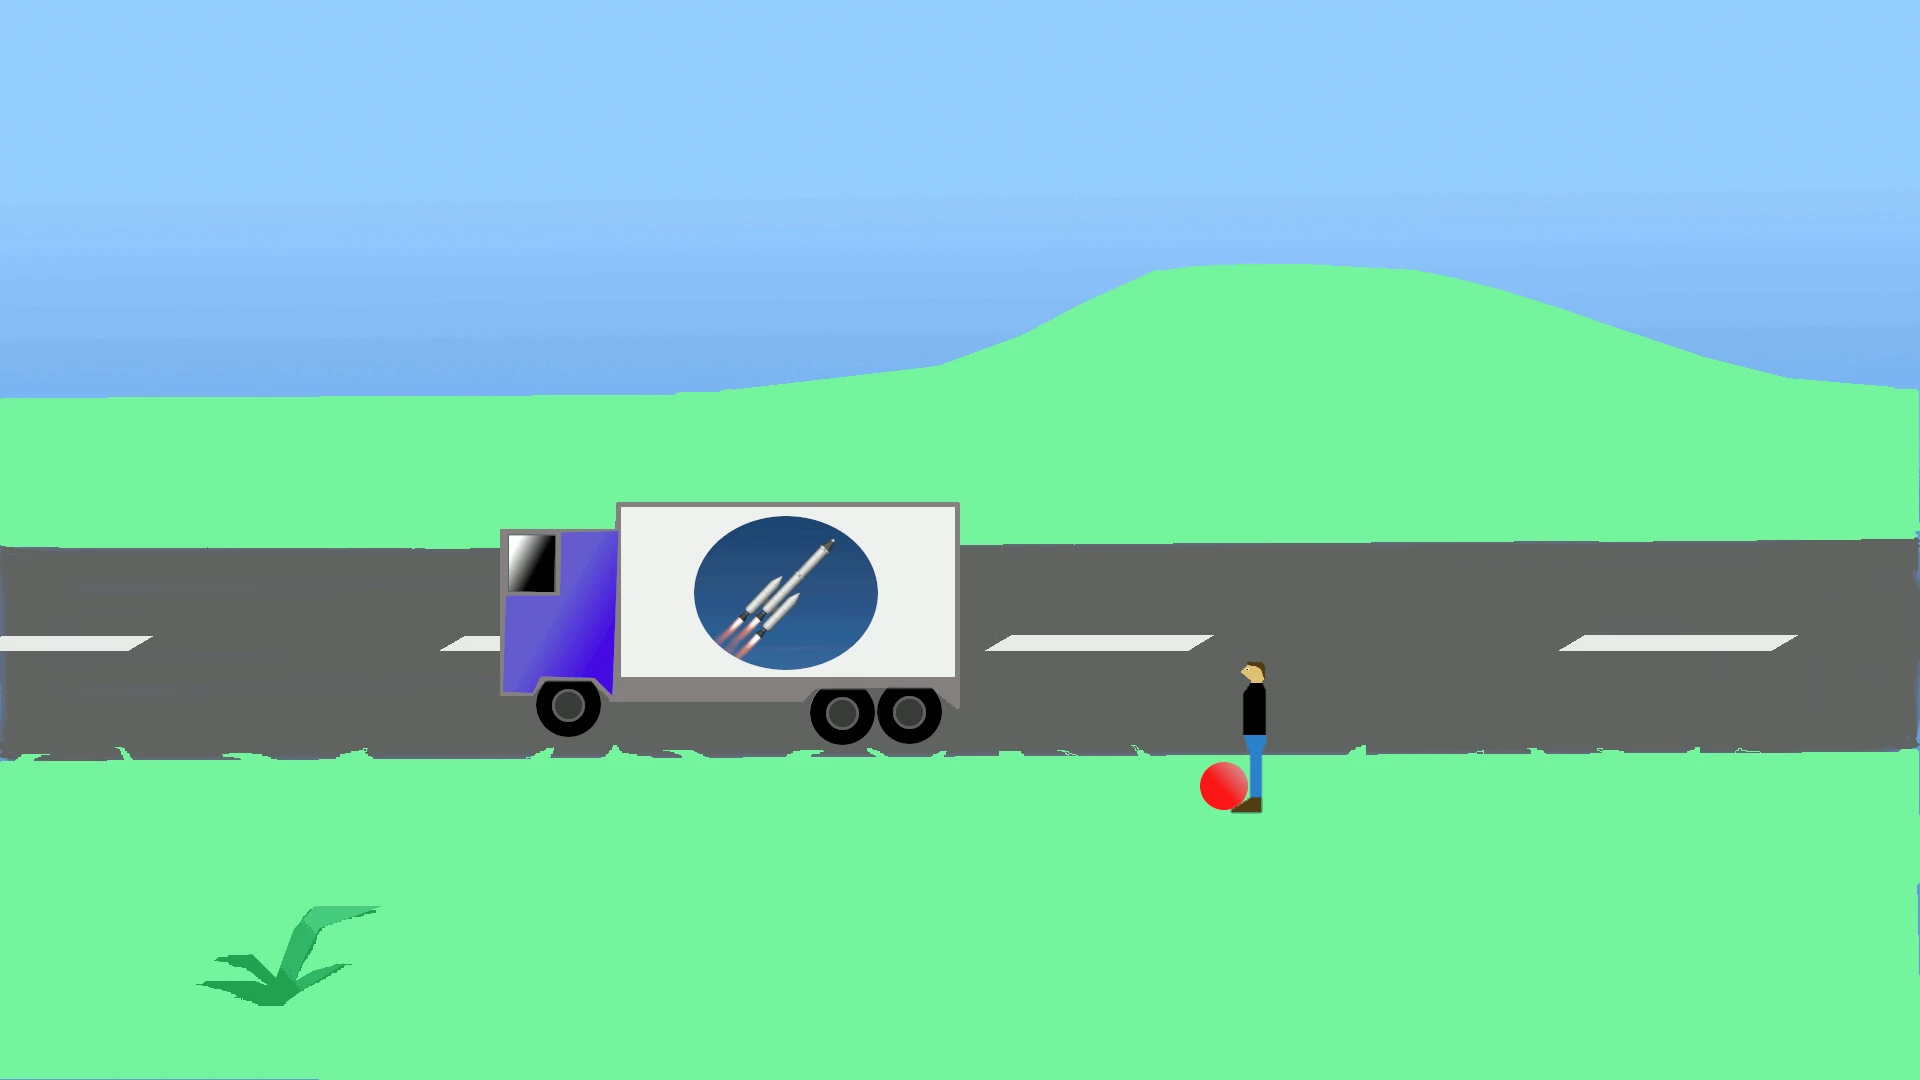
But hey, what would happen if the ball is sent against the truck while it's driving towards us? Well, let's try:
Wow, now the ball bounces at a much faster speed! What happened is that because of the truck's speed; there was a higher relative speed between the ball and the truck. Thus the ball received a greater impact from the truck and bounced stronger. Seems logical right?
All this applies according to the laws of Newtonian mechanics. The ball gained speed from the truck. The truck is slowed down a bit (a decrease in speed that is negligible, about less than 1 mm/s). Also, the truck's driver will notice the ball coming and leaving with the same speed. Suppose the ball is traveling with 20 km/h and the truck with 40. The driver will see the ball approaching with 40+20=60 km/h and leaving with the same 60 km/h. However, from a fixed observatory (for example a person sitting on the road), the ball approaches with 20 km/h and leaves with 40+40+20=100 km/h. The ball changes speed with 120 km/h and goes in a completely different direction.
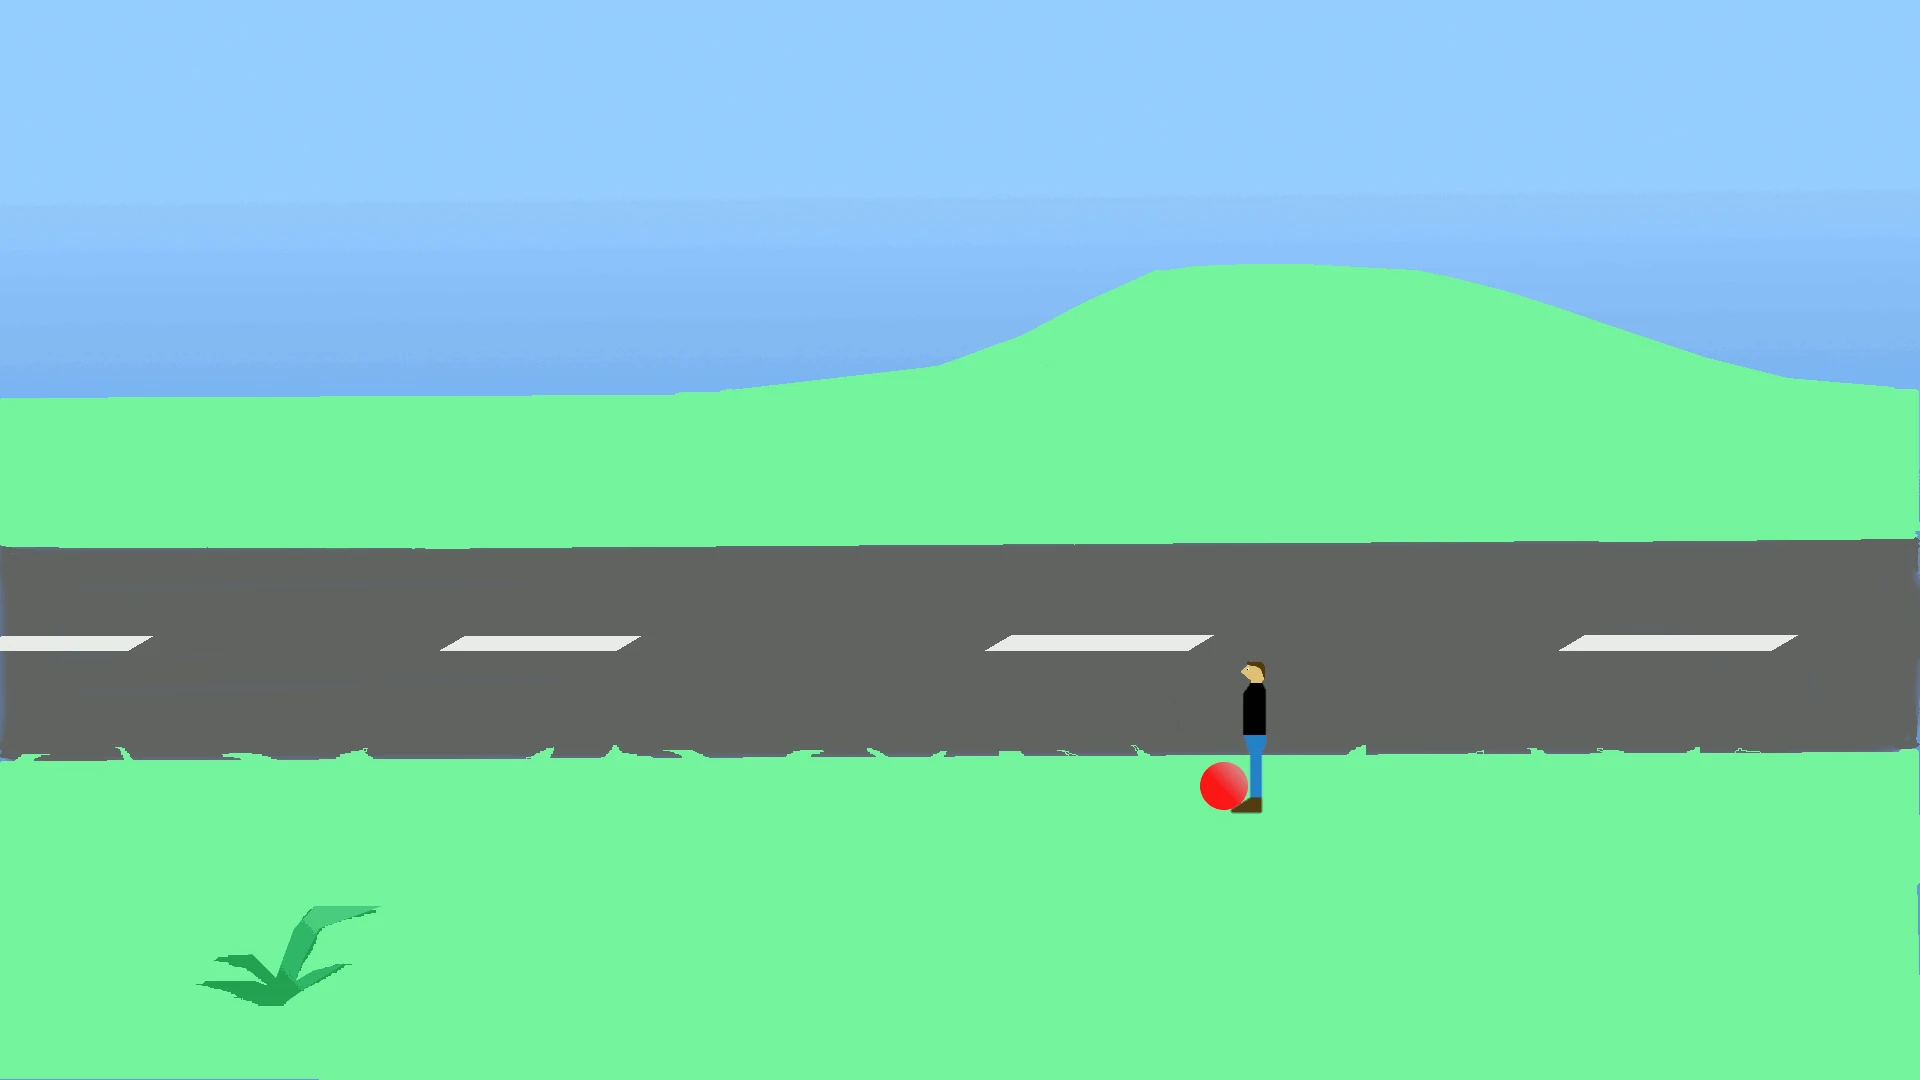
Now, let's try the same experience, but with the truck driving away. What do you think it would happen?
Correct, now, the ball bounces at a reduced speed. In this case, the relative speed was reduced and then the impact was lower.
Now, if the truck is driving with 20 km/h and the ball is approaching with 30 km/h, the driver will see the ball approaching with 30-20=10 km/h and leaving with 10 km/h. The ball will send a bit of its kinetic energy to the truck, which will move a bit faster (again, less than 1 mm/s). A fixed observatory on the road will notice the ball continuing its trajectory with only 10 km/h after the impact.
Is that OK? So let's get back to Spaceflight Simulator!
Oh, before that, just a warning: in case somebody would be tempted to reproduce that experience in real life, be warned this is a bad idea! You would expose yourself and other people at danger (you probably have no idea of the speed a ball trowed at a fast moving vehicle could acquire), so please, DON'T DO IT! This is really a bad idea. Also, in reality, a ball will lose some speed because of friction and the results will not be quite as expected.
OK, let's go on now.
So, How the gravitational slingshot works?
Let's think about it... What happens during that fly-by of the Moon we were talking about? First, the rocket enters the SOI at low speed and as it gets lower it accelerates right? OK, but once it passed the periapsis, the altitude increases again and the speed diminishes until you exit its SOI. Now, the speed is the same as when the rocket entered the SOI, so we should not be able to gain speed like that...
Indeed, but... Hey wait, the Moon is moving right? Of course it does, when you look at it from outside it orbits around the Earth, so yes it's constantly moving! Remember how the speed of the truck influenced the speed at which the ball bounced? This is exactly the same phenomenon here. Of course, the Moon doesn't impact your rocket (Well, if it happens, the rocket is doomed) like the truck with the ball, but the Moon still attracts it and manages to deflect its trajectory, so the same reasoning applies.
Now we understood how it worked, let's see exactly how one should proceed to use this to its advantage. Let's suppose our rocket is cruising into space and is about to encounter the Earth. Let's use that opportunity to perform a slingshot!
See how the Earth deflects the rocket's trajectory and increases its speed?
There's also included a ghost rocket in the animation. Unlike the real rocket, it's unaffected by the Earth's gravity and keeps going in a straight line. If you carefully observe the two rockets, you will notice that the real rocket is much faster in the end.
What is important here is flying over the side the Earth comes from, so that it deflects your rocket in the direction the Earth is moving (towards the right here).
Now, what if on the contrary we want to reduce our speed? In this case you just have to fly over the other side:
See? Now the rocket's trajectory is deflected in the opposite direction. As a result, the rocket is considerably slowed down.
By increasing the speed, a rocket will move on an ellipse with its apoapsis higher, possibly reaching another planet. By opposite, if the speed is reduced, the rocket will move along another ellipse, with a lower periapsis, probably reaching another planet.
Is it OK? Then you get it! Let's just summarize what you need to remember and we'll see in practice.
As we saw it, what's important is the direction in which the rocket's trajectory is deflected: in the direction towards which the planet moves? It will speed up! In the opposite direction? It will slow down!
The closer you go to the planet, the more your trajectory will be deflected. Thus, one will generally want to fly over the planet as close as possible.
The trajectory will be more deflected by a massive planet than by a light one. Imagine the result with Jupiter!
something important to notice is that the speed gained doesn't depend on the mass of a rocket. This means that the result will be the same with a small capsule or with a rocket carrying a diverted asteroid. This makes that maneuver particularly valuable for heavy rockets!
Reaching Mercury[]
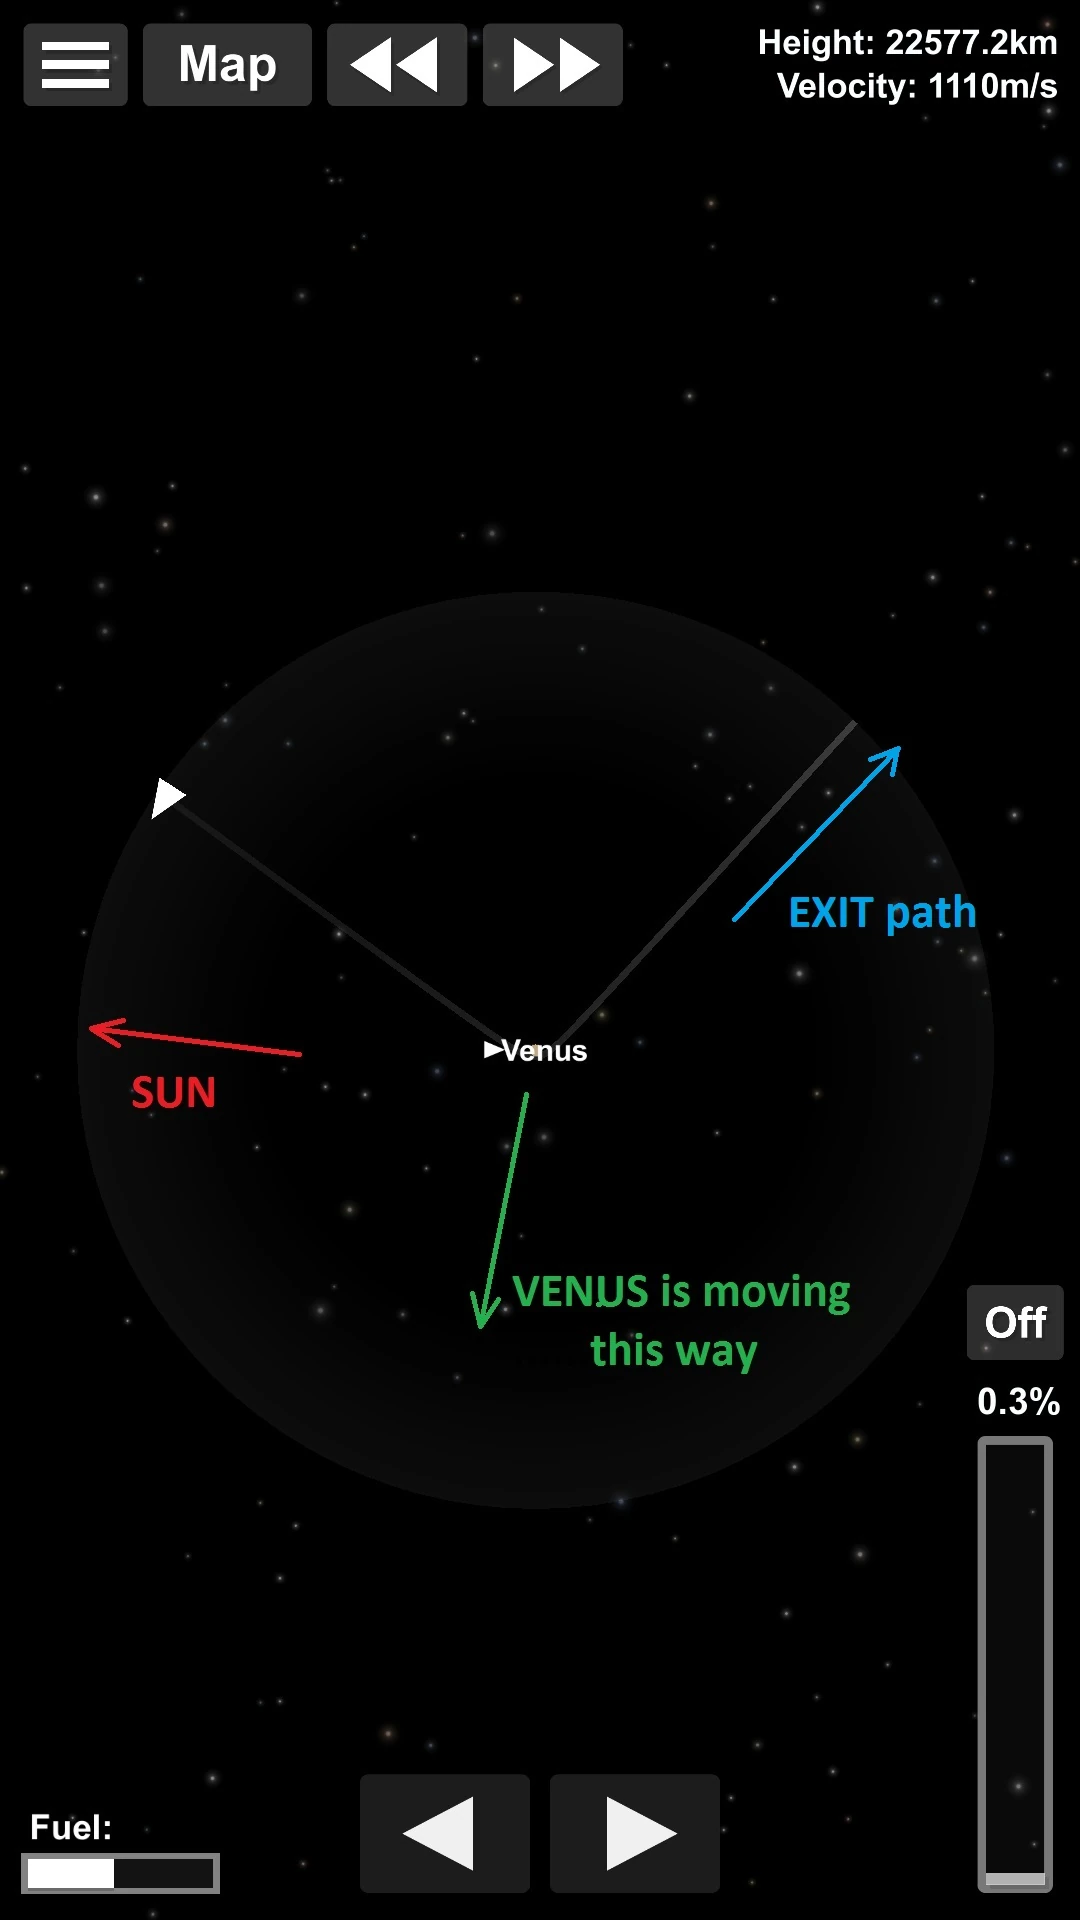
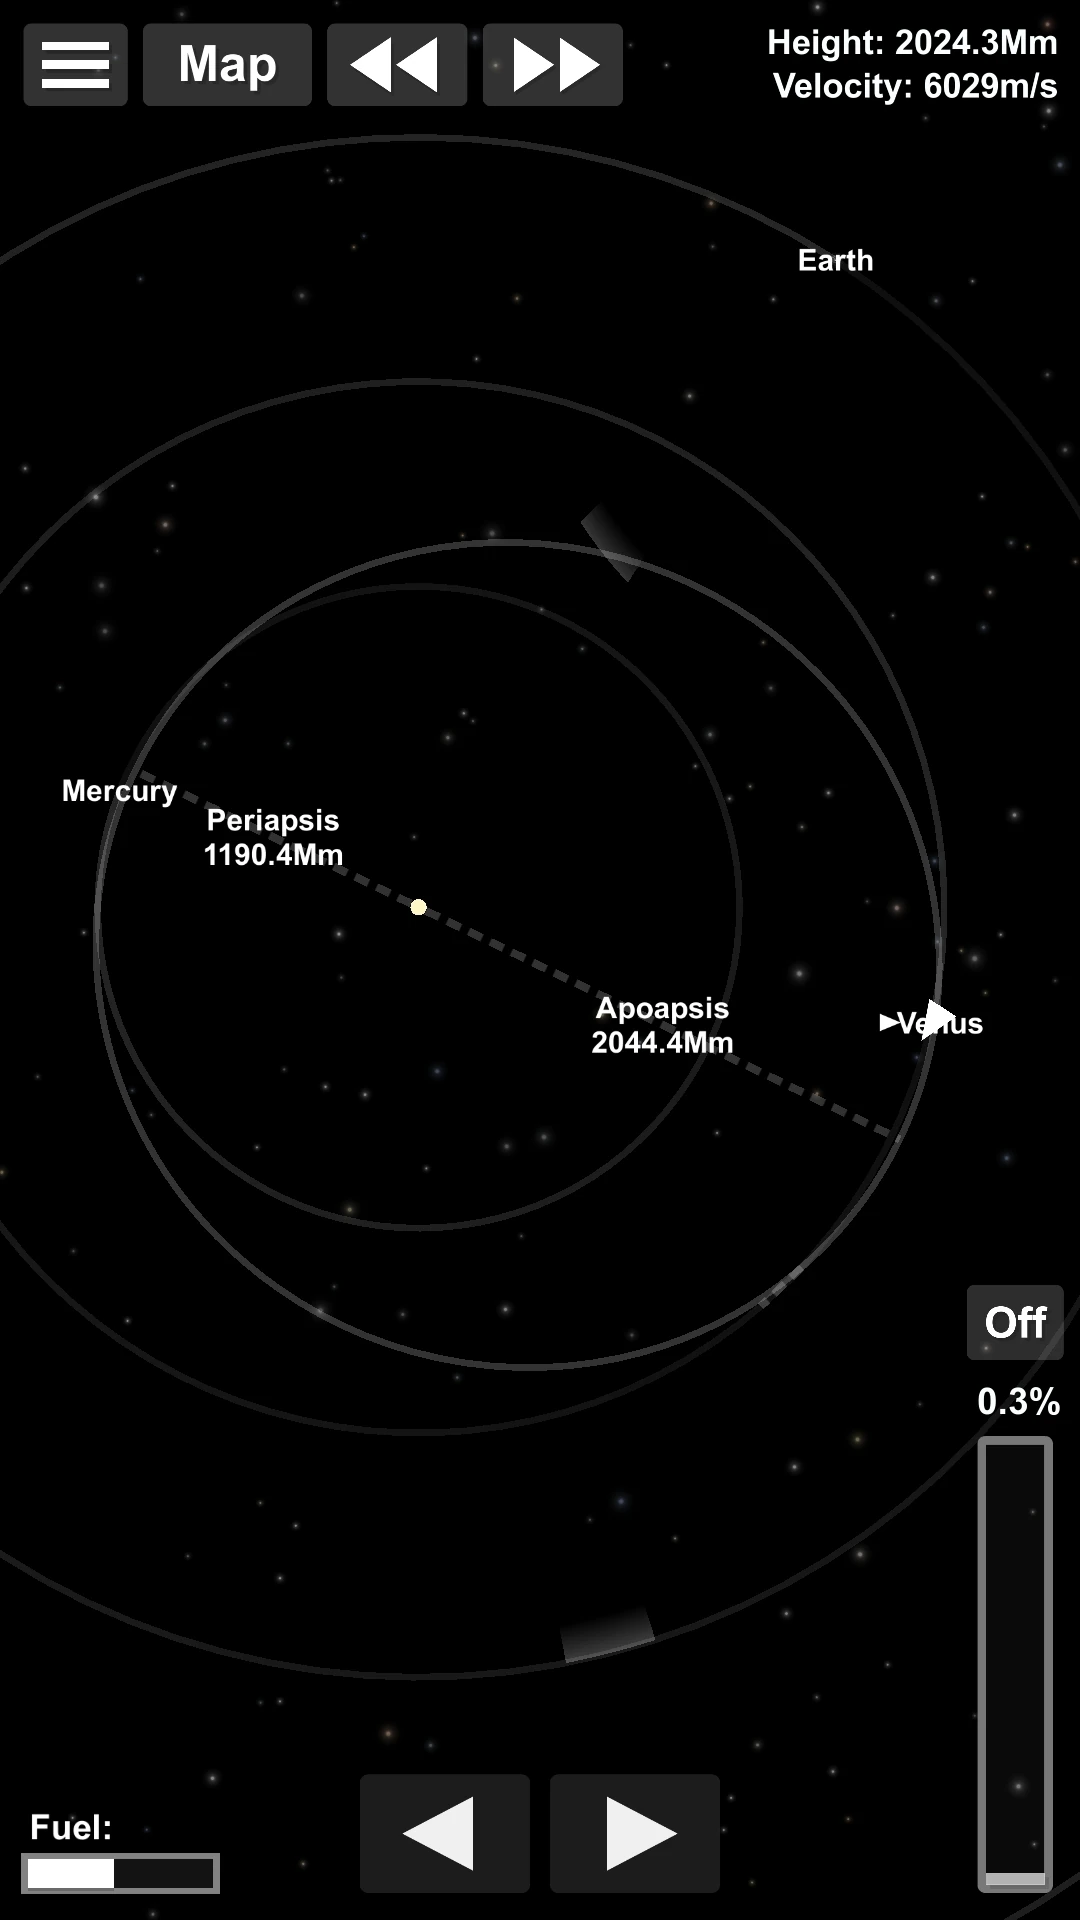
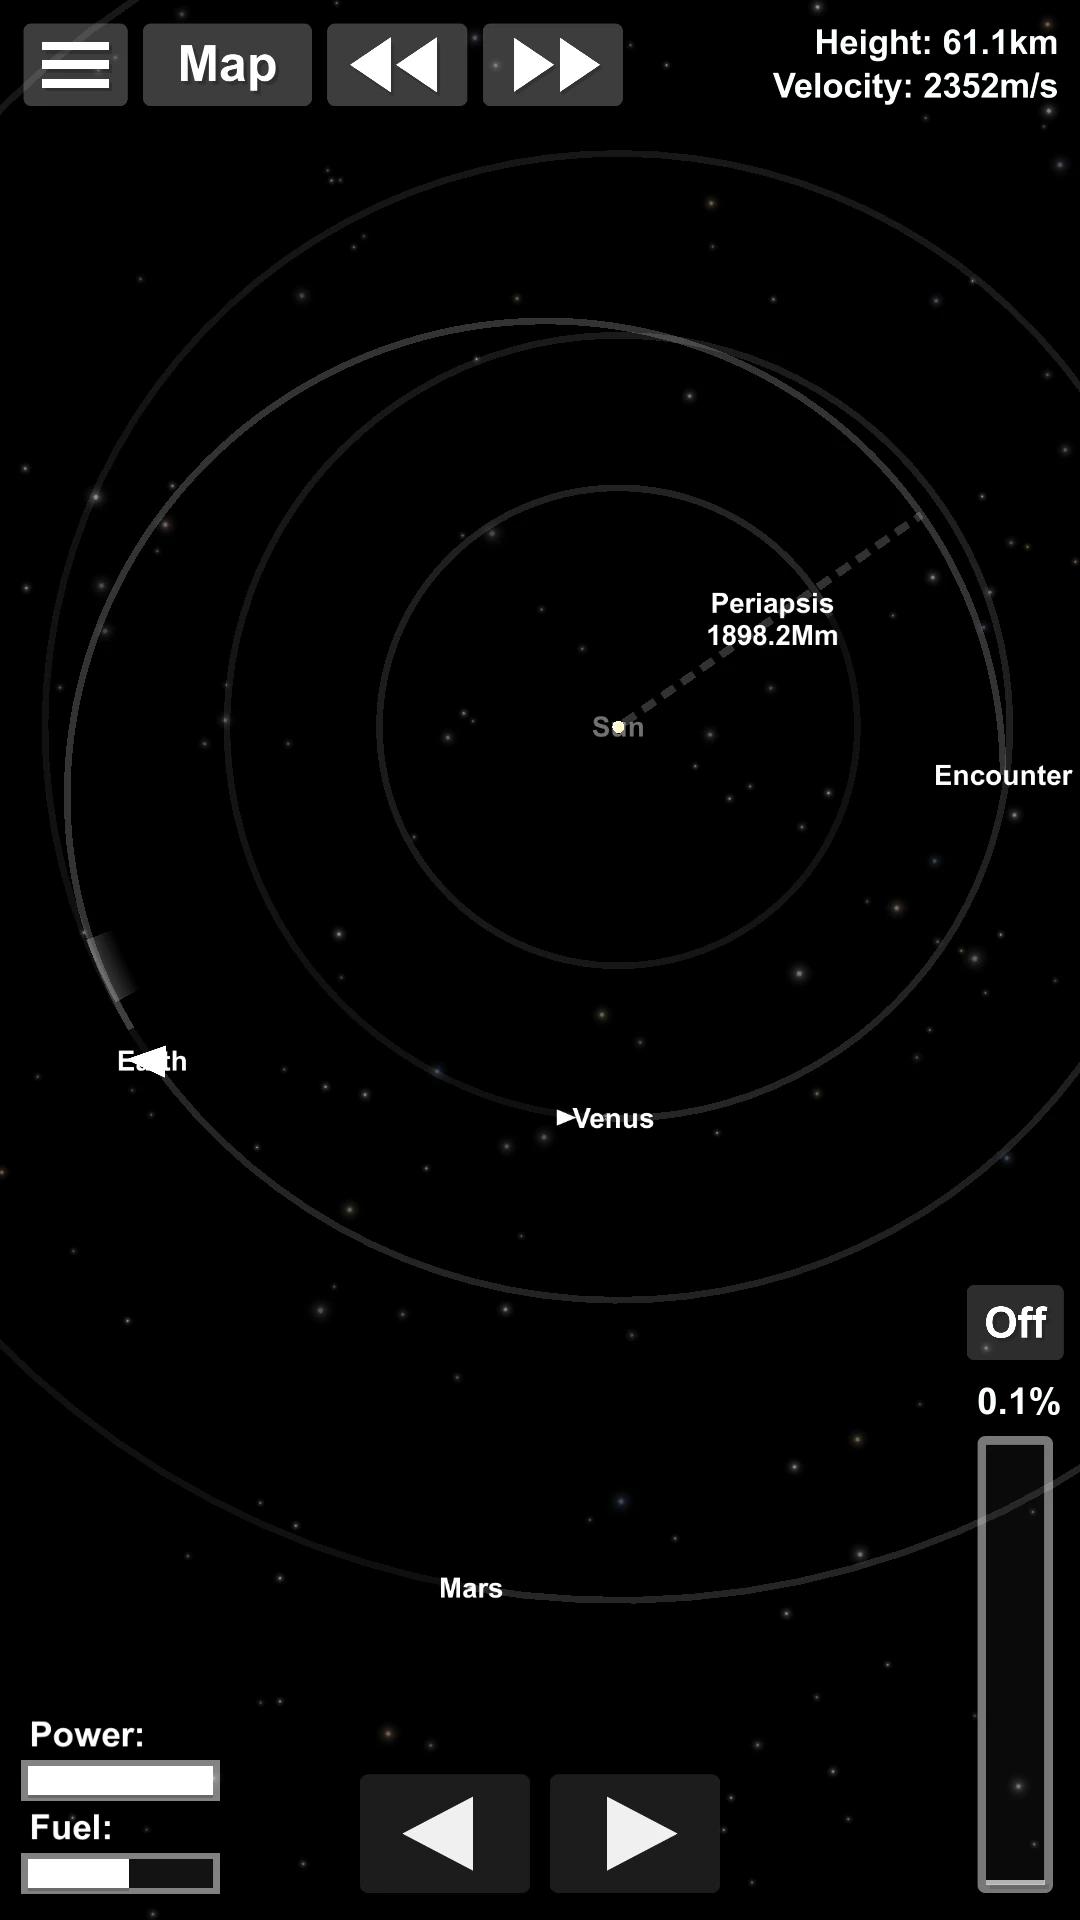
To finish that tutorial, let's see an example of an easy and popular use of that maneuver. Let's suppose you want to go to Mercury. As Venus is quite massive and is approximately half-way on your path, this is a very good opportunity to use the gravity assist maneuver. To do this, first get an encounter with Venus, as if you actually wanted to go there:
You may notice that the injection burn is slightly done after the transfer window, which is why the trajectory goes below Venus orbit before the encounter. The reason for this is because the slingshot from Venus will be more efficient after that. Otherwise it wouldn't reach Mercury directly. The counterpart is that the rocket had to burn a longer time to get onto that transfer trajectory, but because of the Oberth effect the difference is actually pretty small.
Then, which side should you fly over? Mercury is closer to the Sun than Earth, so we want to decrease our speed. In this case you have to make a retrograde fly-by, so that your trajectory will be deflected backwards:
Adjust your periapsis so that it is just above Venus' atmosphere and let the magic happen:
See? This makes a Mercury mission considerably easier!
To get it right in a space simulator, it can first be practiced with the Moon, as this is a close and easy target. Then, make some tries with more ambitious missions!
How to get the most from a gravitational slingshot?[]
Now we have understood the basics, let's see how to use this technique as efficiently as possible.
Firstly, let's debunk a current approximation about this: It's common to assume that a fly-by on the rear face of a planet will increase your speed, and one on the front face will decrease it.
This will generally give the expected result, but not always. In practice, you may experiment an effect much weaker than expected, or even a reversed one!
As we saw, what is important is the direction in which the rocket is deflected. If the rocket is deflected in the direction in which the planet moves, it will speed up. Otherwise, it will slow down. This is closer to reality, but still approximate. To be precise, you also have to take into account your rocket's velocity when entering the SOI.
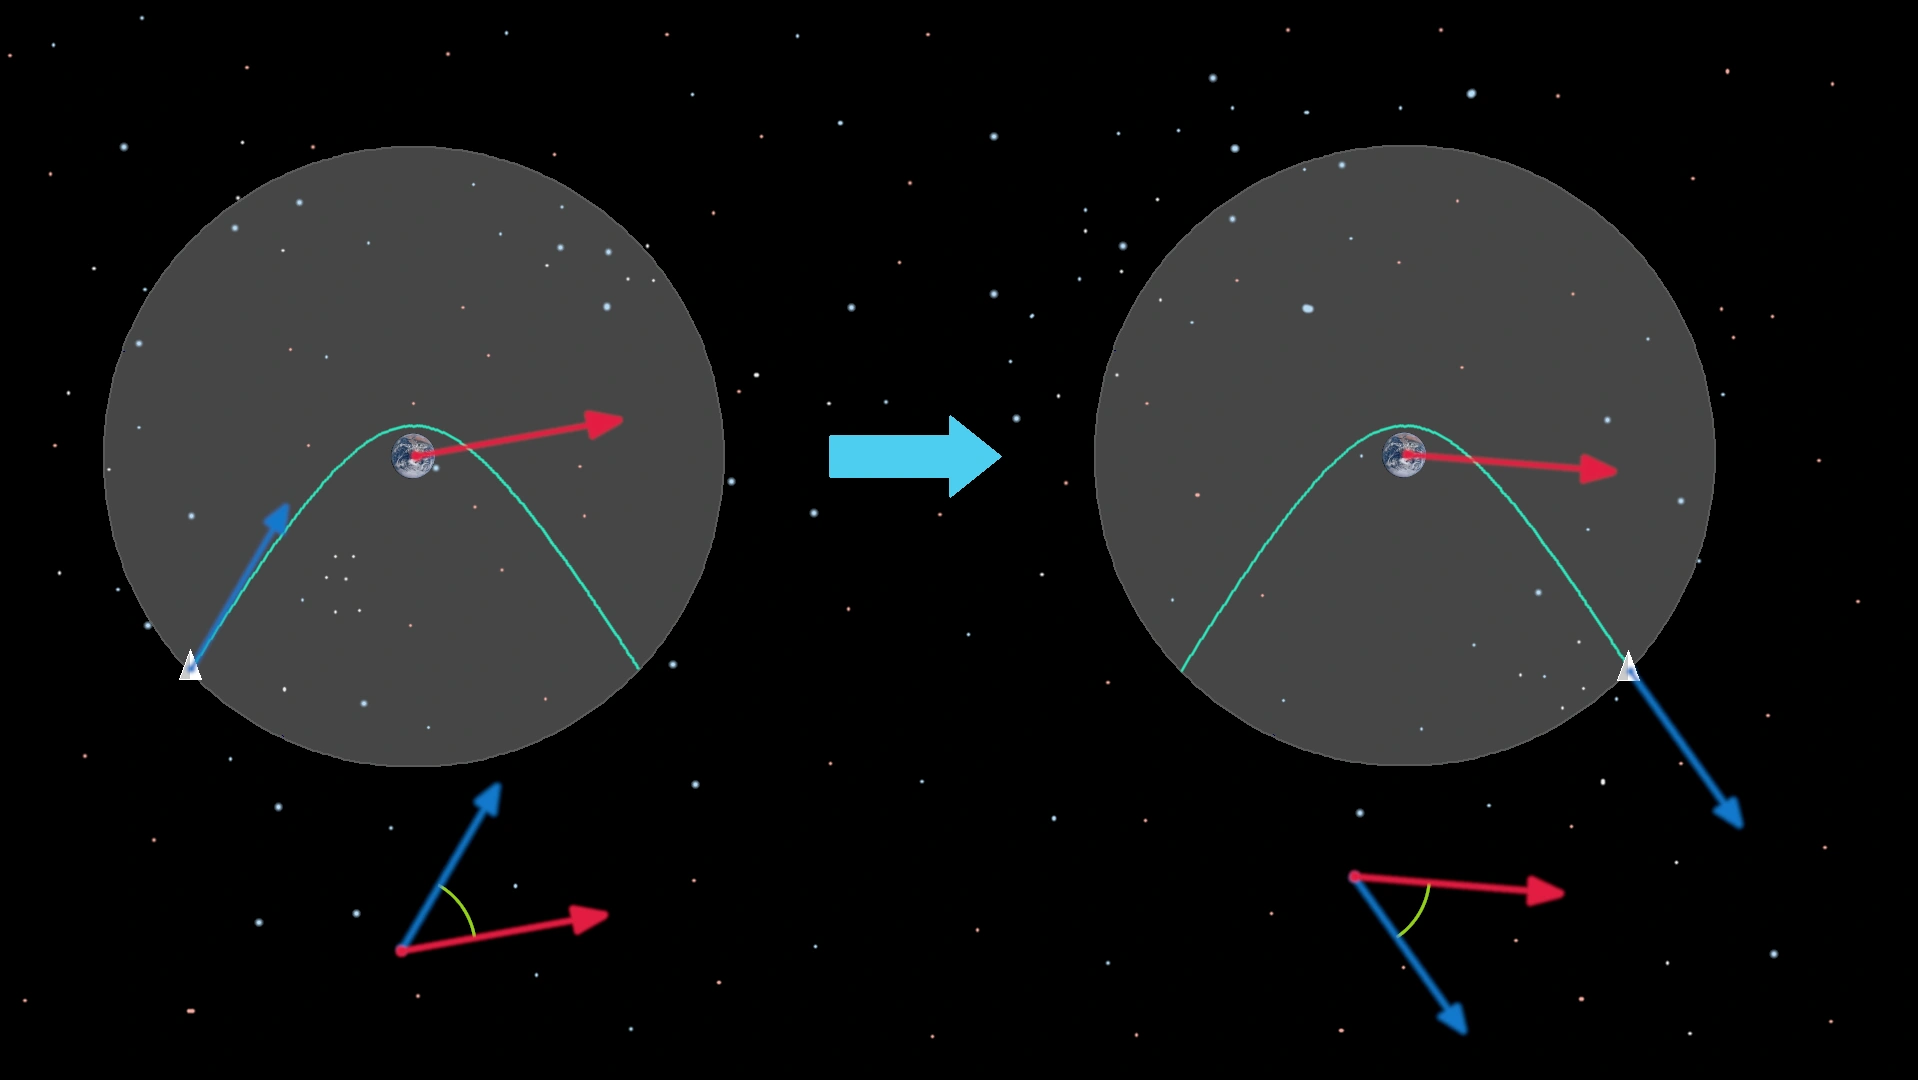
Let's take an example:
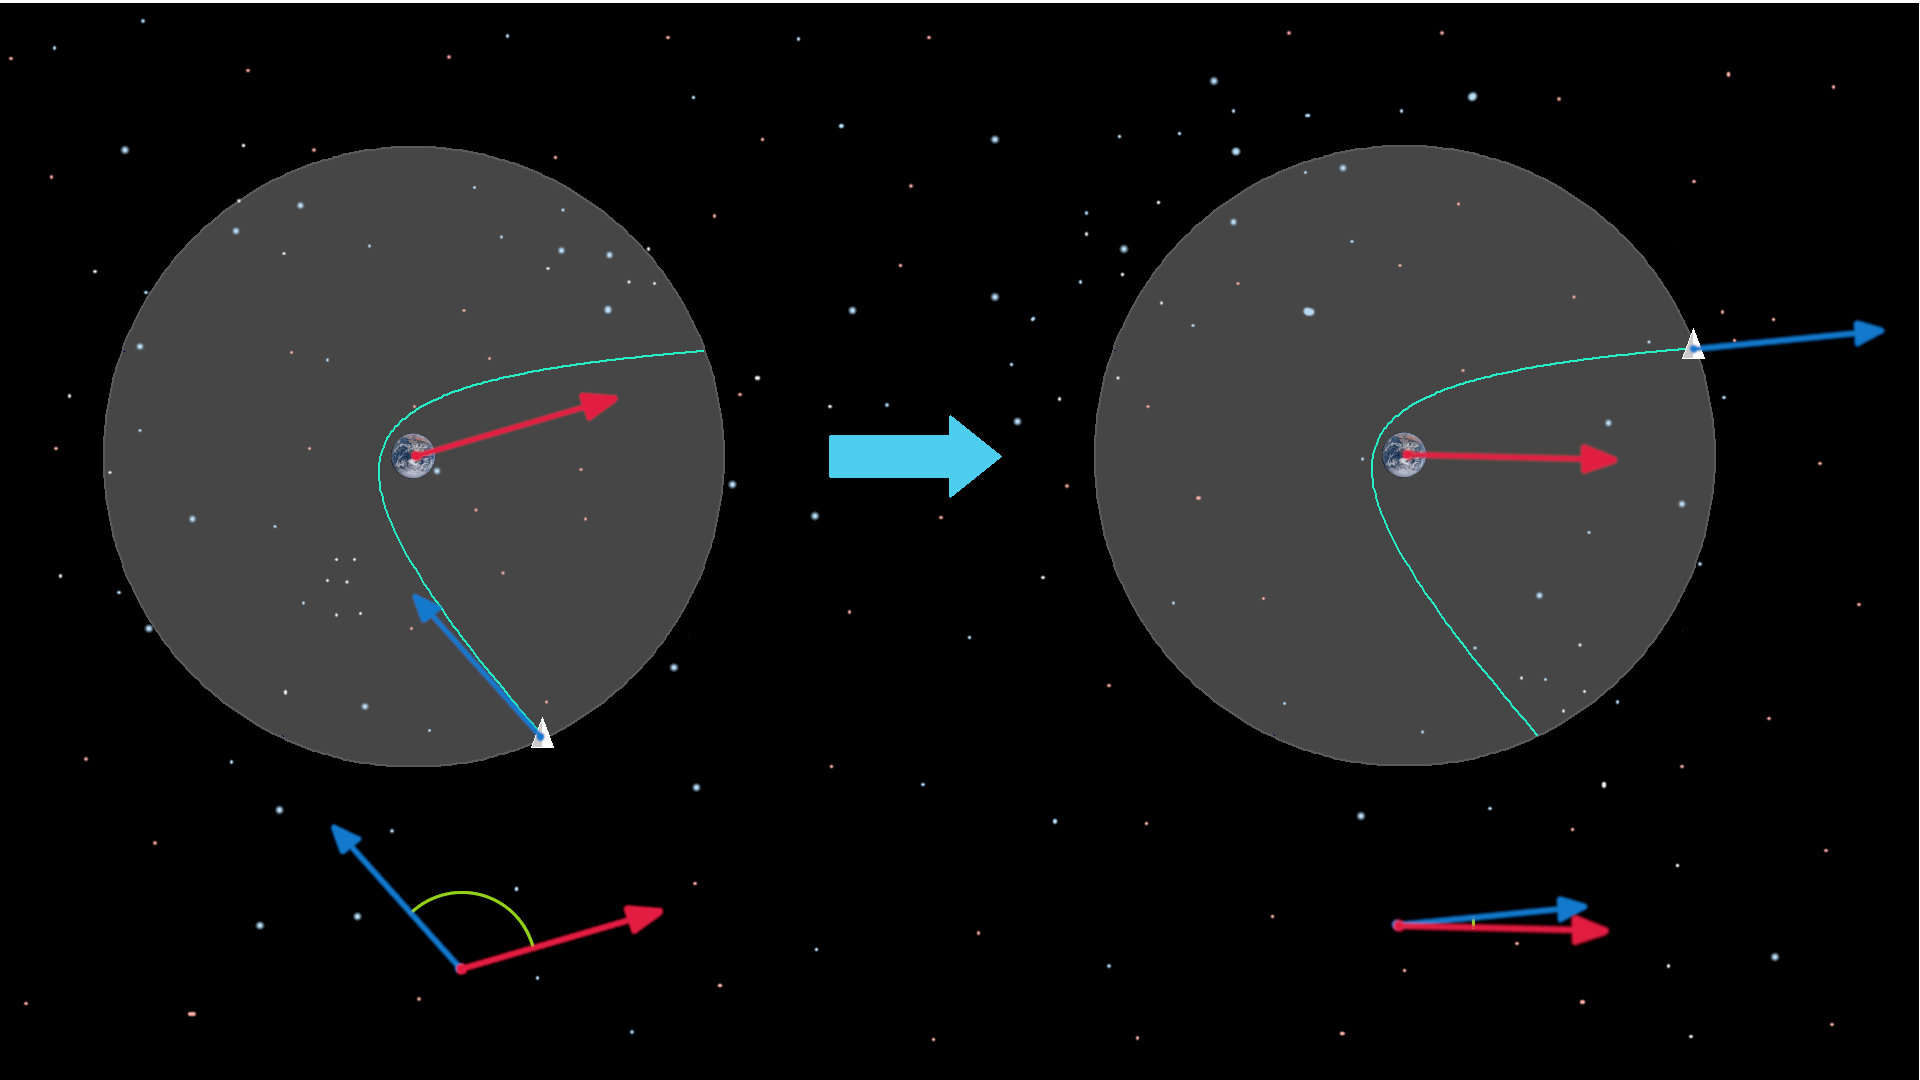
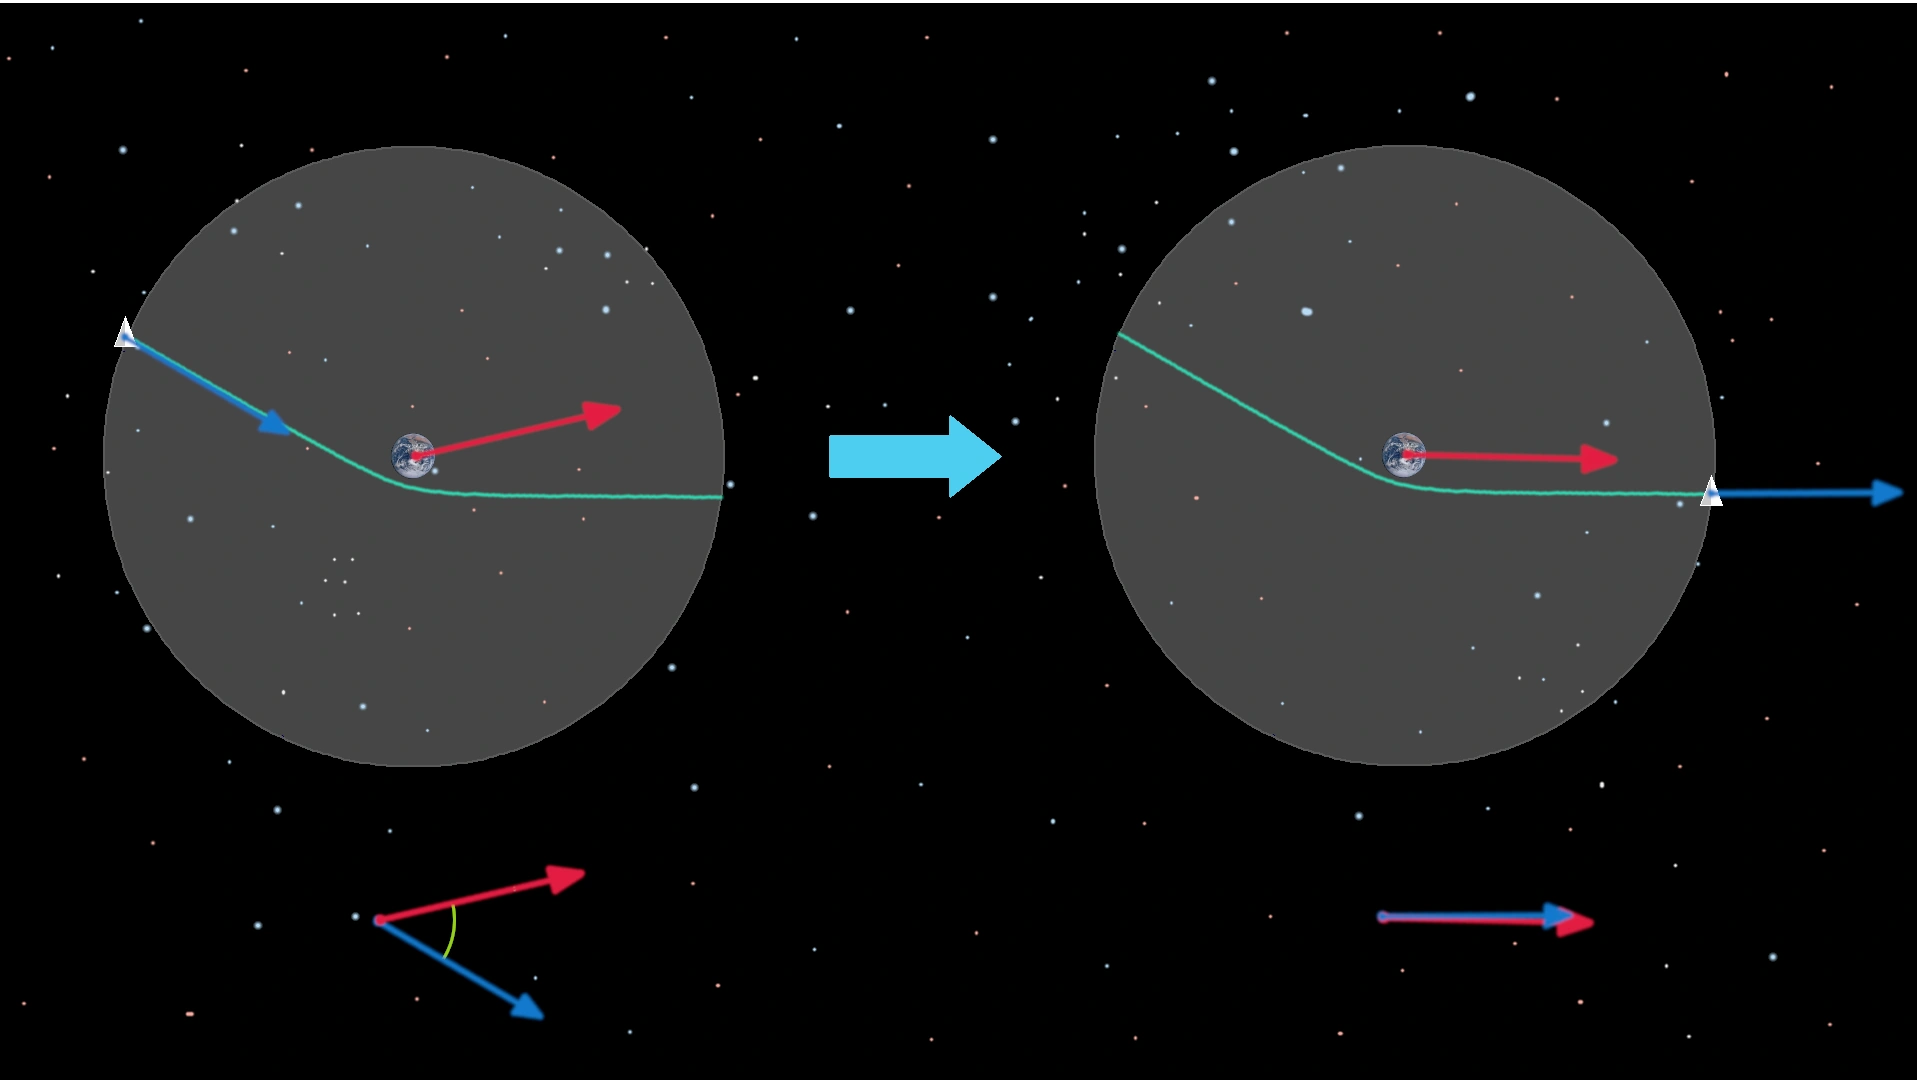
The picture shows the rocket entry in the SOI on the left, and its exit on the right. Each time, the rocket's velocity is showed with a blue arrow, the planet's one with a red arrow. The planet's velocity has slightly moved between the entrance and the exit to simulate the planet rotation.
What you have to look at is the angle between the rocket and the planet's velocities. It's represented below each situation.
In this case, the slingshot makes the rocket speed up. Not only because the exiting rocket's velocity is aligned with the planet's one, but also because those velocities were far from being aligned at first. Having made that alignment better is what actually made speed up the rocket.
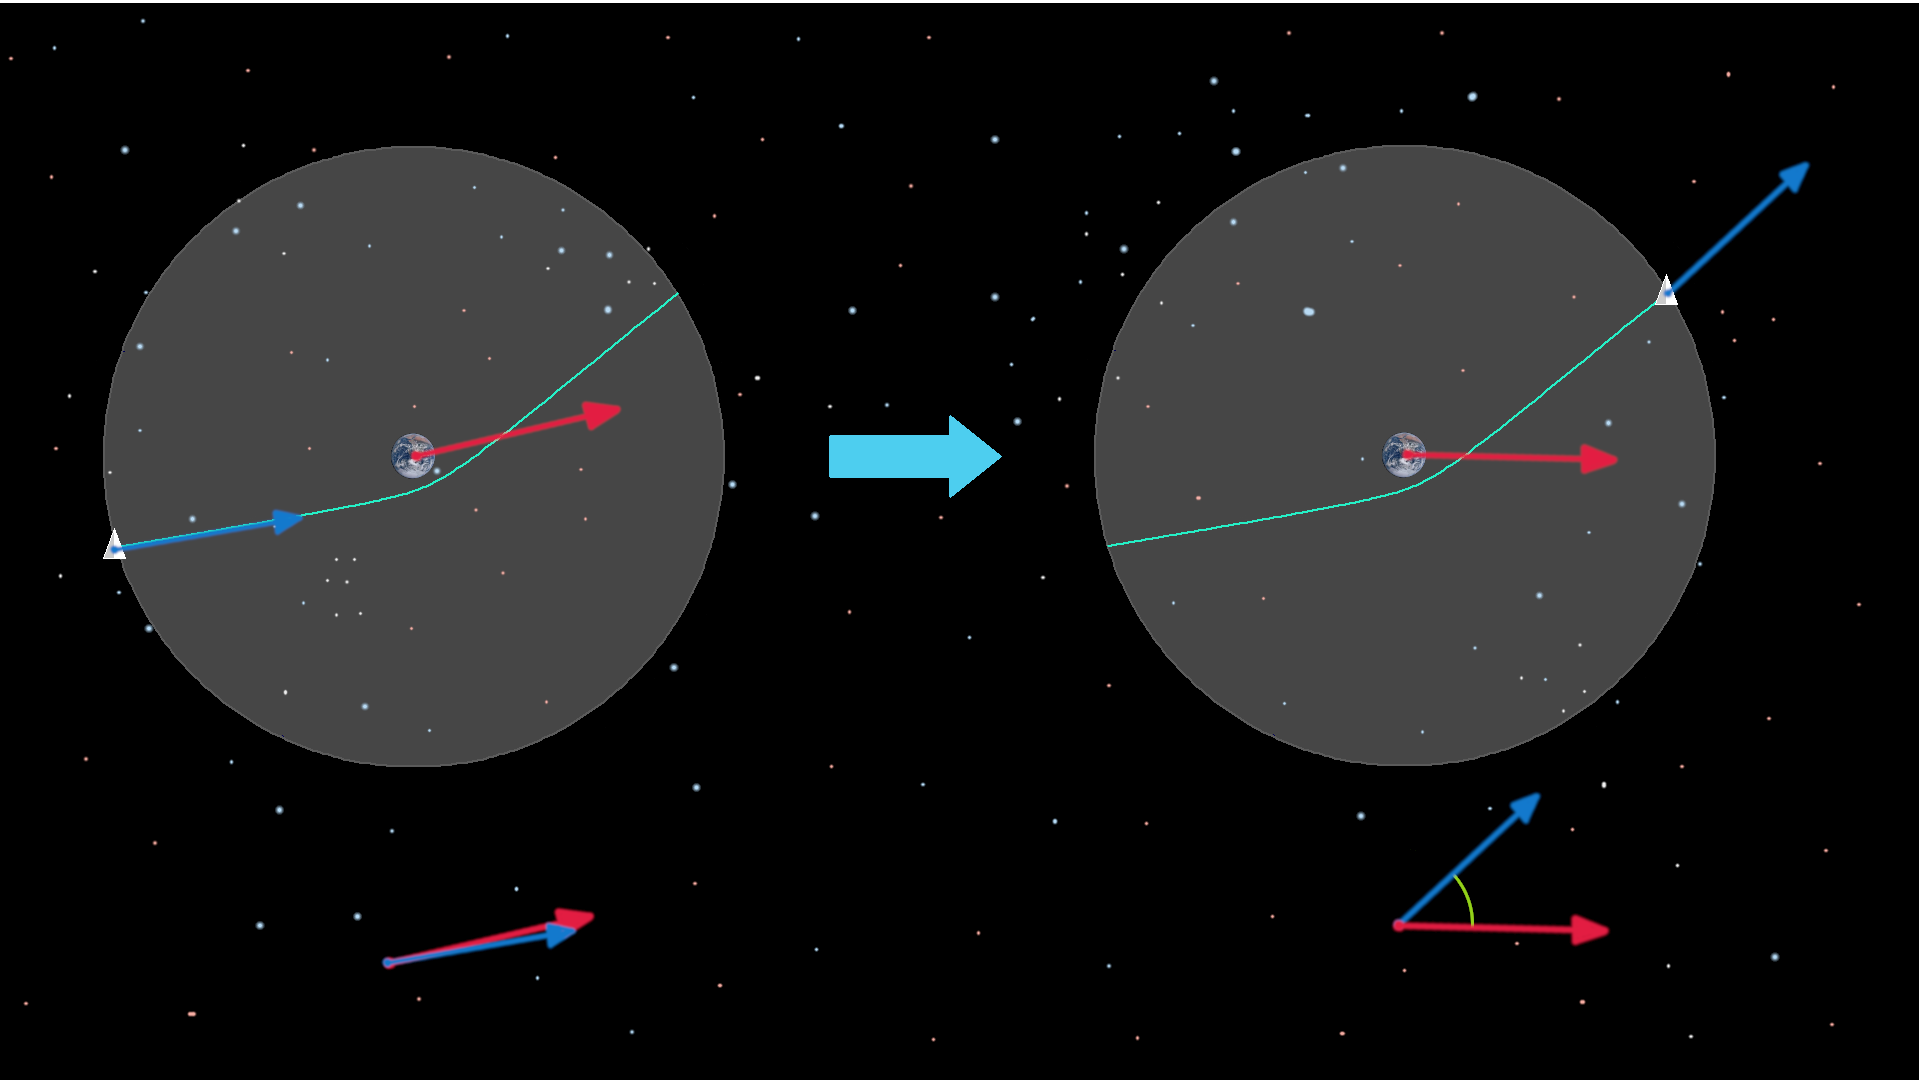
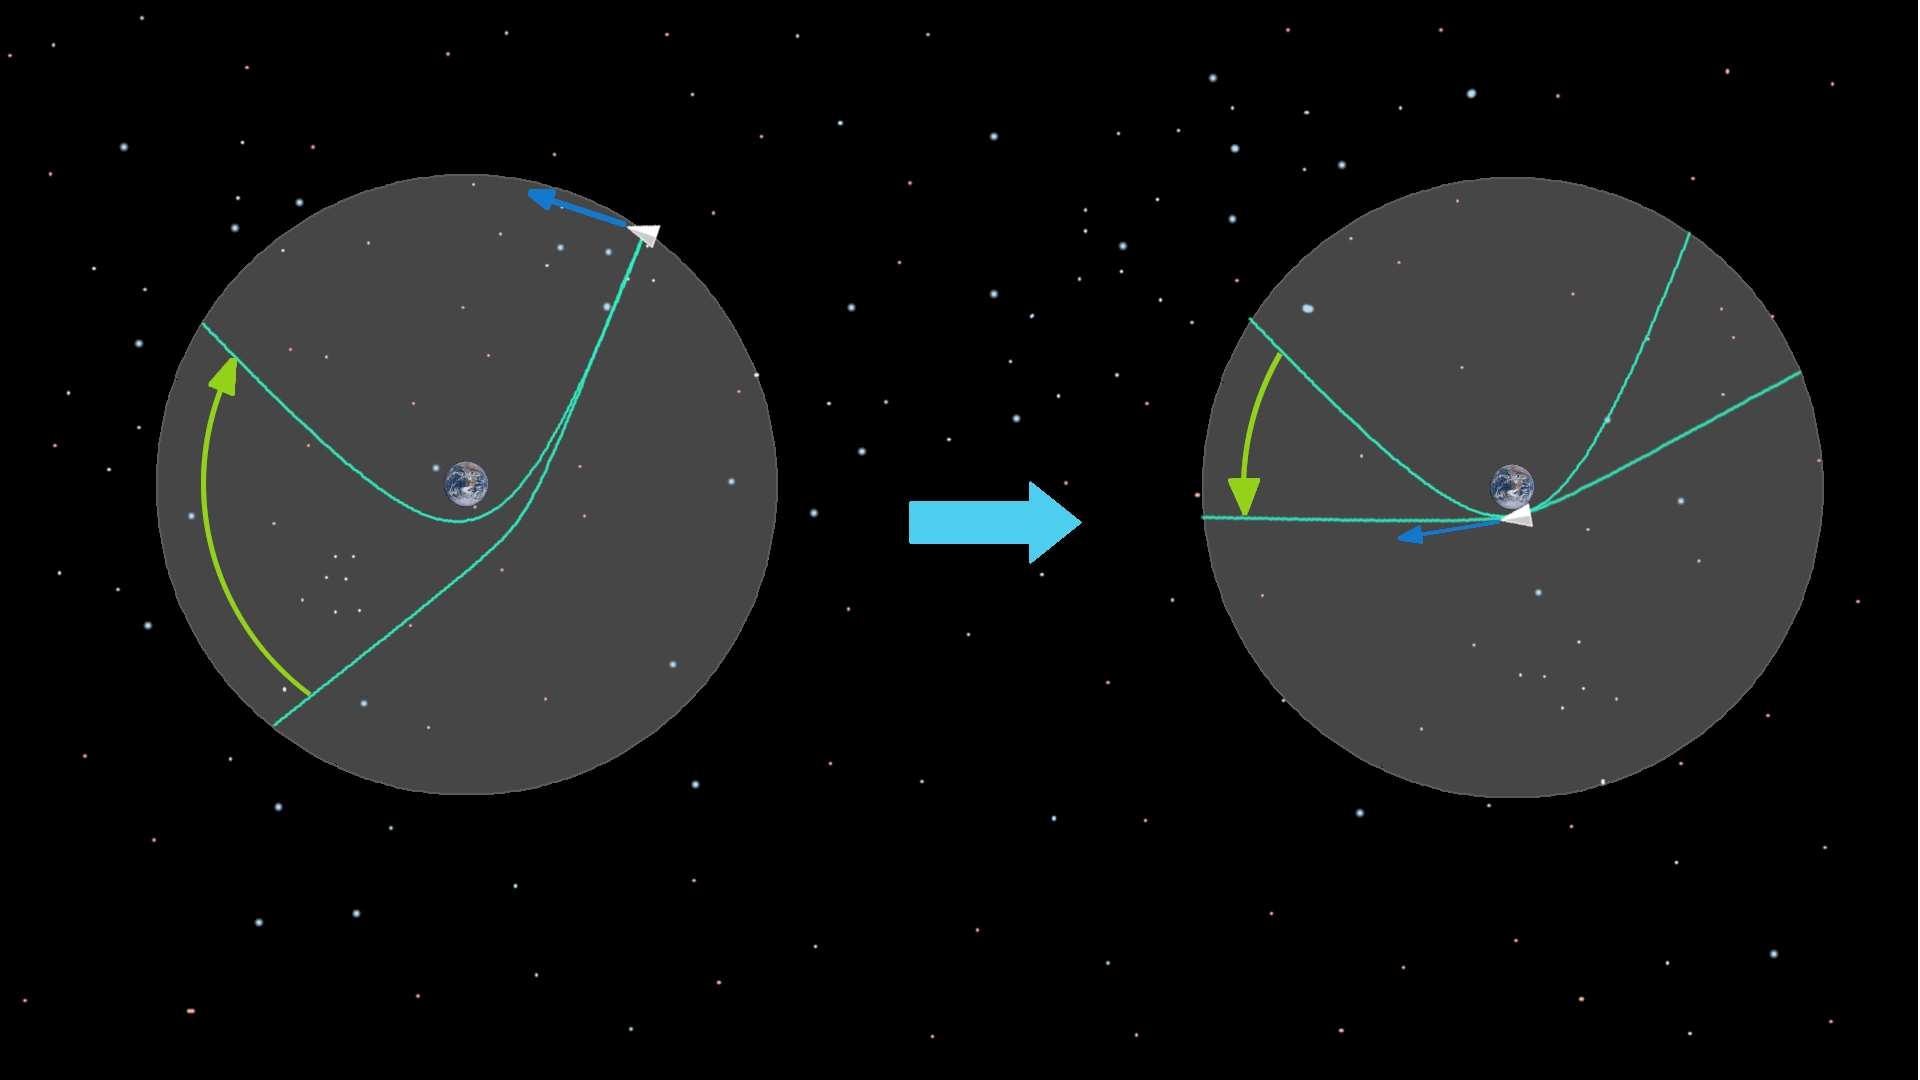
On the contrary, degrading that alignment will make it slow down. Here is an example of this:
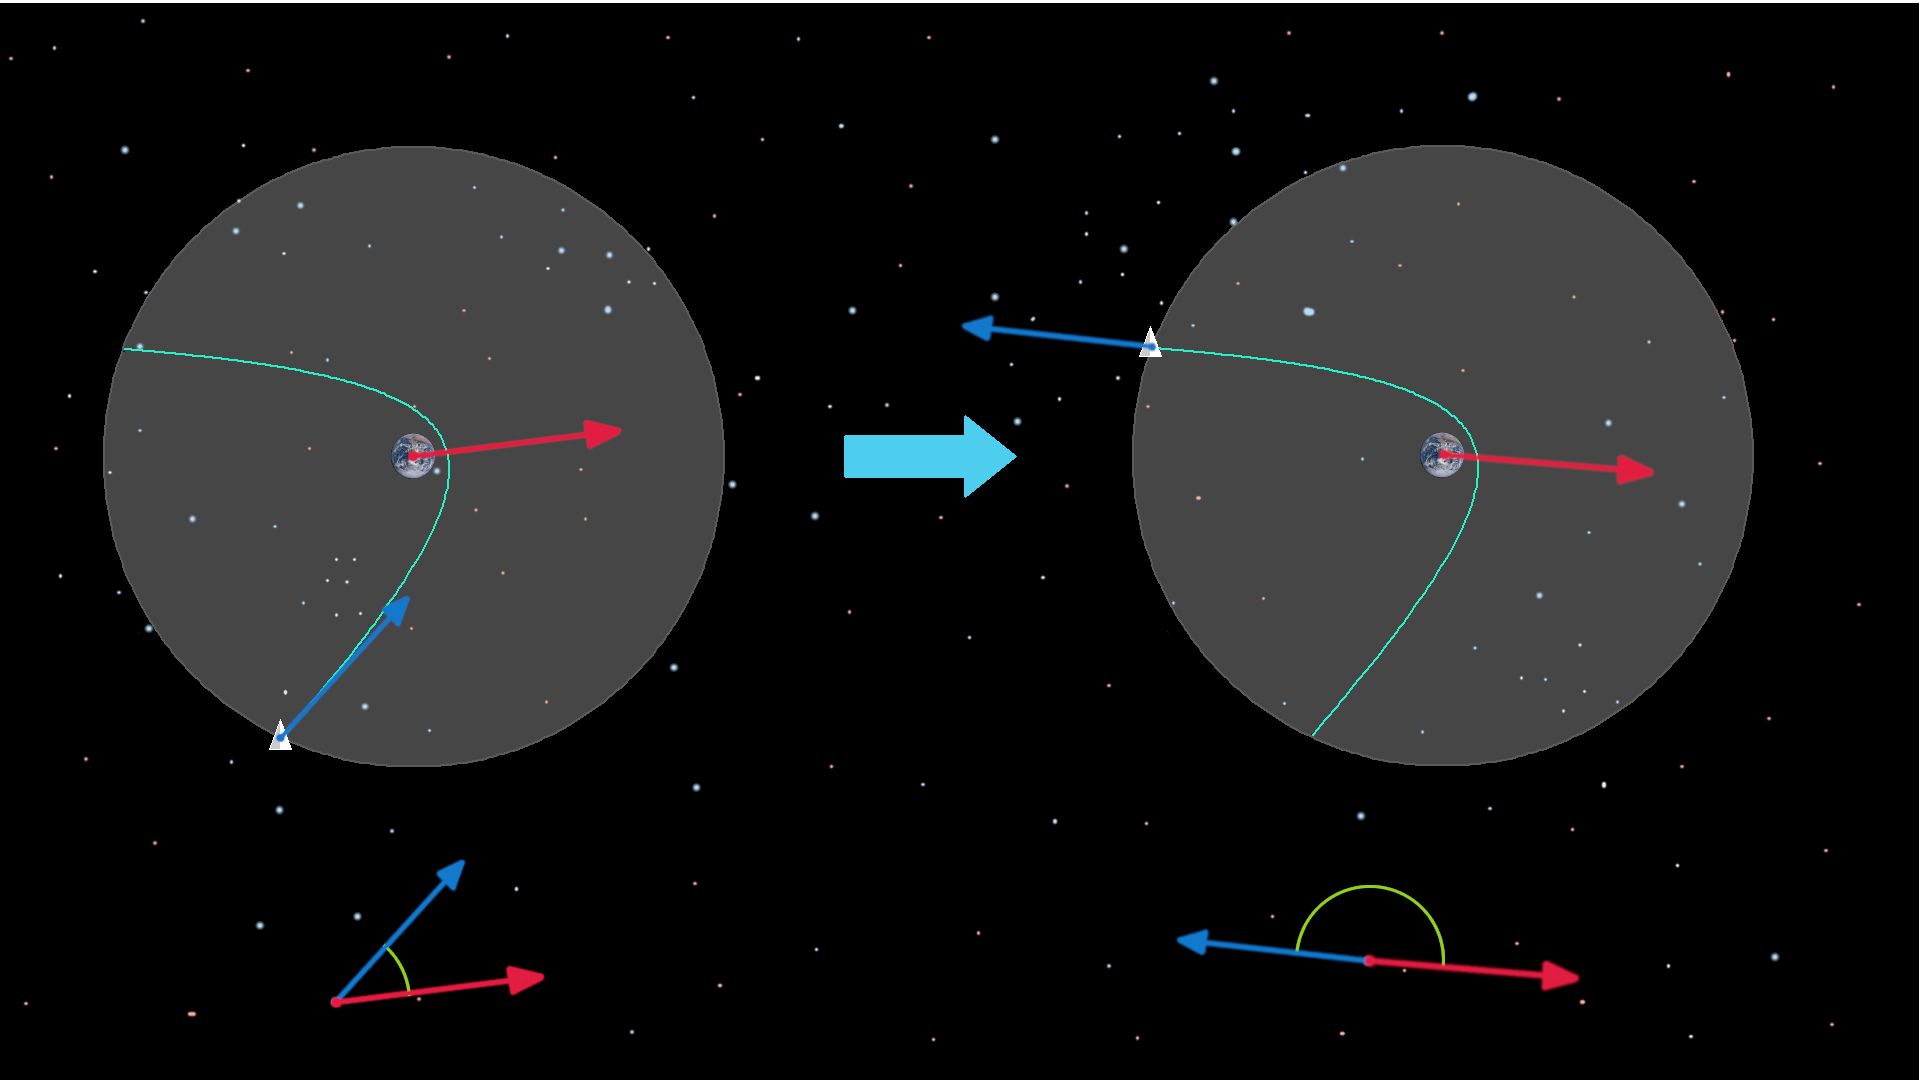
In this case, the rocket's velocity form a relatively small angle when entering, but ends nearly in the opposite direction. This time the speed has been decreased.
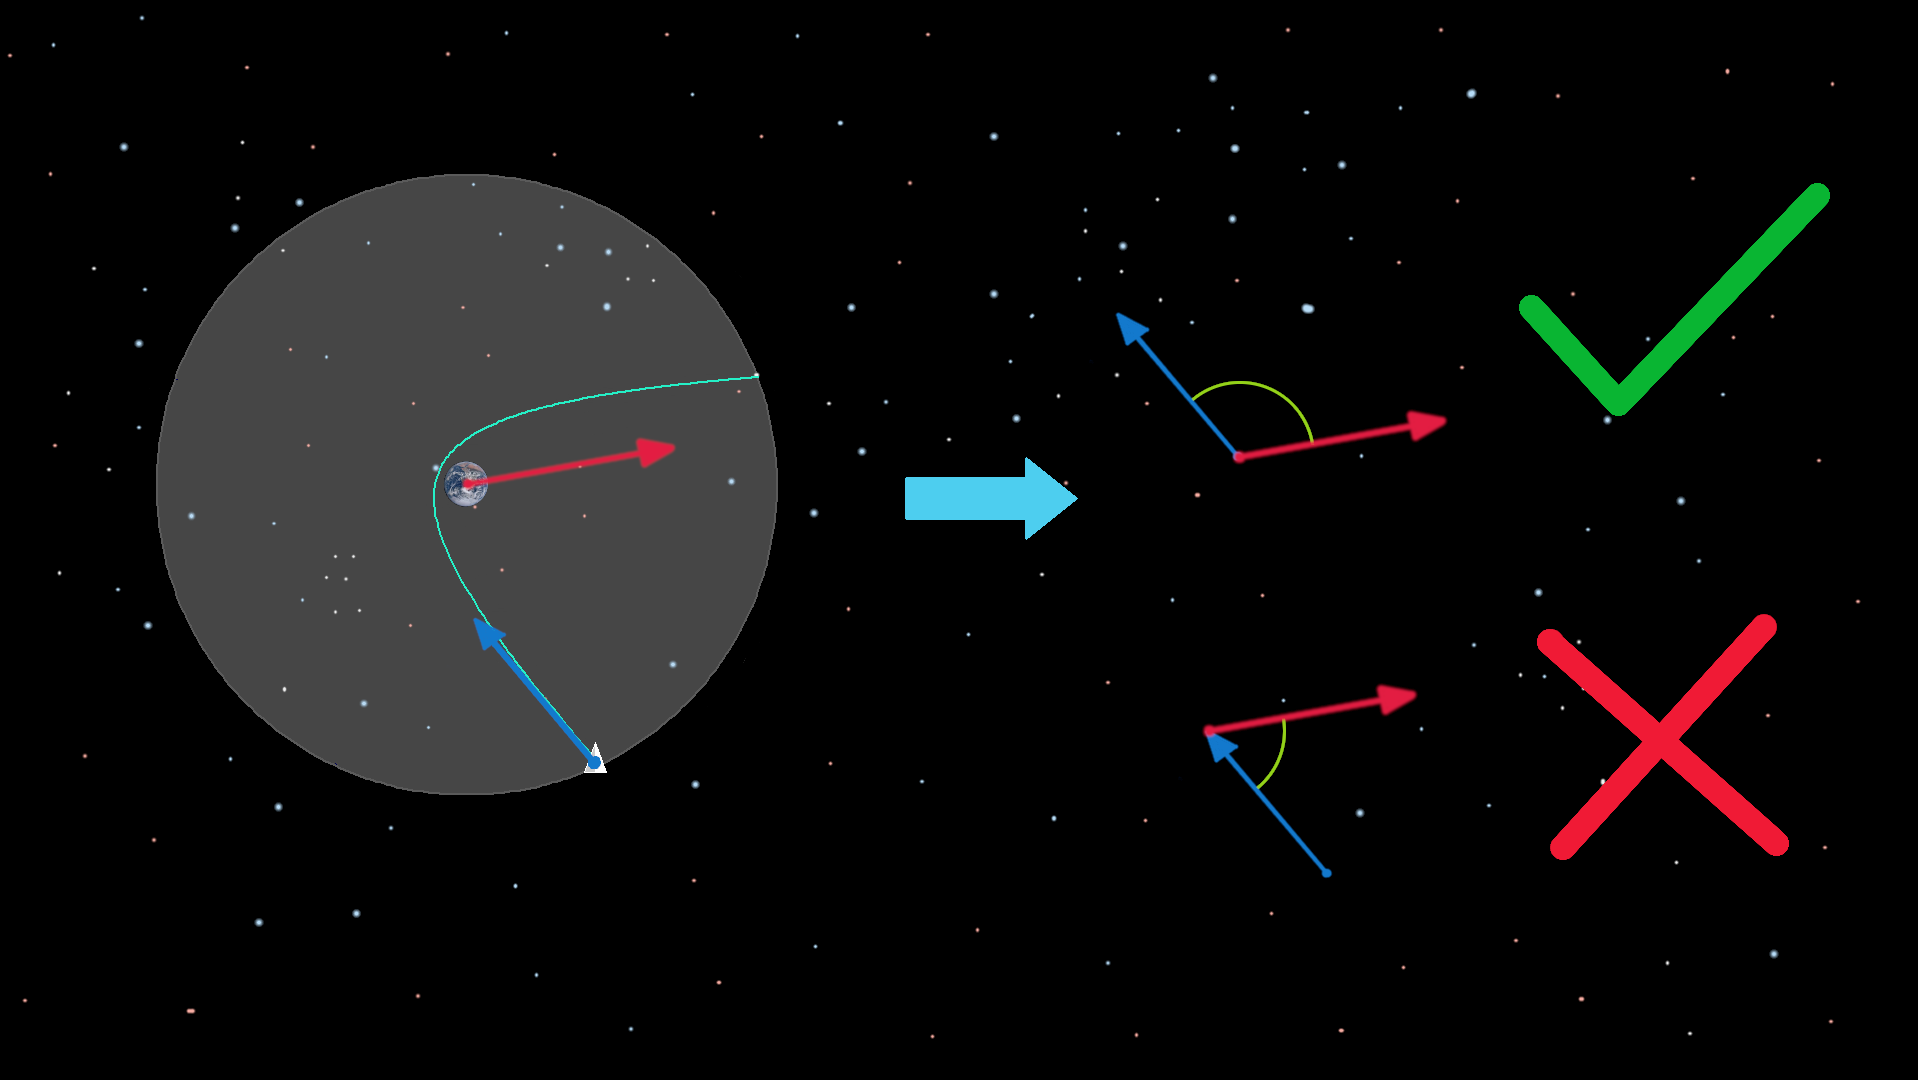
Just a precision to avoid confusion, to evaluate correctly the angle, be careful to match the arrow's origins as shown on the image:
Understood? OK, let's go on some exercises! Don't worry, it will be easy. I'll show you a gravitational slingshot, and given the velocities shown, you will have to predict the result. Ready? Go!
Let's practice!
Here is a first situation to examine:
Will the rocket's speed increase or decrease in this case? Check the answer to verify!
Answer: As you probably supposed it, the rocket will increase its speed in this case. The angle between velocities is not that great at the entrance, but they end perfectly aligned, so the rocket speeds up.
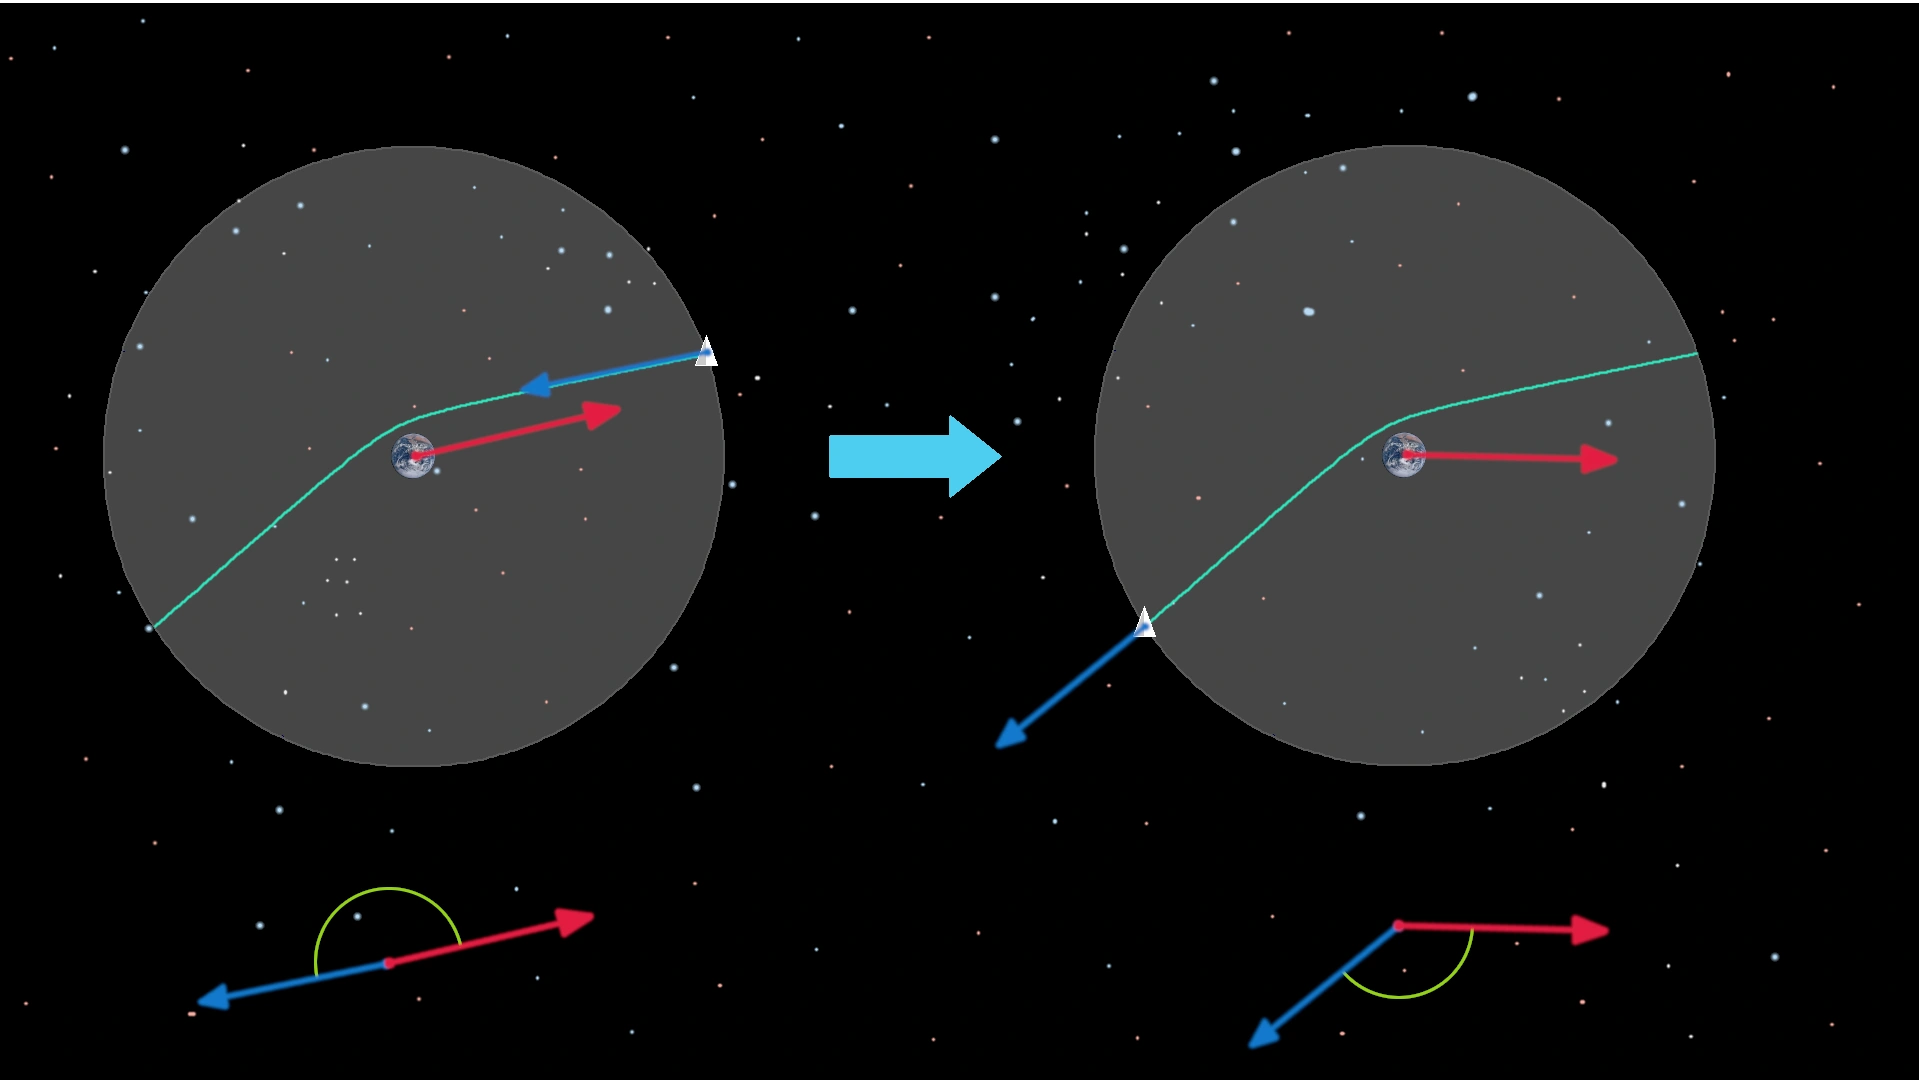
OK, let's continue with a similar situation:
You found the answer? Check below to see if it's correct.
Answer: This situation looks very similar to the previous one at first, so maybe you've been tempted to answer that the rocket will speed up as well. Actually that's the contrary, it will slow down in this case! As one can see above, what you have to look at is how the angle between the velocities evolves. In this case they were perfectly aligned at the entry and the maneuver degraded the alignment. Of course, the velocities in the end are still far from being opposite to each other, but the fact that the alignment has been degraded is what counts.
Something interesting to notice is that in this case, as the alignment is the best possible at the beginning, you can only degrade it during the maneuver, so there is actually no way you can speed up in this configuration! Even making the flyby on the other side will slow down your rocket in the end.
On the other hand, if you actually want to slow down, that's an interesting configuration, but choosing the other side to make the flyby is actually less interesting: as the planet's velocity rotates clockwise due to its rotation around the Sun, it's better to deflect your trajectory towards the other side (counterclockwise) to maximize the angle formed in the end.
Is that OK? Let's go on with that one!
Answer: Indeed, in this case the speed will increase. This is the opposite situation now: As the velocities are perfectly opposite to each other at the entrance, you can only reduce the angle between them, so the speed can only increase in the end. The same as before, flying over both sides will increase the speed, but deflecting the rocket's trajectory counterclockwise will maximize the result.
Let's see another situation now:
Take your time to think about it. Is that OK? Check the answer!
Answer: In this case, the angle has been reduced, so the speed will increase in the end. However, because the angle has not changed that much, the result may not be amazing. What's particular in this situation is that the trajectory has been overfolded: if it hadn't been deflected that much, we could have had a better alignment, and thus a greater speed in the end. If this situation happens, it may be better to raise your periapsis, or if you're willing to spend a little fuel, to perform a powered slingshot for an even greater effect. We'll talk about this after that.
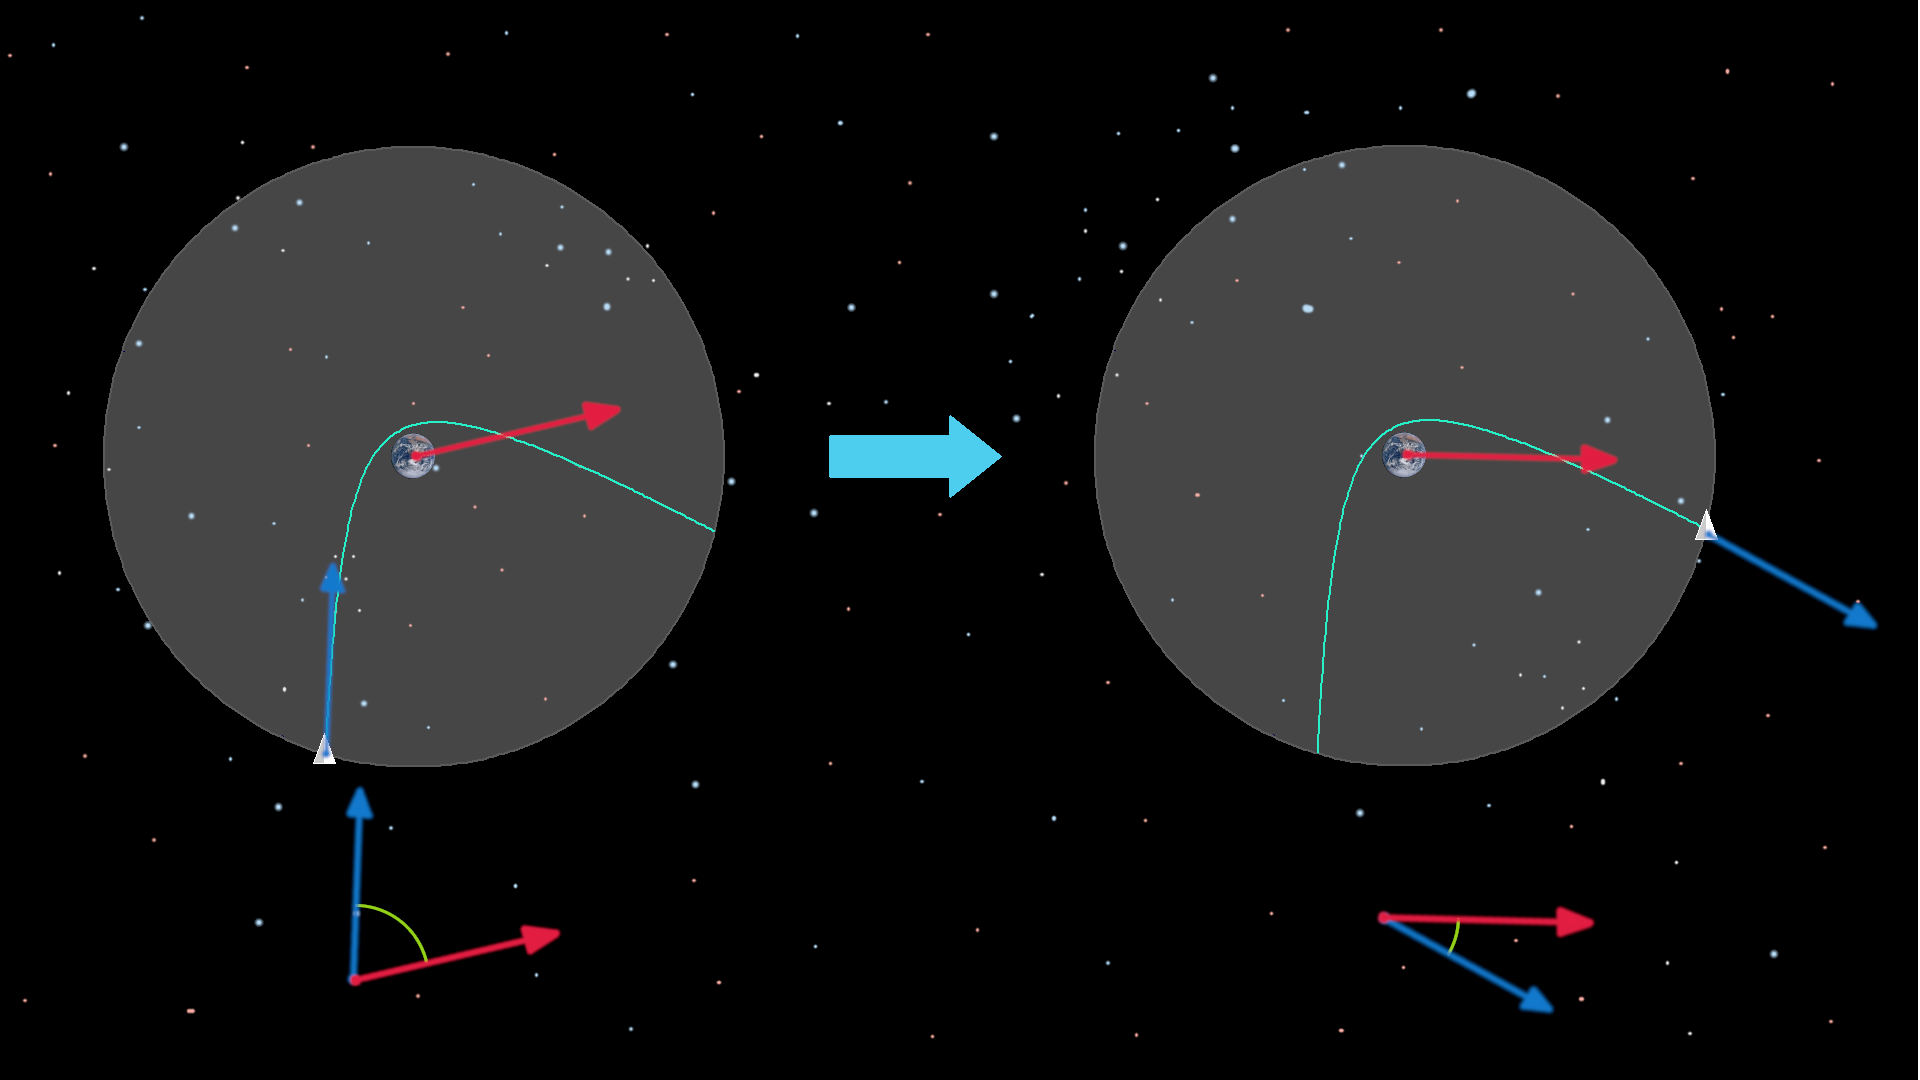
Let's try a last one! What will happen in this case:
Have an idea? Check the answer:
Answer: Again, the trajectory is overfolded in this situation. But what's particular here is that the angle at the entrance and at the exit is the same, so the speed will neither decrease, nor increase (or not significantly). In this situation, your rocket's speed hasn't changed, but its direction did, so you may end on a similar orbit as before, but your apoapsis/periapsis will be shifted compared to before. However, this is not something interesting to do in practice.
Is that OK? Now, let's see how to use this to our advantage!
How to adjust your trajectory?
Now that you've understood the importance of the planet's and the rocket's velocities, it is time to see two efficient ways to modify the trajectory in your favor:
Adjusting the periapsis[]
As shown above, lowering your periapsis will deflect your trajectory further, so that's a very simple way to adjust the direction your rocket will have at the exit. Of course, you can anticipate as soon as you aim for the planet, before you even enter the SOI, but because this is imprecise, you may want to adjust your trajectory precisely when entering the SOI. You can do this by burning at very low throttle, so it will consume practically no fuel.
Performing a powered slingshot[]
A powered slingshot consists in combining the gravity assist with an Oberth maneuver: When you reach the periapsis, you can burn prograde to make the maneuver even more effective. Burning at the periapsis will combine two effects:
- You will benefit from the Oberth effect, which will drastically change your trajectory even with a small impulse.
- This will modify the angle of your exiting trajectory.
As a drawback, it will consume a small quantity of fuel. However, if using that maneuver modifies the angle between the rocket's and the planet's velocities in your favor, the combination of the two effects will be extremely powerful.
For this reason, it can be interesting to put your rocket on an overfolded trajectory and then to modify the exit angle in your favor with this maneuver. Remember the two last situations in the previous chapter? This is the perfect situation to use that maneuver.
Something to notice is that it can also be interesting to burn retrograde at the periapsis, but this is pretty rare. This will only be advantageous if your trajectory is very opened (when your rocket is very fast) and if it modifies the exit angle clearly in your favor.
Here is how to perform those two maneuvers:
The diagram on the left shows how to adjust the periapsis when entering the SOI and the one on the right shows the Oberth maneuver and how it changes your trajectory.
Now, you have everything you need at your disposal, the rest is practice! Remember, to get the most of a gravitational slingshot, it's all about precision!
To Mercury and back[]
A trip to Mercury requires even more Delta-v than a trip to Pluto. Without gravity assists, this seems impossible. The principles are shown in Spaceflight Simulator using a small rocket:

This rocket is in low Earth orbit and its purpose is to reach low Mercury orbit and then to come back to Earth.
That rocket doesn't look great for such a mission, but you'll see it can be done.
First step: Gravity assist with Venus[]
Level: EASY
Instead of going directly to Mercury, we'll first aim for Venus to use its gravity. So first set Venus as a target, then burn to put the rocket on a transfer trajectory to Venus:

You may notice an important detail: The engine burn is not in the transfer window, but after! It is good to burn after one transfer window width.
This is actually better as you will enter Venus' SOI at a more favorable angle. Otherwise Venus's gravity won't be able to bend the trajectory enough. If you burn in the transfer window, that's not a big problem though; you'll just have to perform a powered slingshot on Venus to compensate.
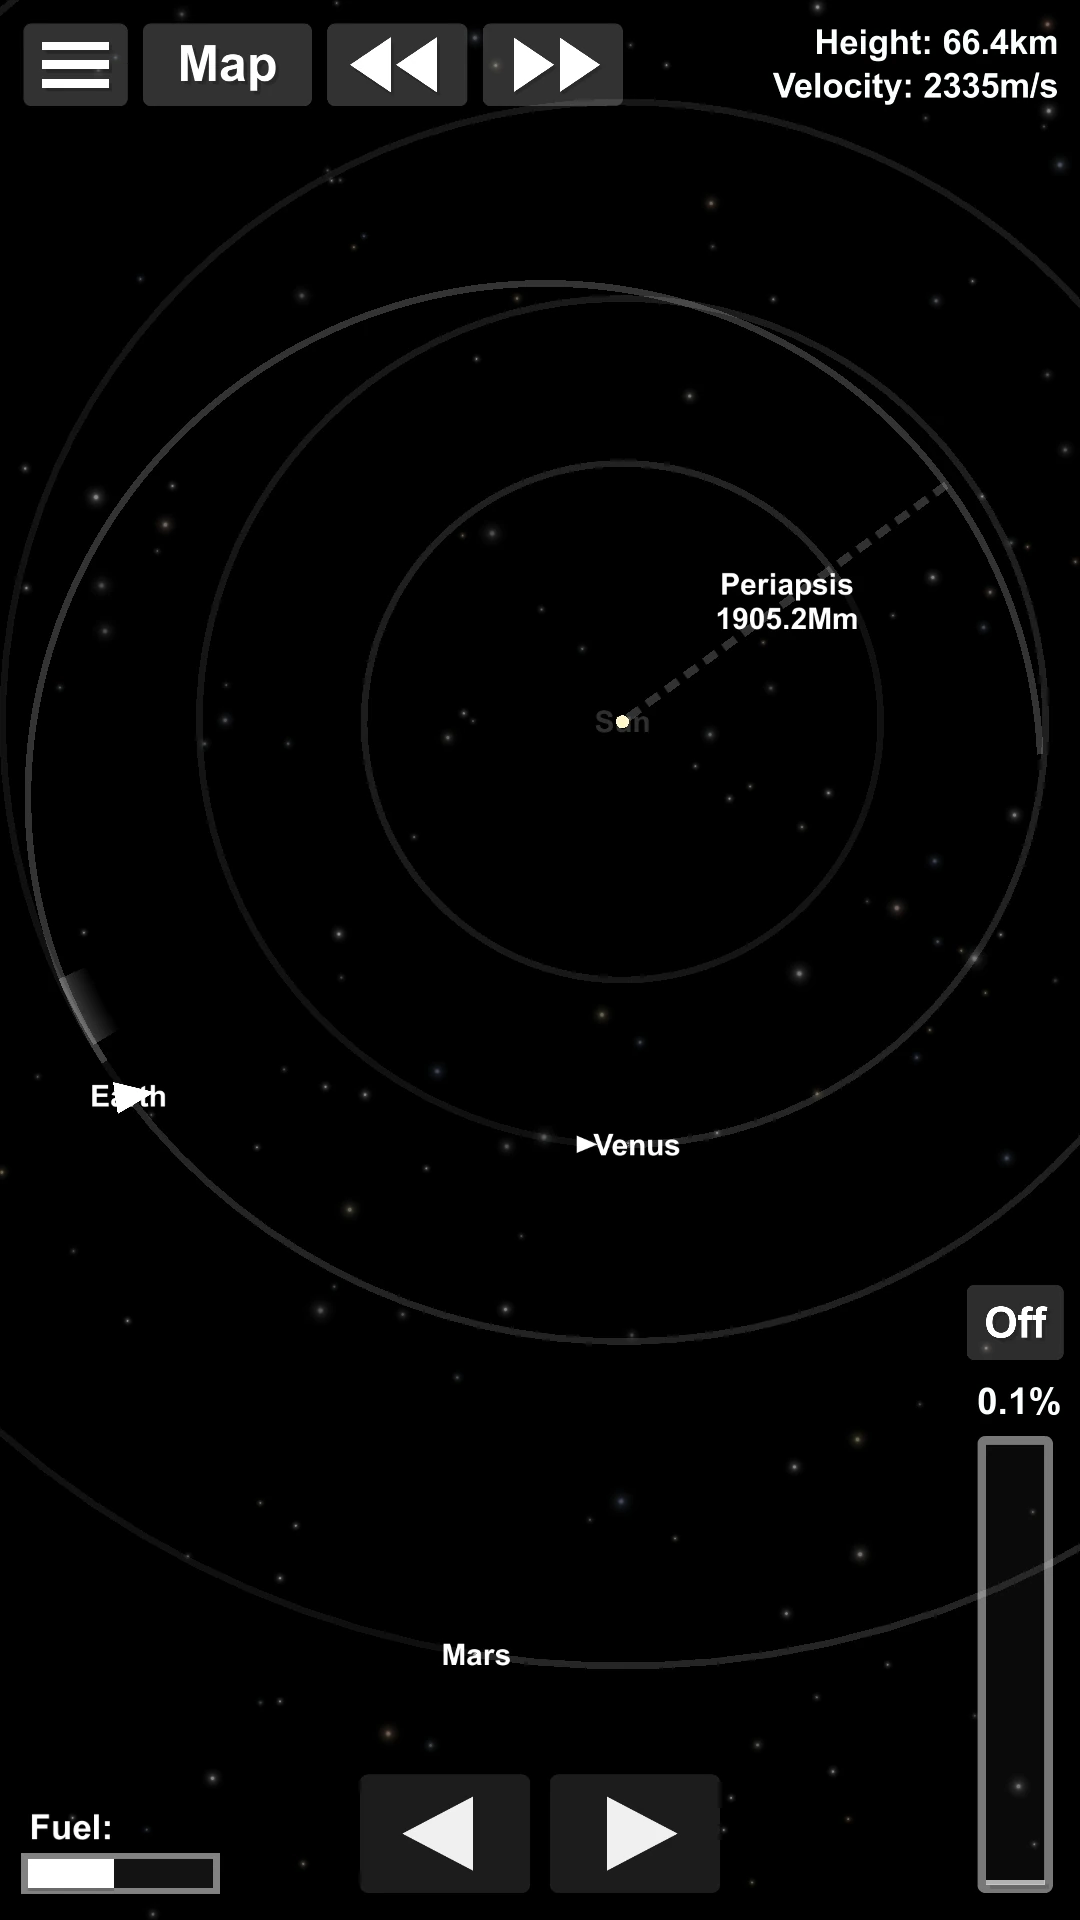
Now, as the rocket approaches Venus, this is its enter and exit trajectory:
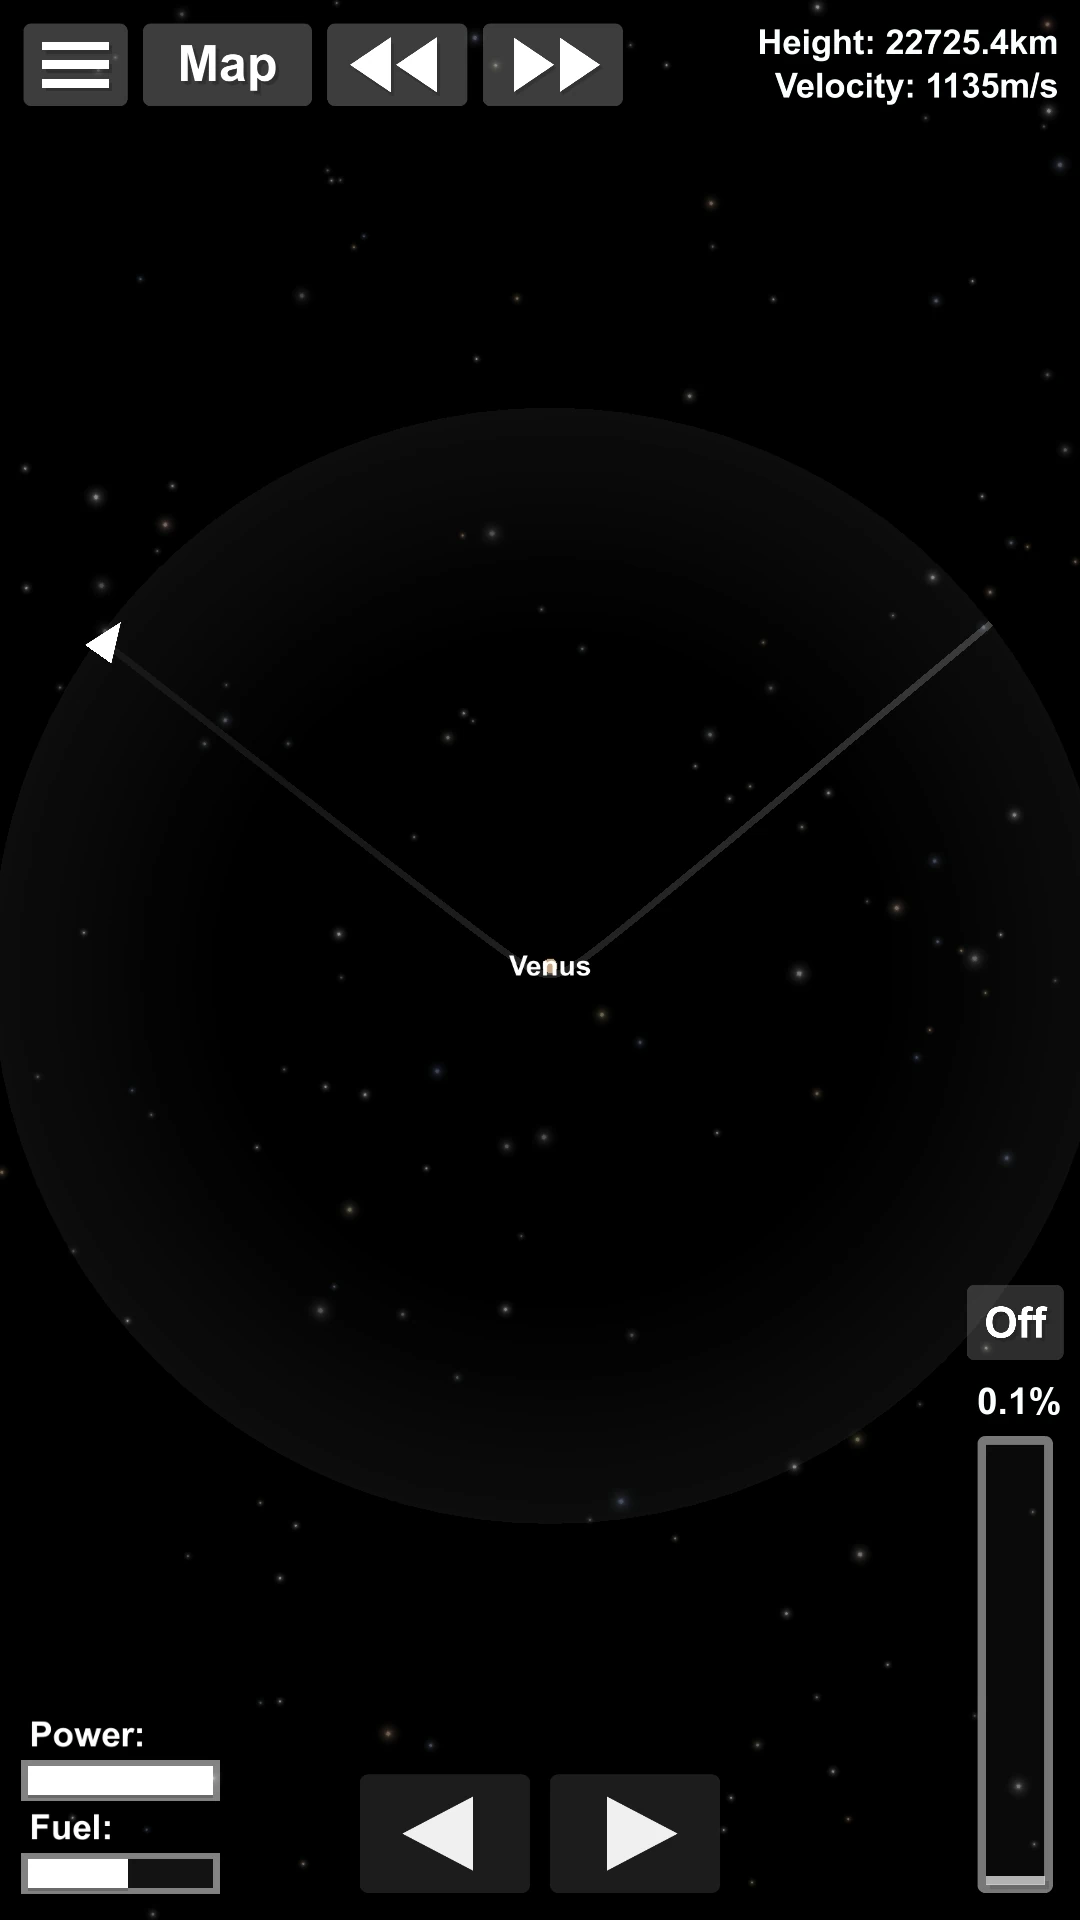
After this, the rocket is on a transfer trajectory to Mercury. Something important to do when you enter the SOI is to adjust your periapsis: if your transfer trajectory to Mercury doesn't go down enough, you can correct this by lowering your periapsis above Venus. If you can't lower it more, then you can burn prograde at the periapsis (powered slingshot) to increase the slingshot effect.
In this case it may not be necessary though.
Second step: Gravity assist with Mercury[]
Level: TRICKY
OK, Venus allowed us to do a great part of the work, but now we will exploit Mercury to lower our orbit, which will make the insertion easier afterwards. However this may be more difficult, because unlike Venus, Mercury is not very massive, so it will be less efficient. Moreover, its closeness to the Sun implies that the velocities involved are high (which is why going to Mercury is hard in general), so modifying our trajectory requires a bigger effort.
It's still possible to save a significant amount of fuel though, but this will require to perform two slingshots.
For this I'll indicate specific orbits to aim, as they are calculated so that you need very few corrections. It will also make your life considerably easier, so I strongly advise to use them!
Important note: In Spaceflight simulator, distances are decreased 1/20. So, if we multiply numbers in this presentation by 20, we get values close to real.
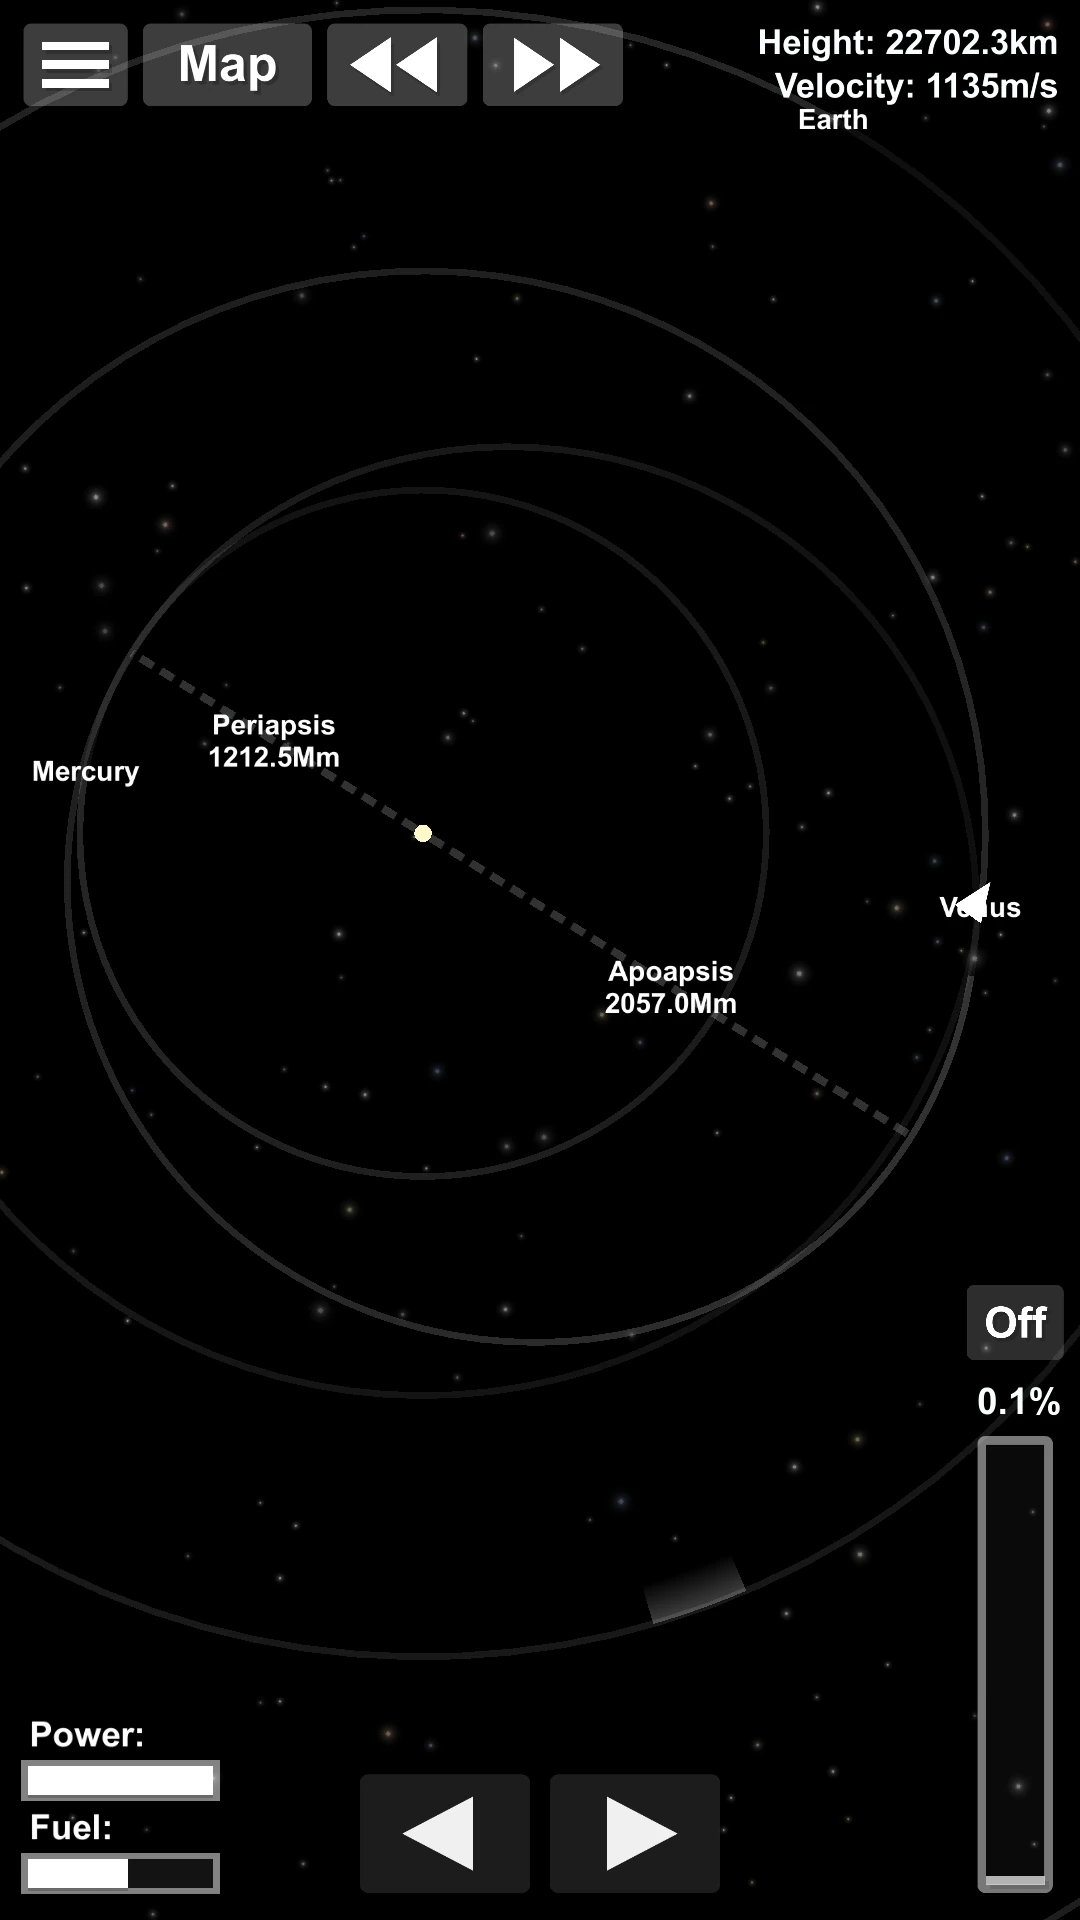
So back to our Venus slingshot:
While you're in Venus, adjust your trajectory so that your periapsis will be at 1212.5 Mm (Mercury is at 1215.5 Mm for your information).
Then exit Venus, and when you reach the periapsis, burn retrograde to adjust your apoapsis at 1980 Mm:
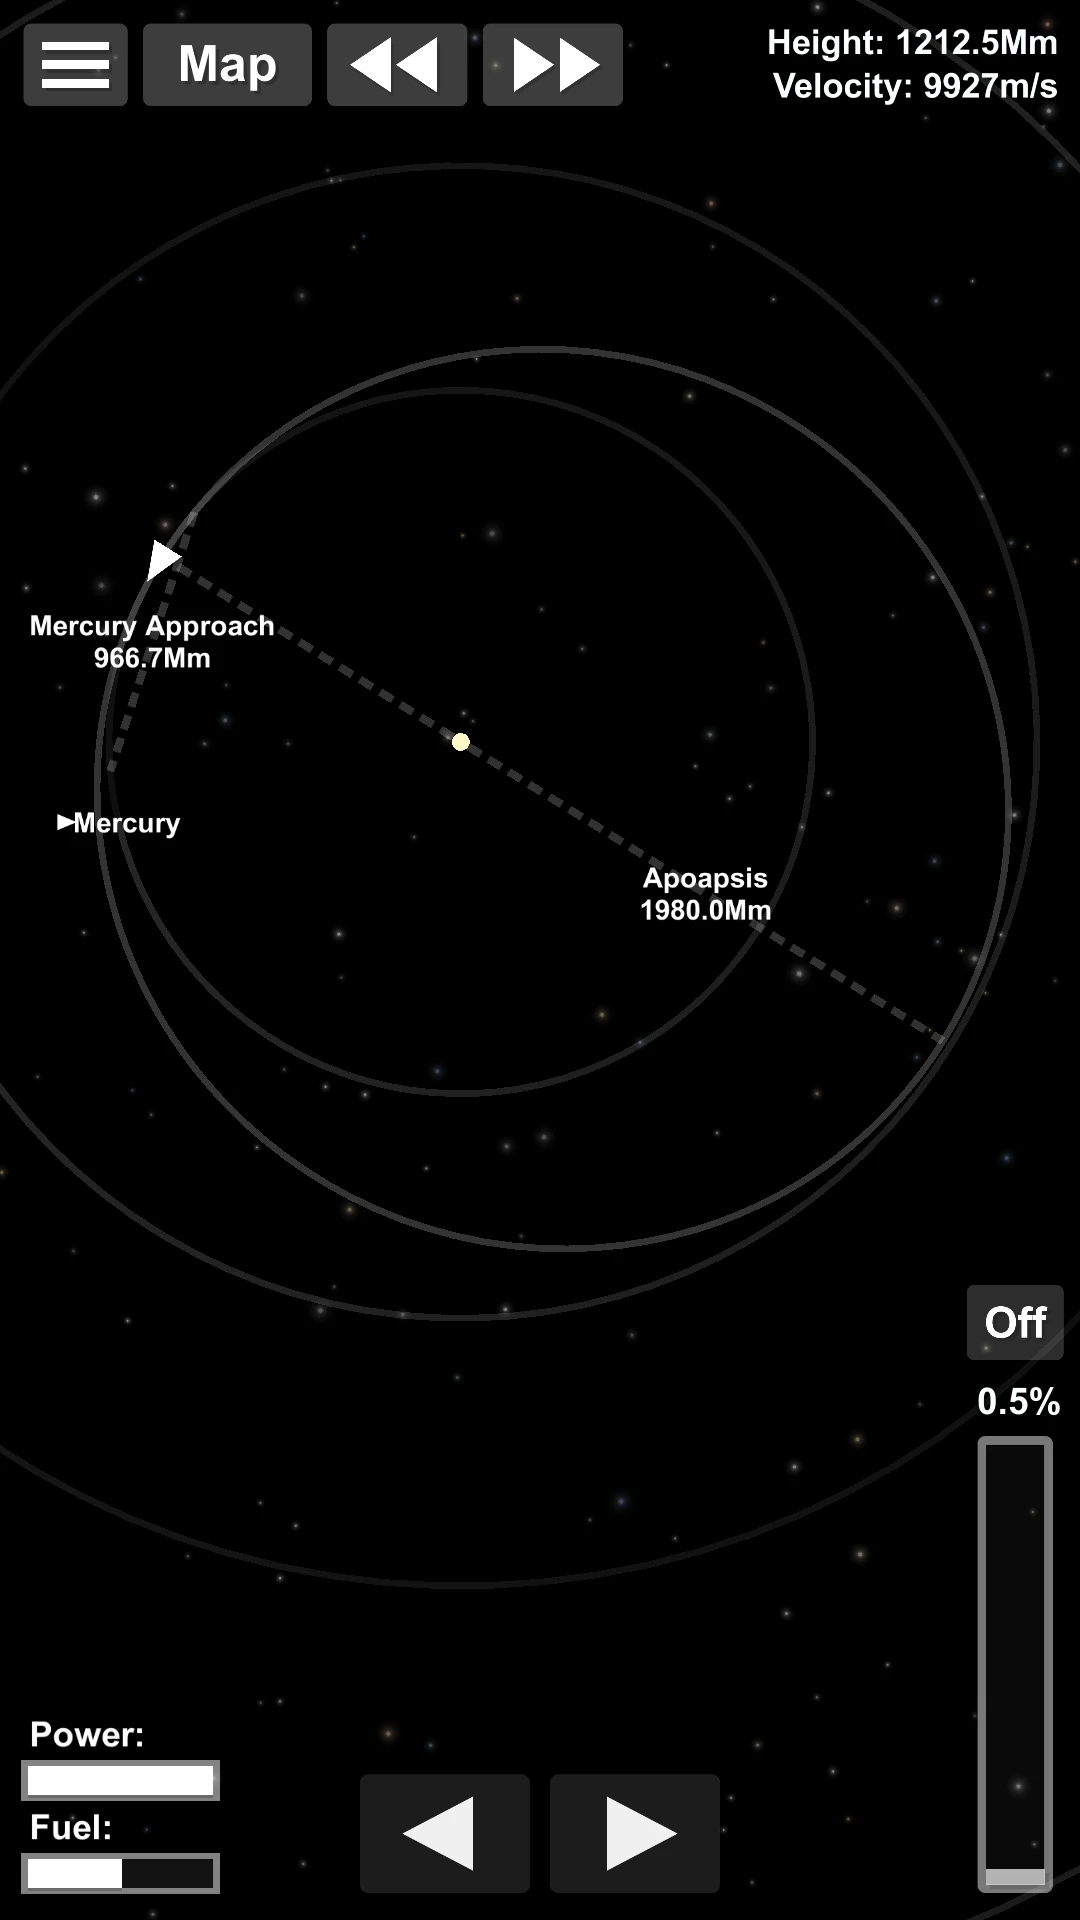
Now, here is the boring part. Set Mercury as a target, then wait until you get a cheap encounter. By cheap, I mean an encounter for which you'll only need a small correction.
Don't worry, on that orbit it's not that hard, because your distance to Mercury will get slightly closer every 2 turns, so it's relatively easy to predict a cheap encounter.
When you get it, adjust you trajectory to cross Mercury to perform a first slingshot:
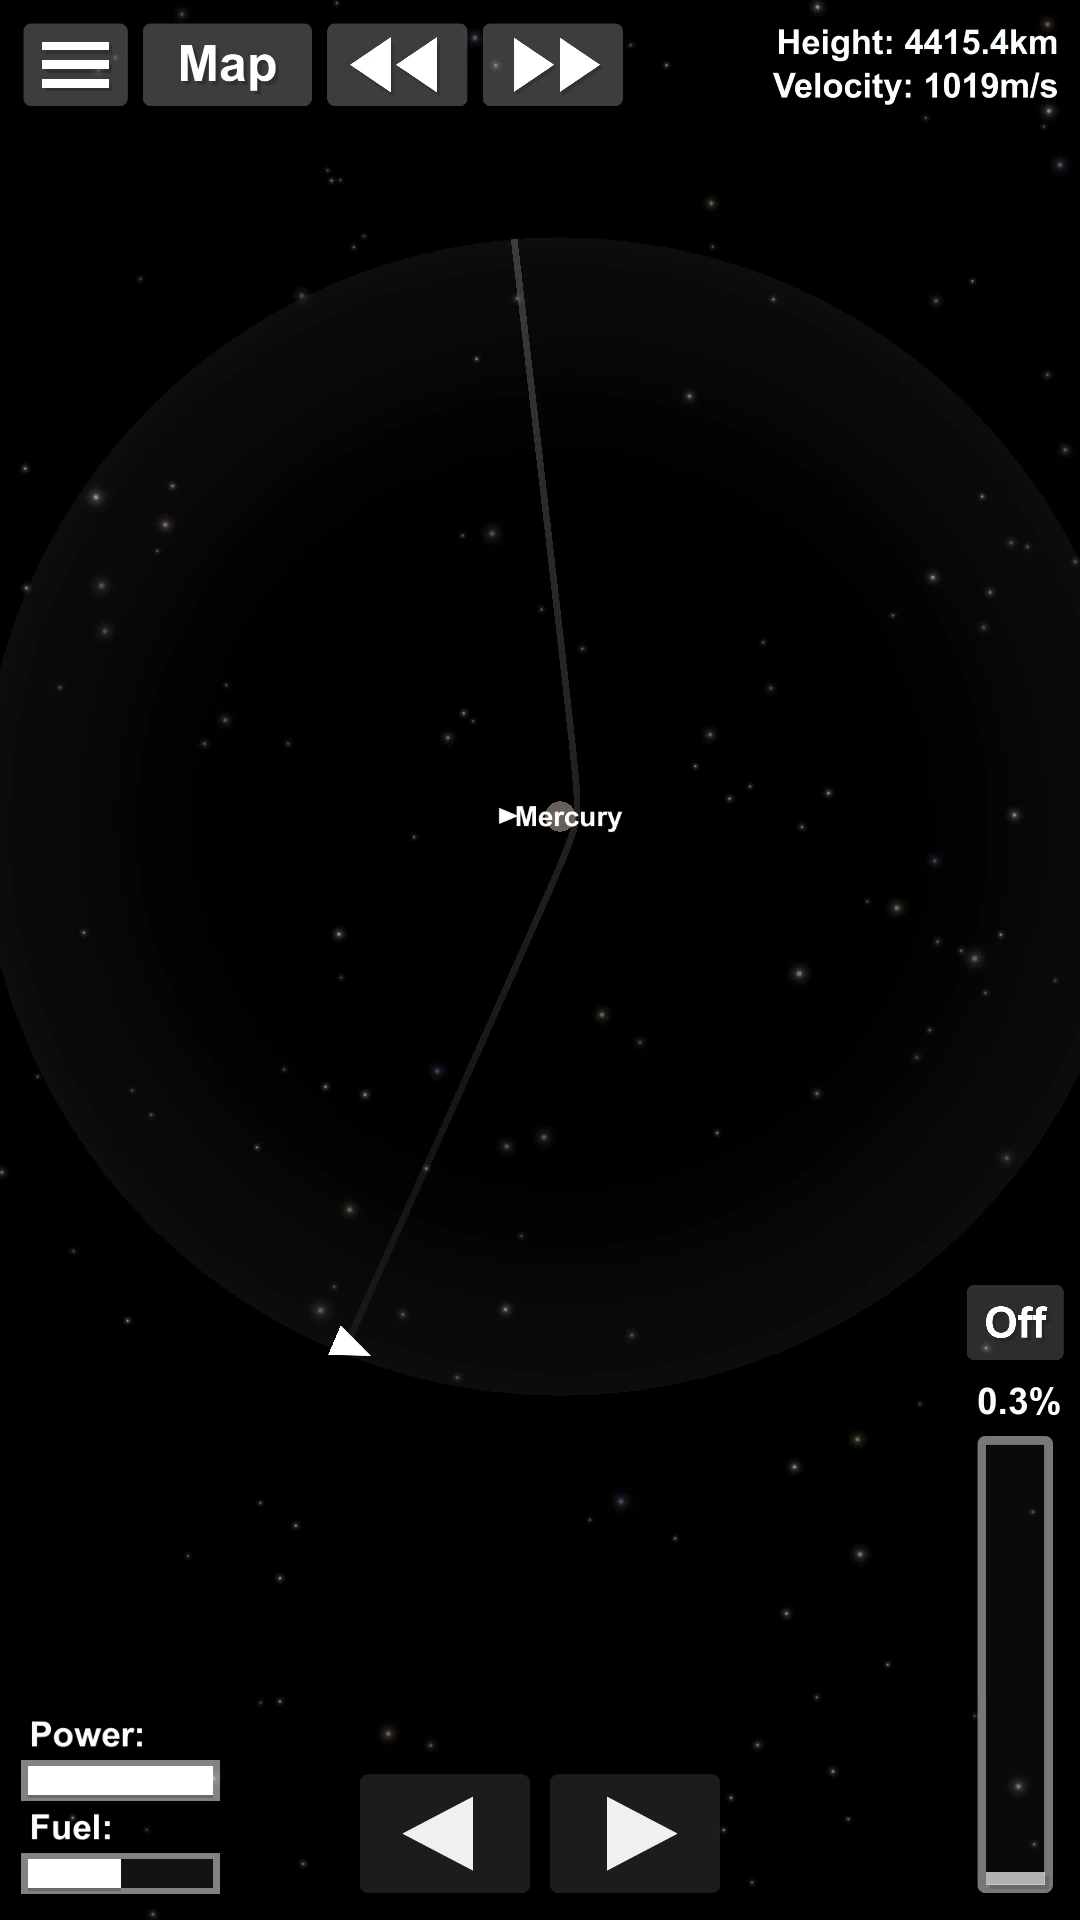
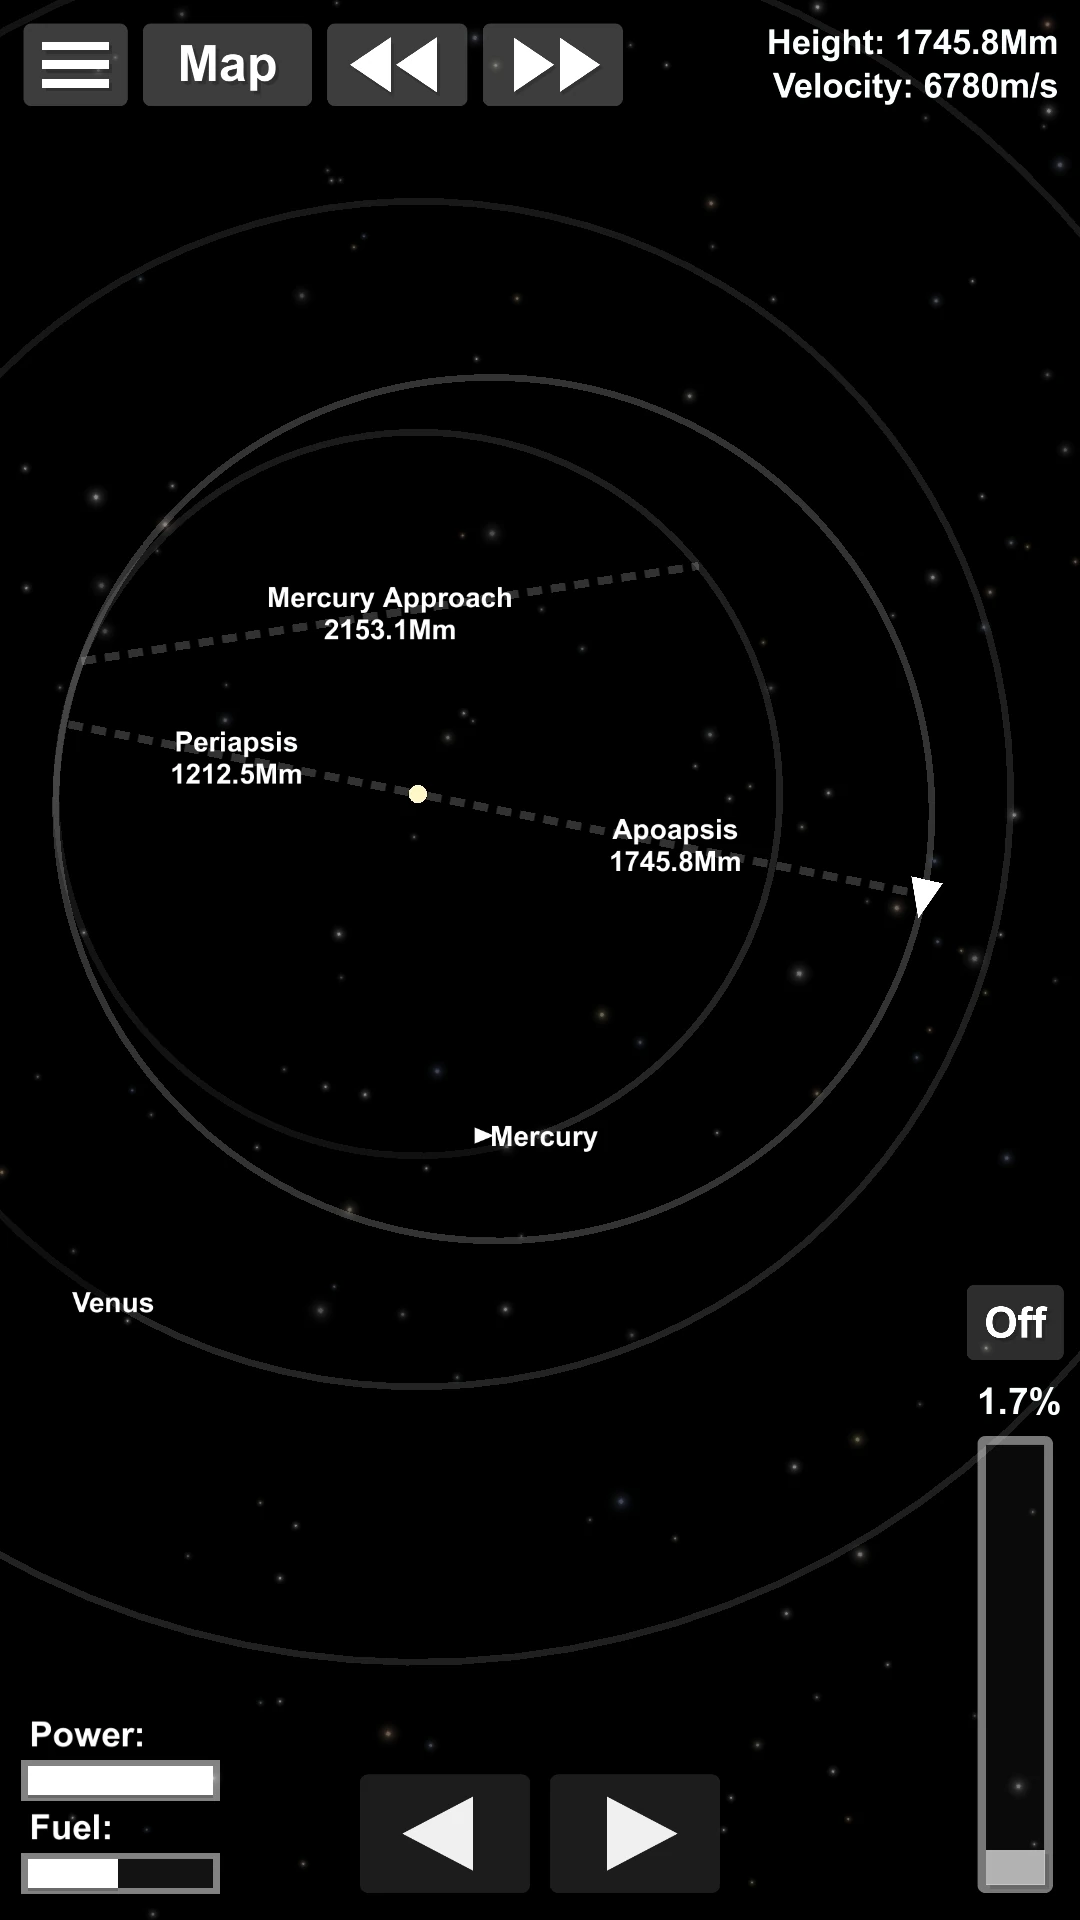
Now you have to adjust your trajectory so that your apoapsis is at 1745.8 Mm.
For this, you can lower your periapsis and if that's not enough, you can burn at the periapsis to boost your maneuver. This may not be necessary, but if you need it, you'll need to burn retrograde in this case. This is a rare situation, but here it is.
Now let your rocket exit Mercury and when you reach the apoapsis, burn prograde to raise your periapsis at 1212.5 Mm:
OK, now you just have to wait the next encounter. What's interesting with that orbit is that you will naturally encounter Mercury again after 3 turns. It will avoid you to wait for long until you get a random encounter. See why this trajectory is interesting?
You will probably have to make a small adjustment on your last turn though.
Then, again, slingshot with Mercury:
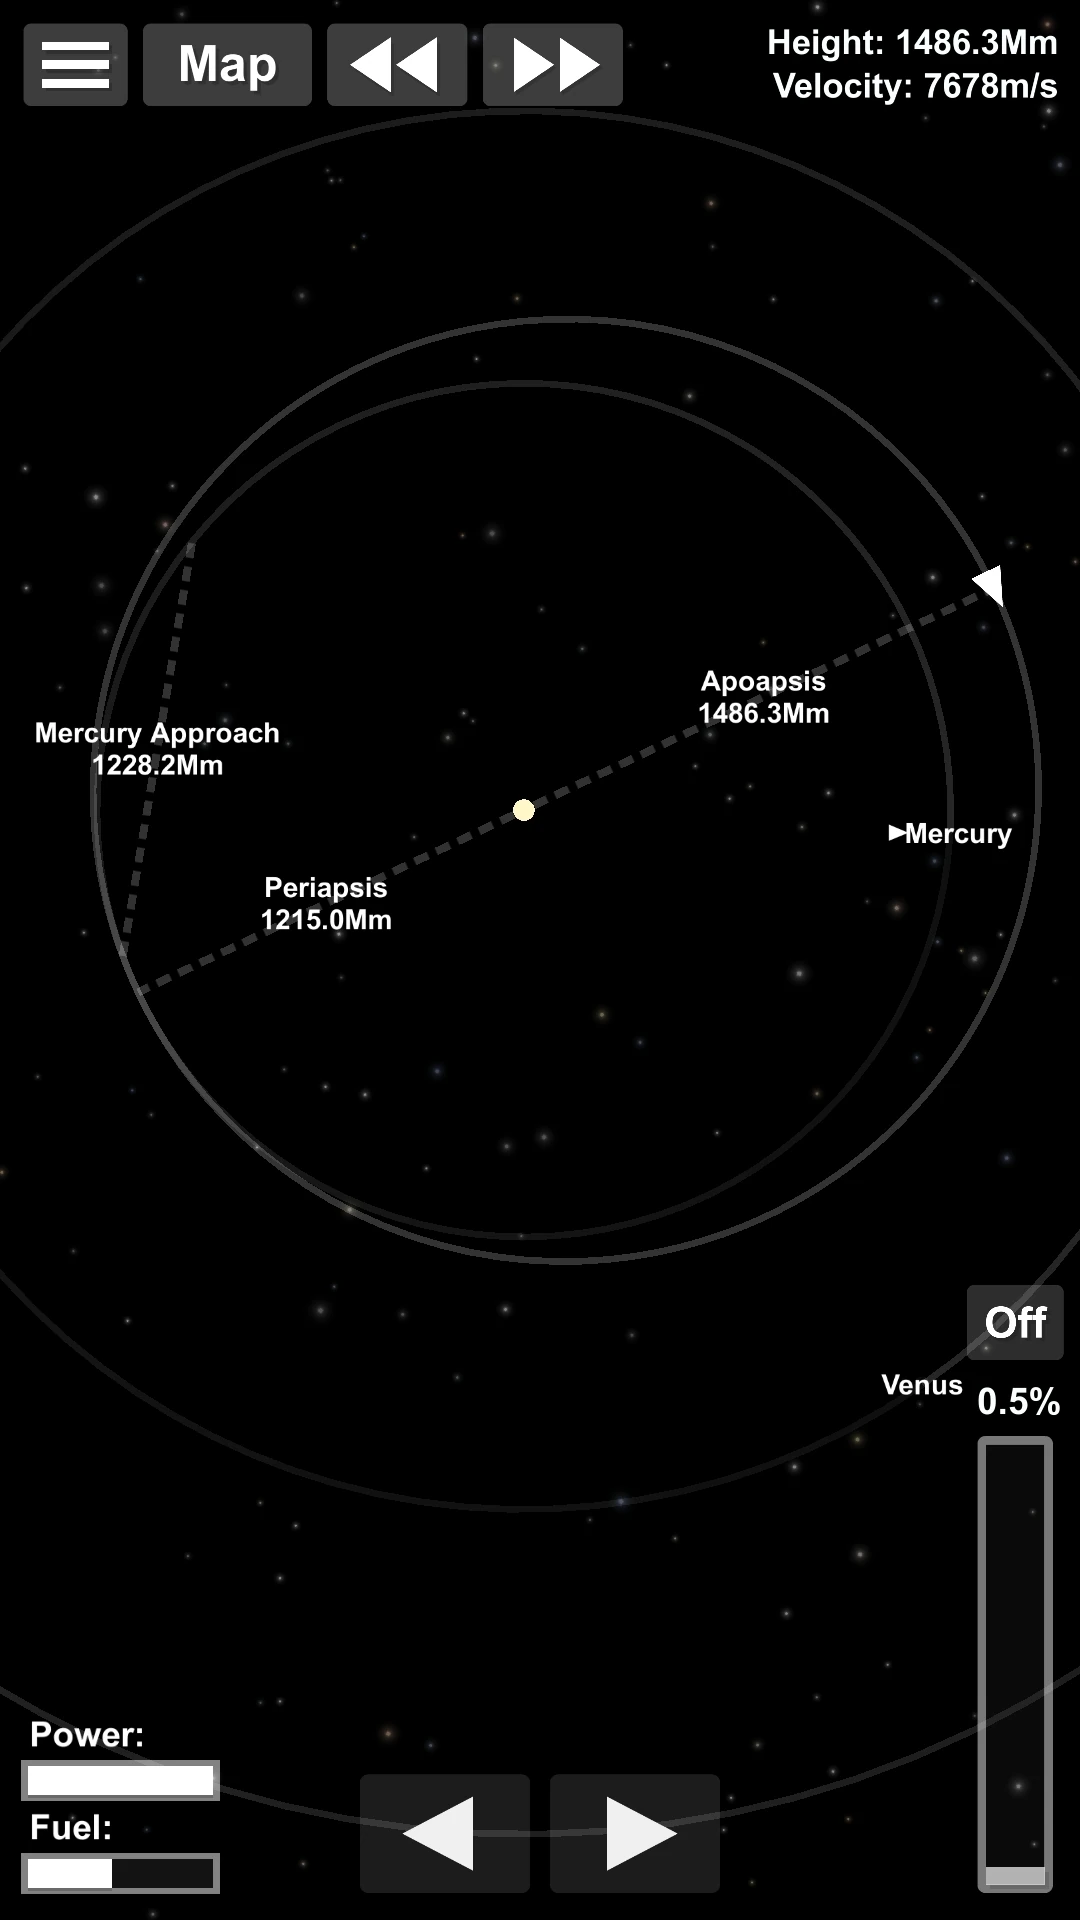
This time, adjust your apoapsis at 1486.3 Mm, and when you reach the apoapsis, raise the periapsis to 1215.0 Mm, as shown on the image.
This time, you will have to wait 6 turns to get another encounter.
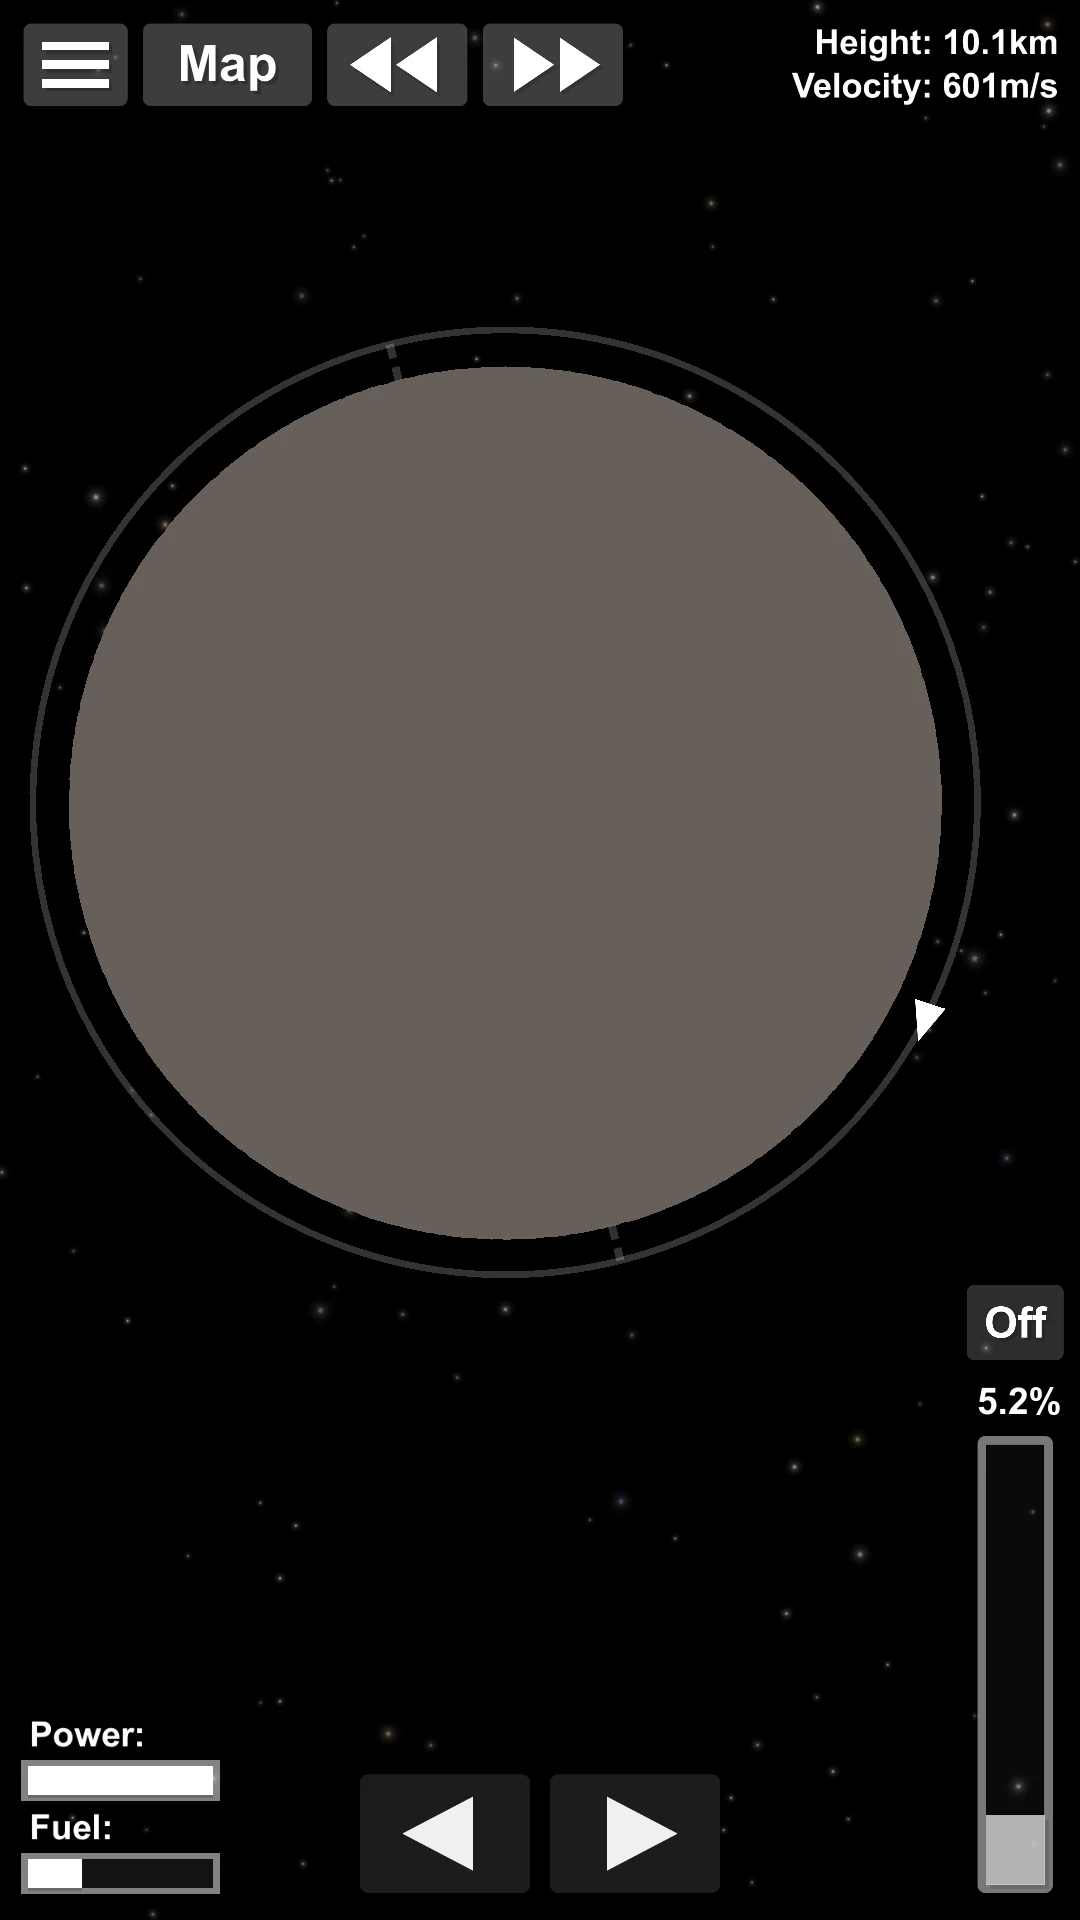
When you get it, you can satellize directly around Mercury:
See? It's not that difficult, but it requires precision. Something important to be aware about is that the two slingshots from Mercury allow to save slightly more than 200 m/s. It's not huge and every unnecessary maneuver will reduce that gain.
That's why I consider it's better to aim for orbits that will be naturally synchronized.
Now, you may think that doing this to save only 200 m/s is not worth it, you could simply add a bit more fuel to your rocket after all. In this case you may be right, but for a heavier rocket this means adding more than a little fuel and as your rocket gets heavier, you may need more engines, which will make the rocket heavier again etc... Not even speaking about the rocket that will have to propel that extra mass onto LEO first.
In such cases, that technique could prove very valuable! And especially as we didn't even take into account the return.
Third step: The return path[]
Level: HARD
Now for the return part, we will obviously use Venus again (this part will be easy), but it's still possible to use Mercury at your advantage to make it more efficient.
There are many techniques to go from Mercury to Venus using gravity assists, but probably the best one is shown here:
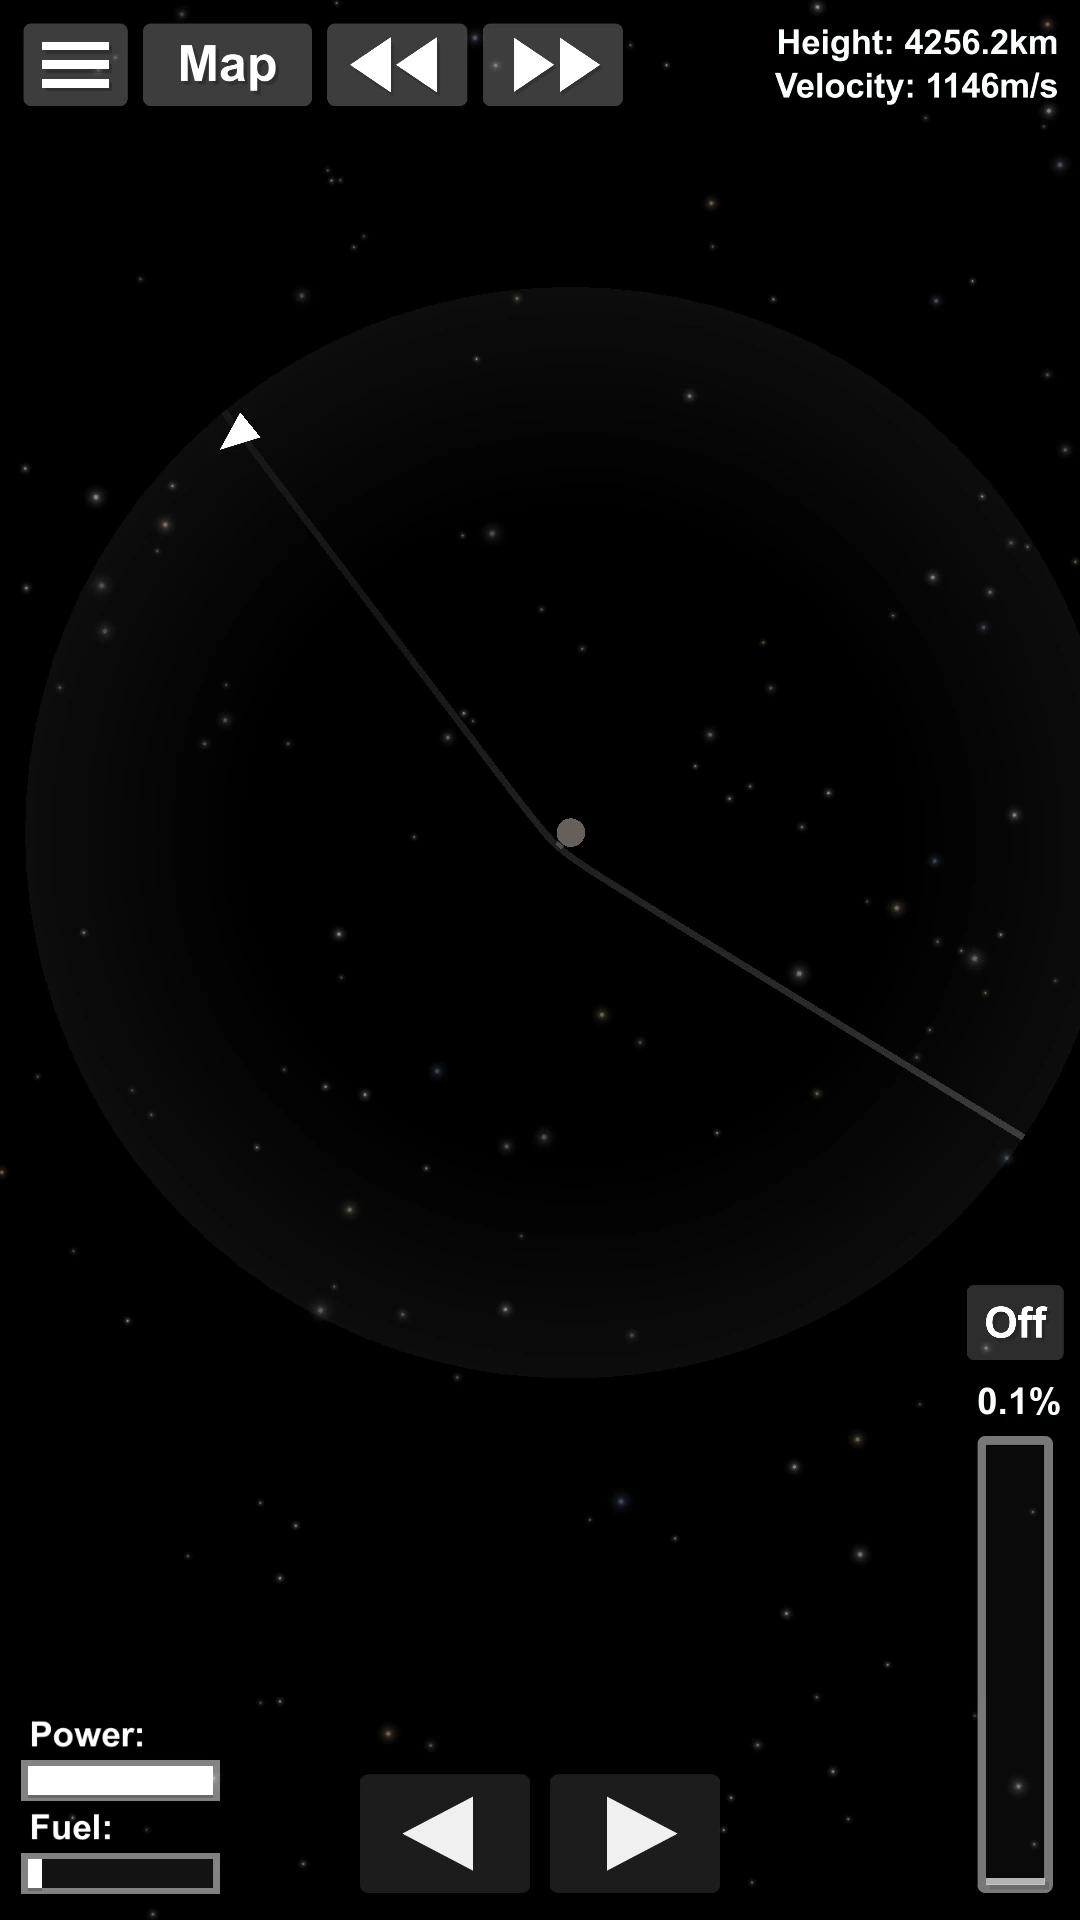
The first step is to burn and quit Mercury so that your periapsis above the Sun is at 1060 Mm:
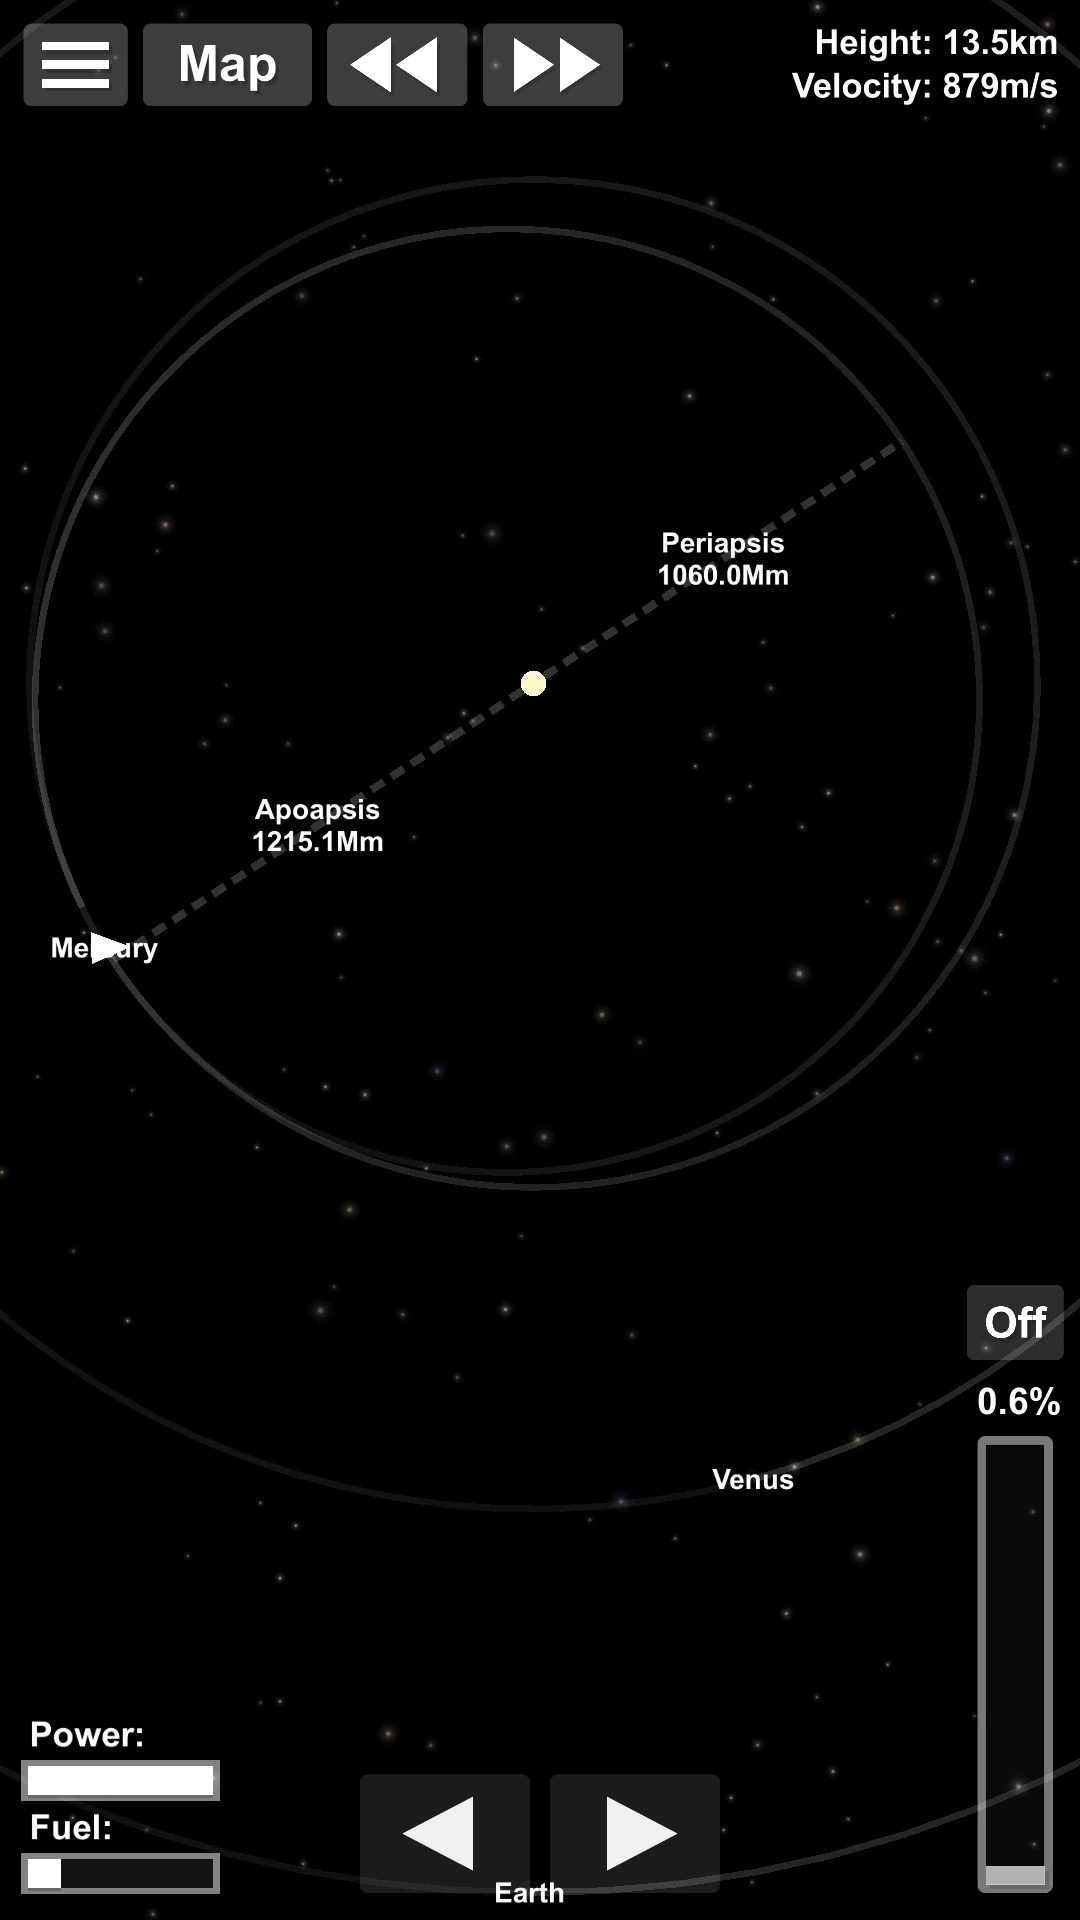
That's right, we go below Mercury level!
This sounds really weird at this stage, but the next maneuver will allow to synchronize our orbit with Mercury, which is important.
When you reach the periapsis, burn prograde until you trajectory enters Mercury again:
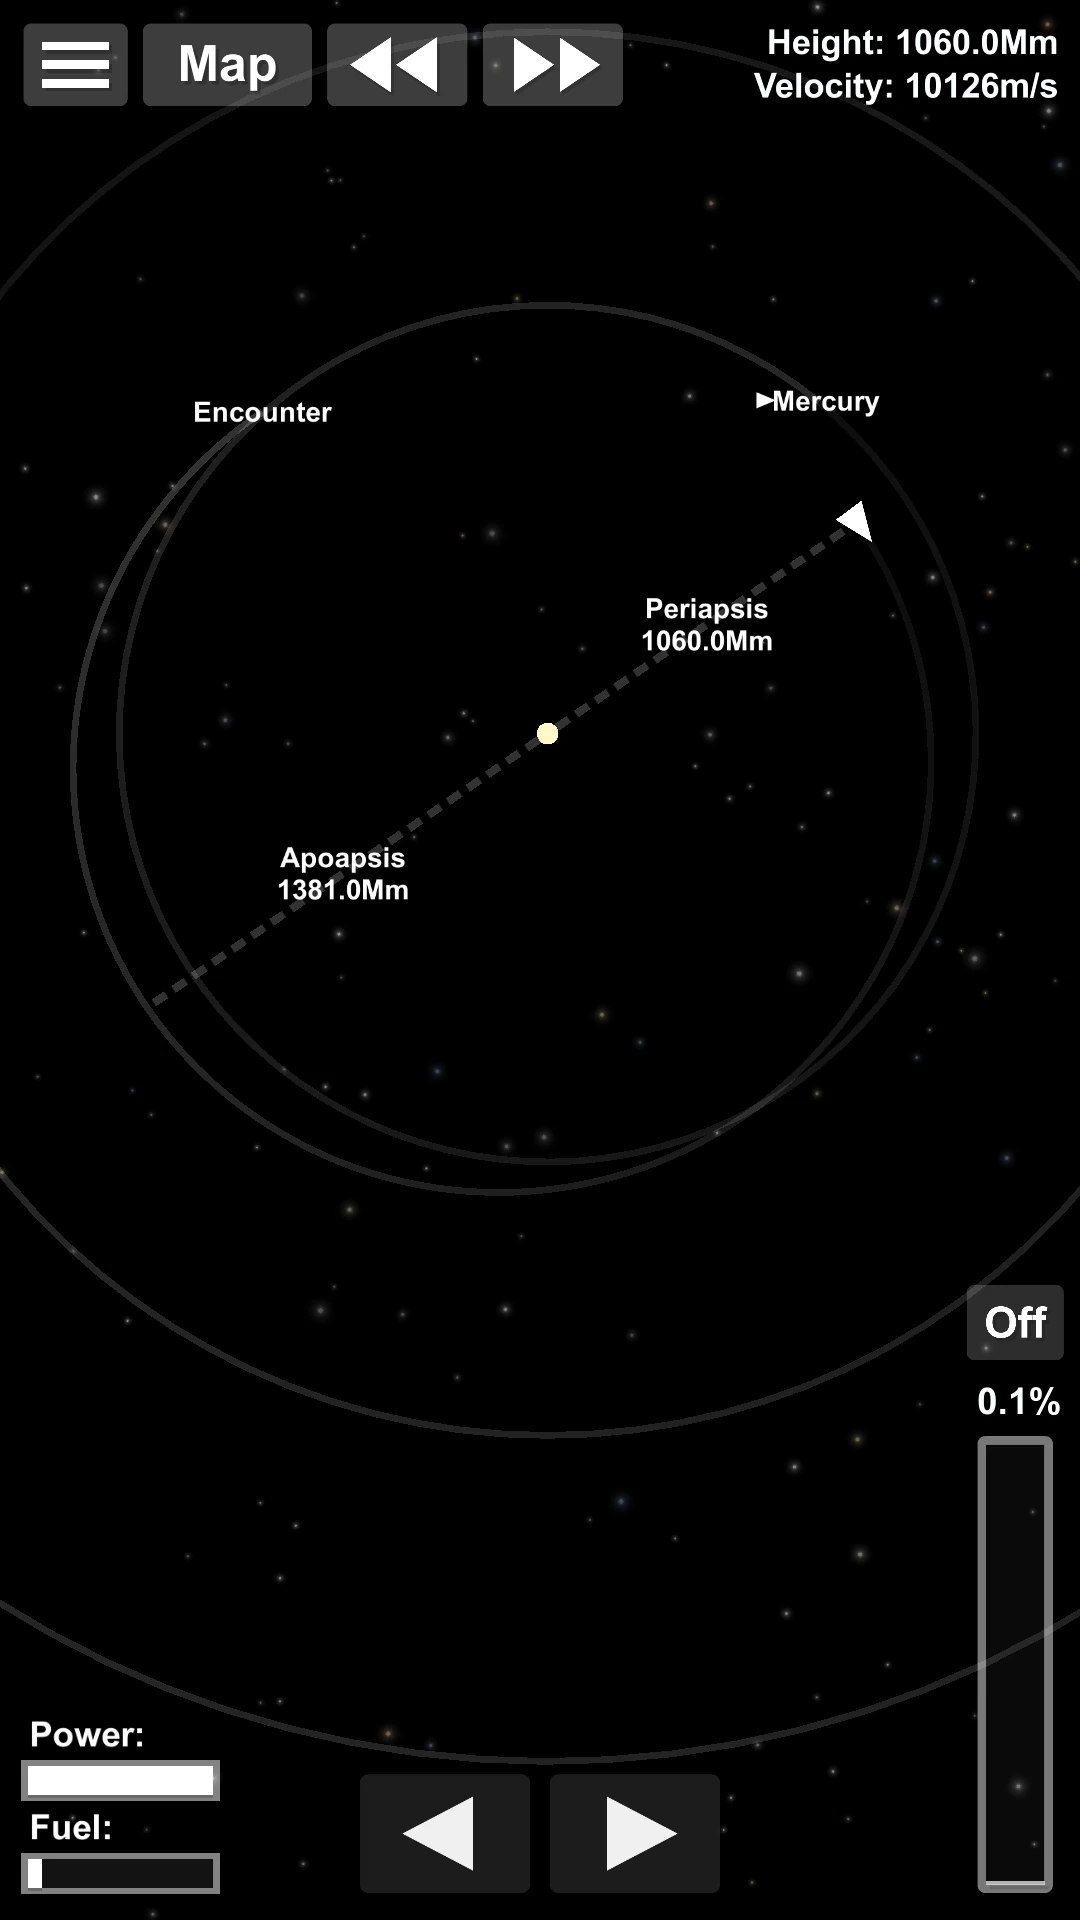
OK, now we are ready for the first slingshot:
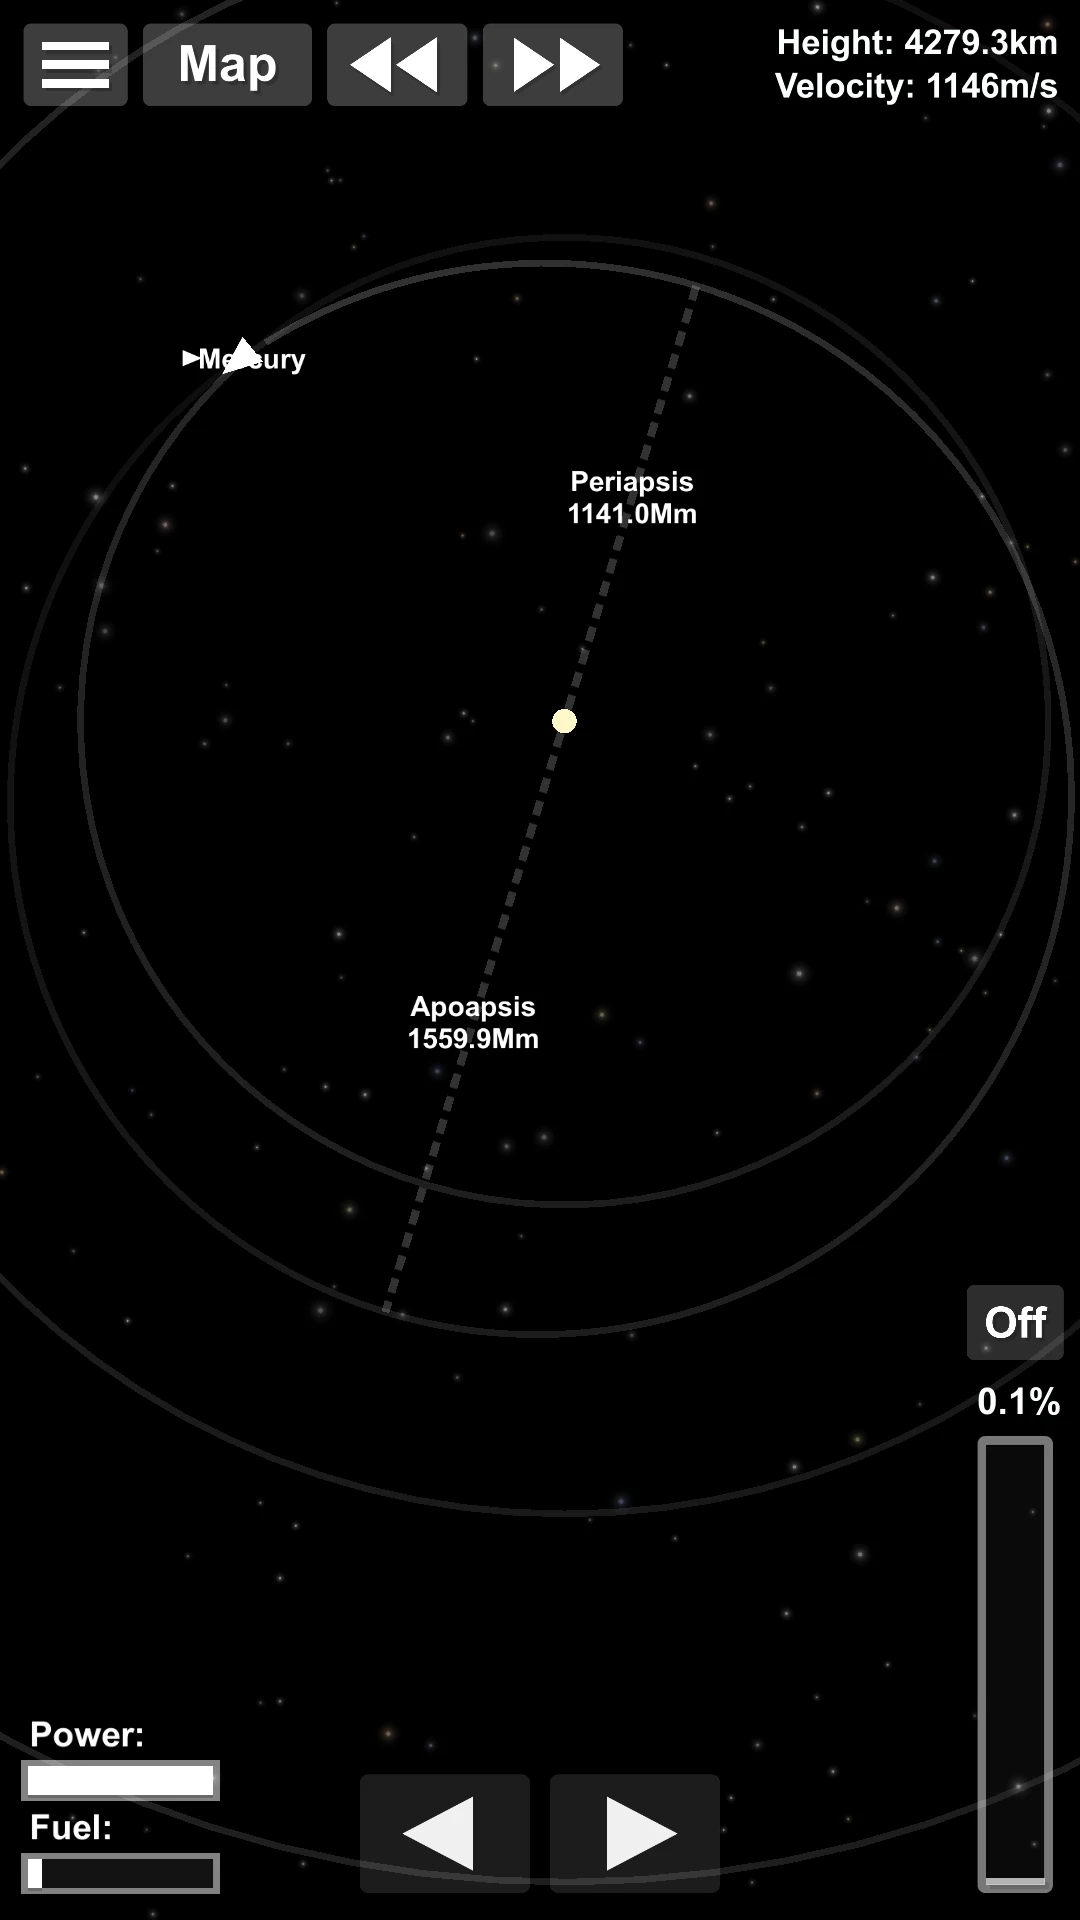
In this case er end on an orbit which peri/apoapsis are 1141.0 and 1559.9 Mm. When reproducing this, you may have some slightly different values. In this case, what is important is that "periapsis + apoapsis = 2700.9 Mm". This is what guarantees that you will meet Mercury again after 6 turns, so try to adjust your trajectory so that you get as close as possible to this value. If there's a slight difference, you may just have to make a small correction on the last turn, so that's still an affordable situation.
Then after 6 turns you can perform a second slingshot and aim for that trajectory:
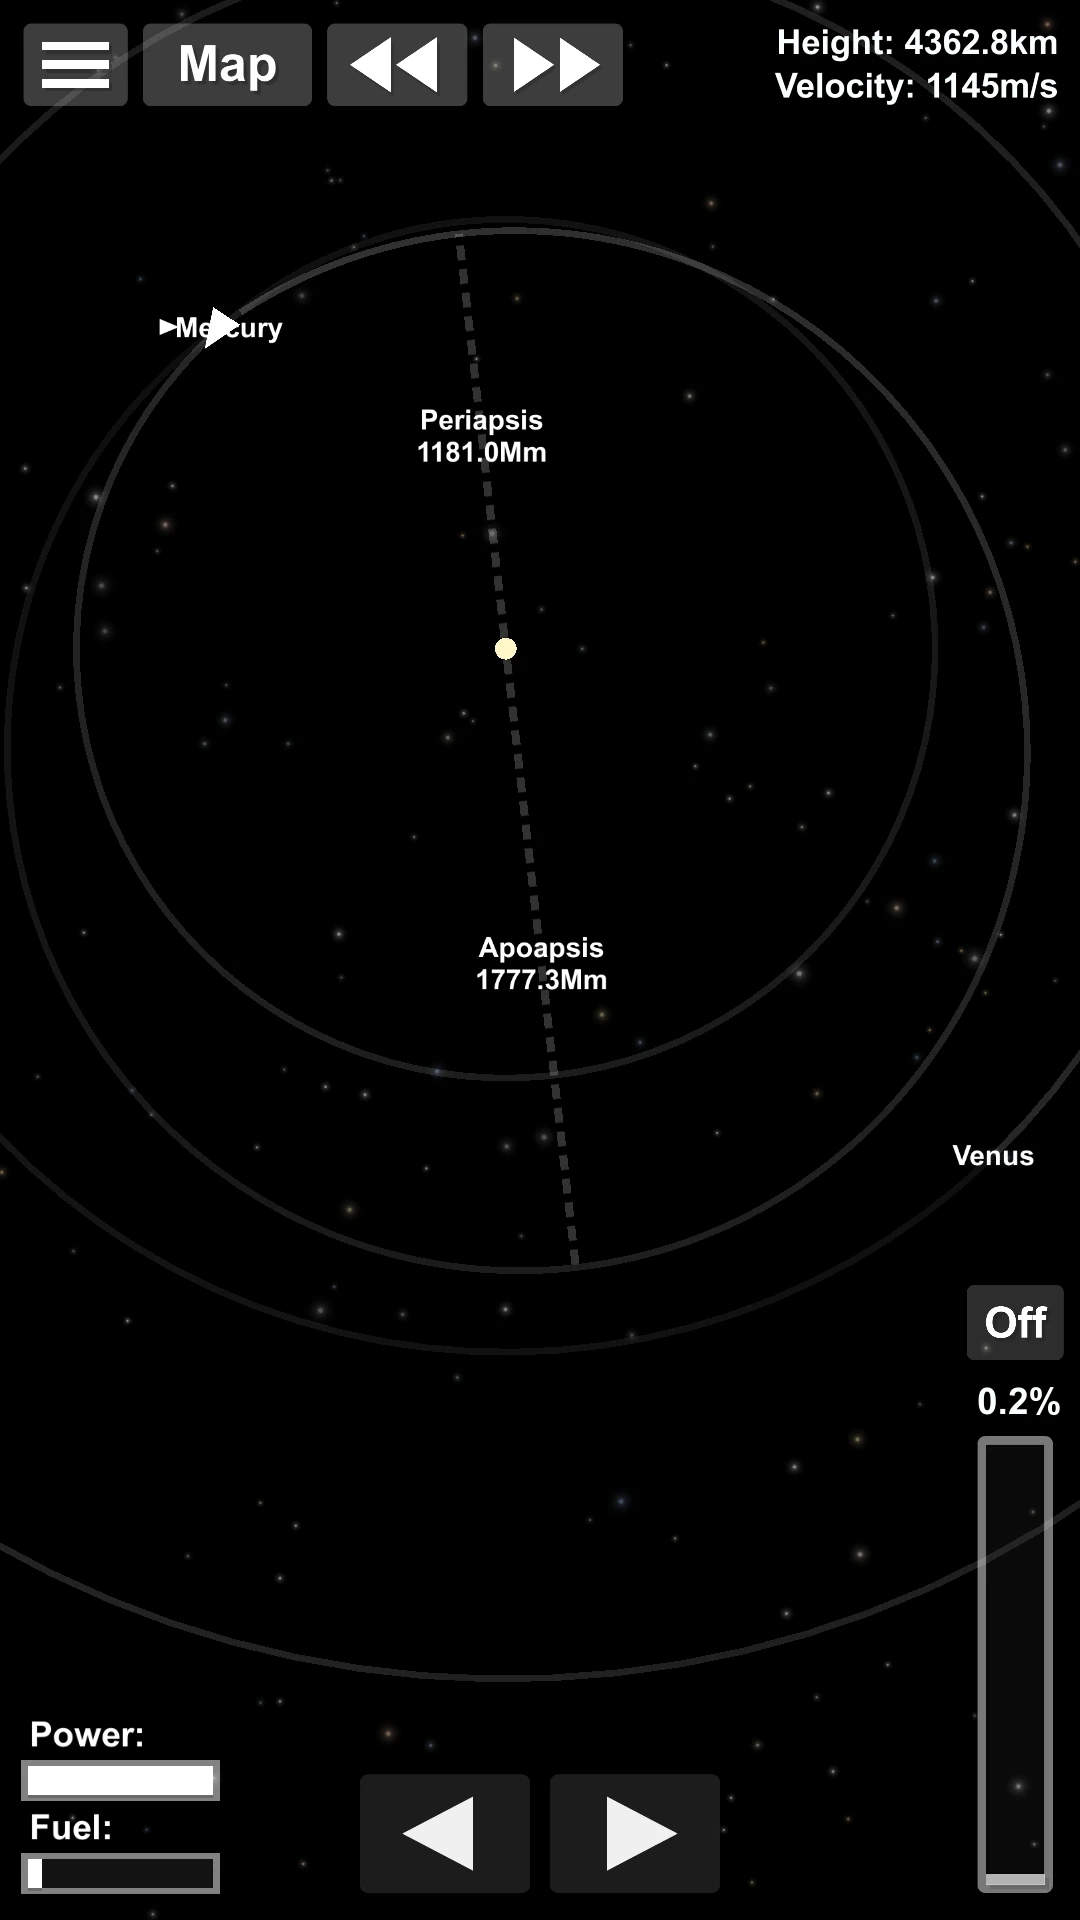
Same as before, but this time, your "peri + apo" should be 2958.3 Mm and you'll meet Mercury after 3 more turns. In this case, the peri/apoapsis are 1181.0 and 1777.3 Mm.
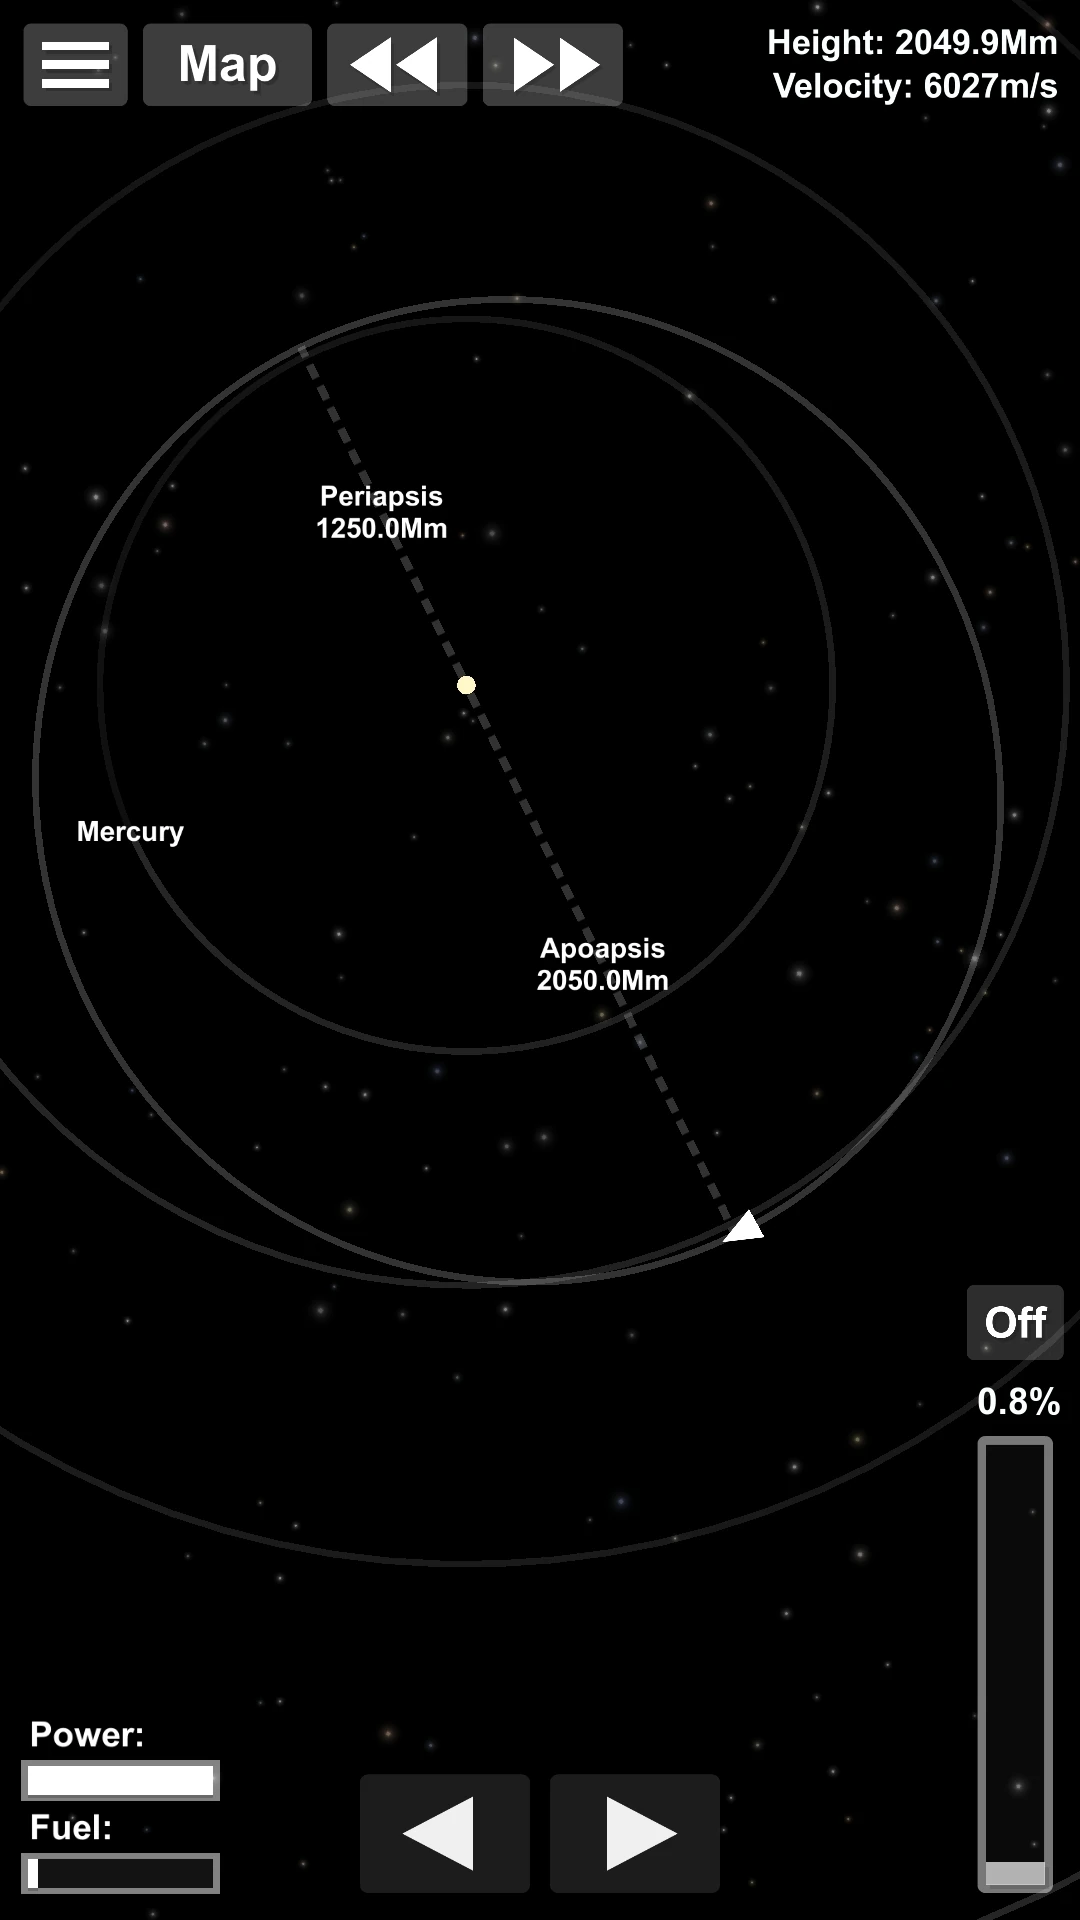
Then, third (and last) slingshot from Mercury:

Now we go for Venus. Try to adjust the apoapsis at 2050.0 Mm. Personally, I had to graze Mercury on that last slingshot and even to boost it a little by burning prograde at the periapsis.
Then, when you reach the apoapsis, burn prograde to raise your periapsis at 1250.0 Mm:
On this orbit, you're safe from meeting Mercury again. Now you have to get an encounter with Venus. On this orbit, your distance may slightly vary every 4 turns, so you can still get a cheap encounter:
After a last slingshot from Venus, you're on a transfer trajectory to Earth. All you have to do is to cross Earth trajectory, and you dit it!
Surprisingly, the rocket still has a little fuel left.
VEEGA Technique[]
This is an interesting gravity assist combination that allows a rocket to reach Jupiter more efficiently than with a direct transfer. This combination is known as the VEEGA path ("Venus Earth Earth Gravity Assist") and has been used in real life by the Galileo probe.
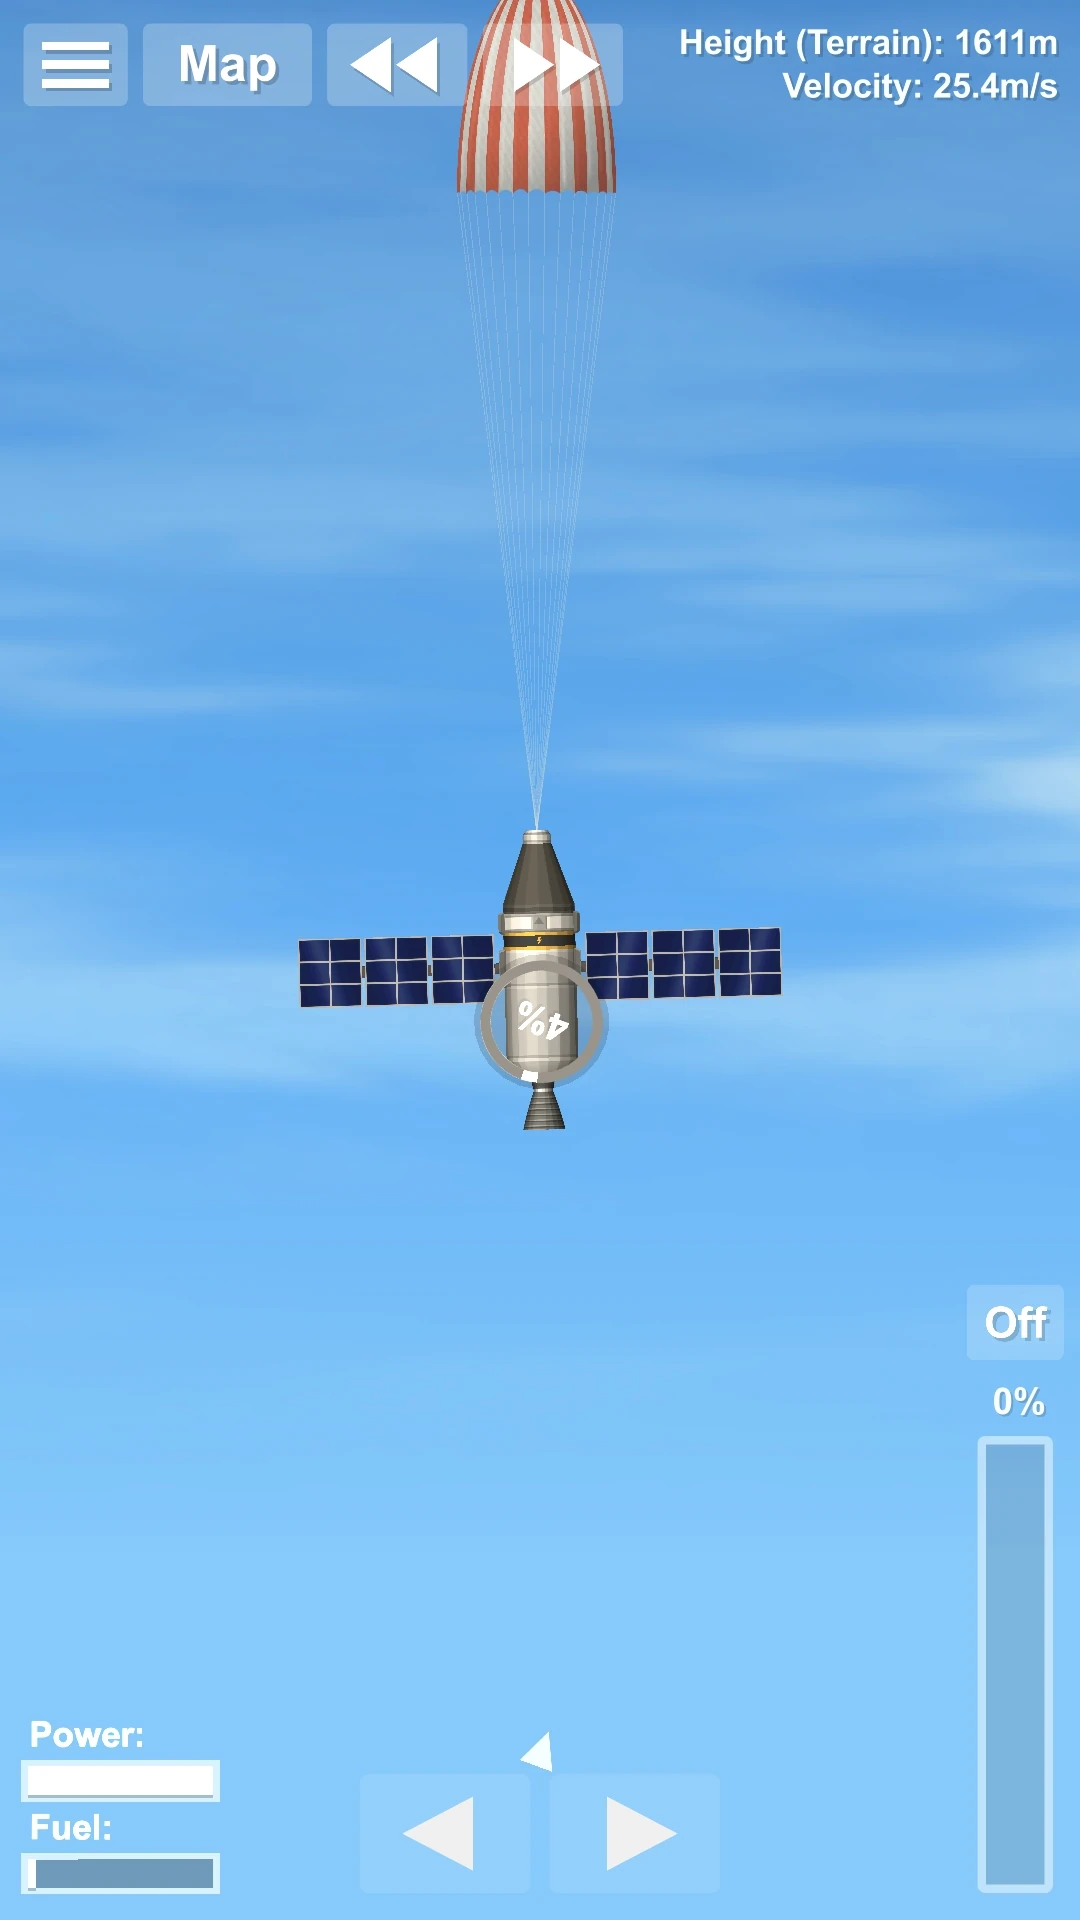
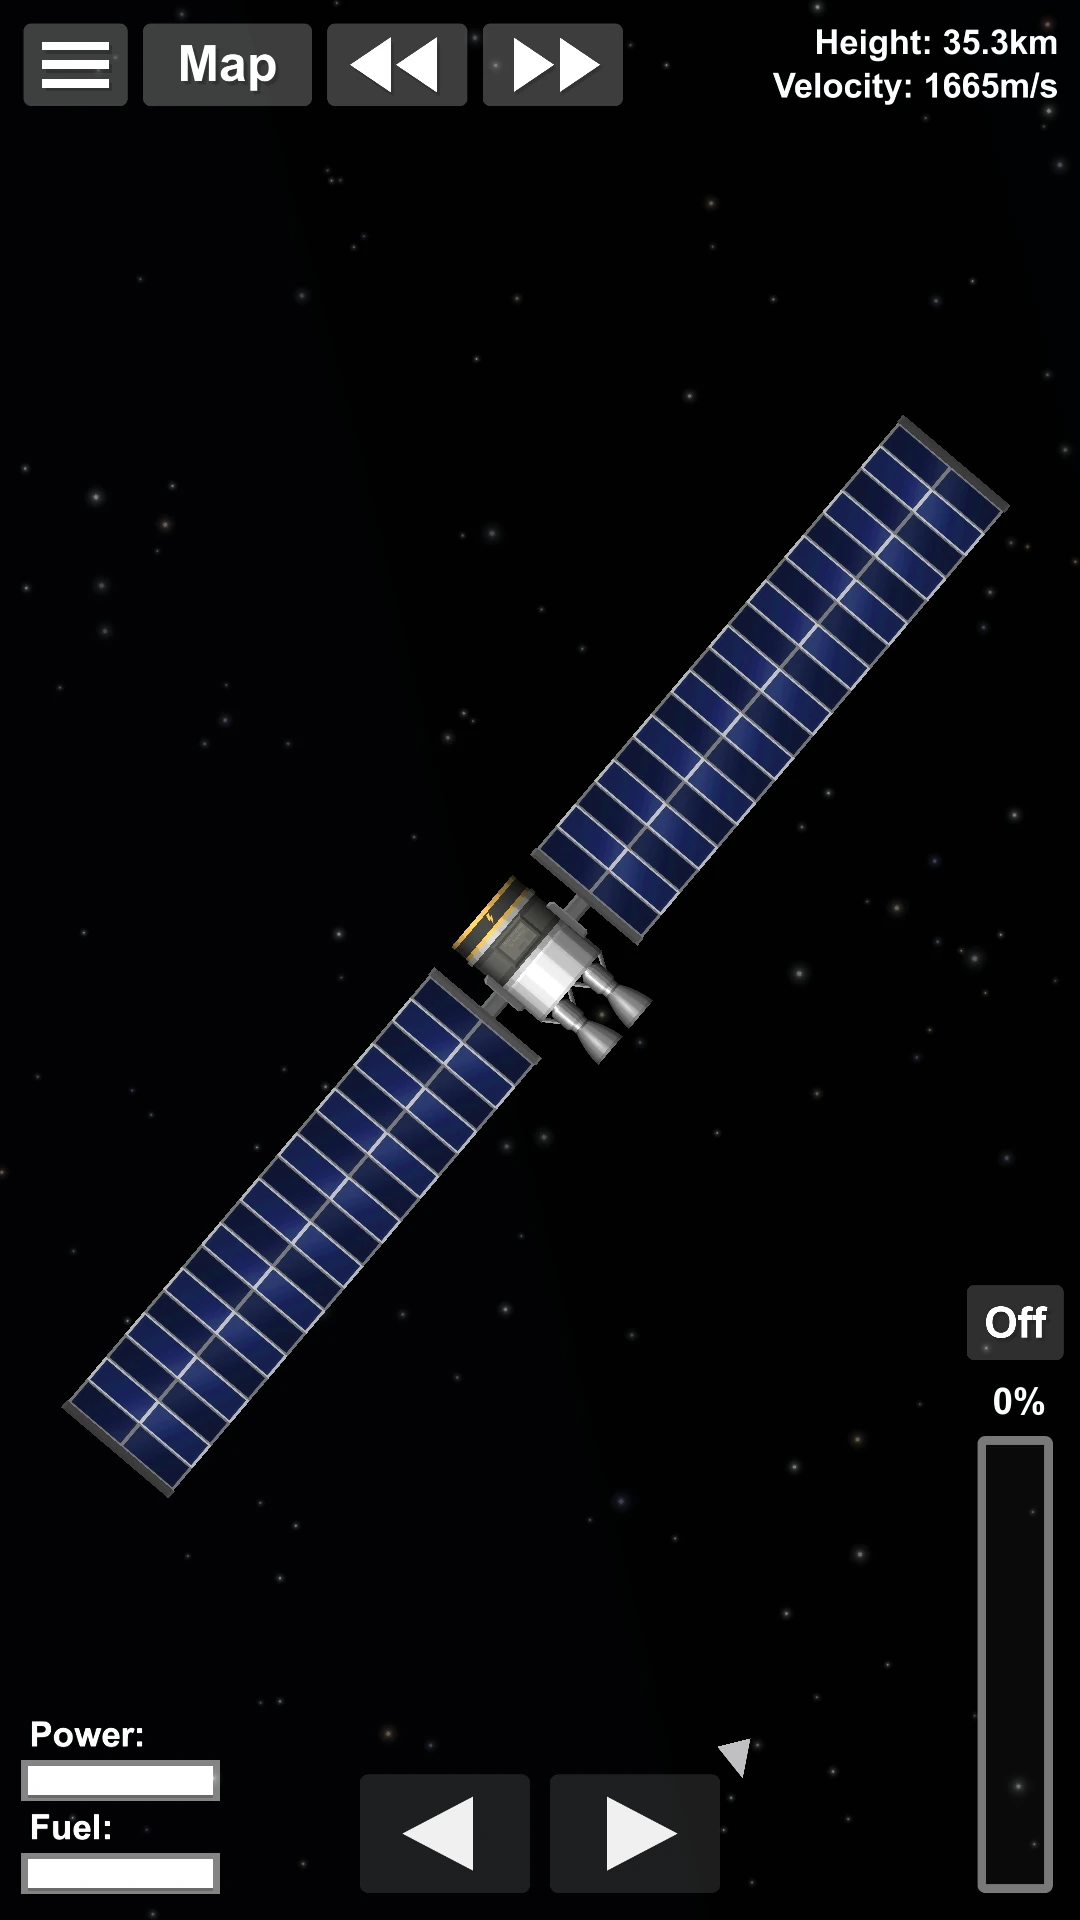
For this, we will use the rocket below, parked in LEO at the beginning of the mission:
It looks quite small and unnecessarily heavy for such a mission right? Indeed, if you try to reach Jupiter with a direct transfer, this will happen:
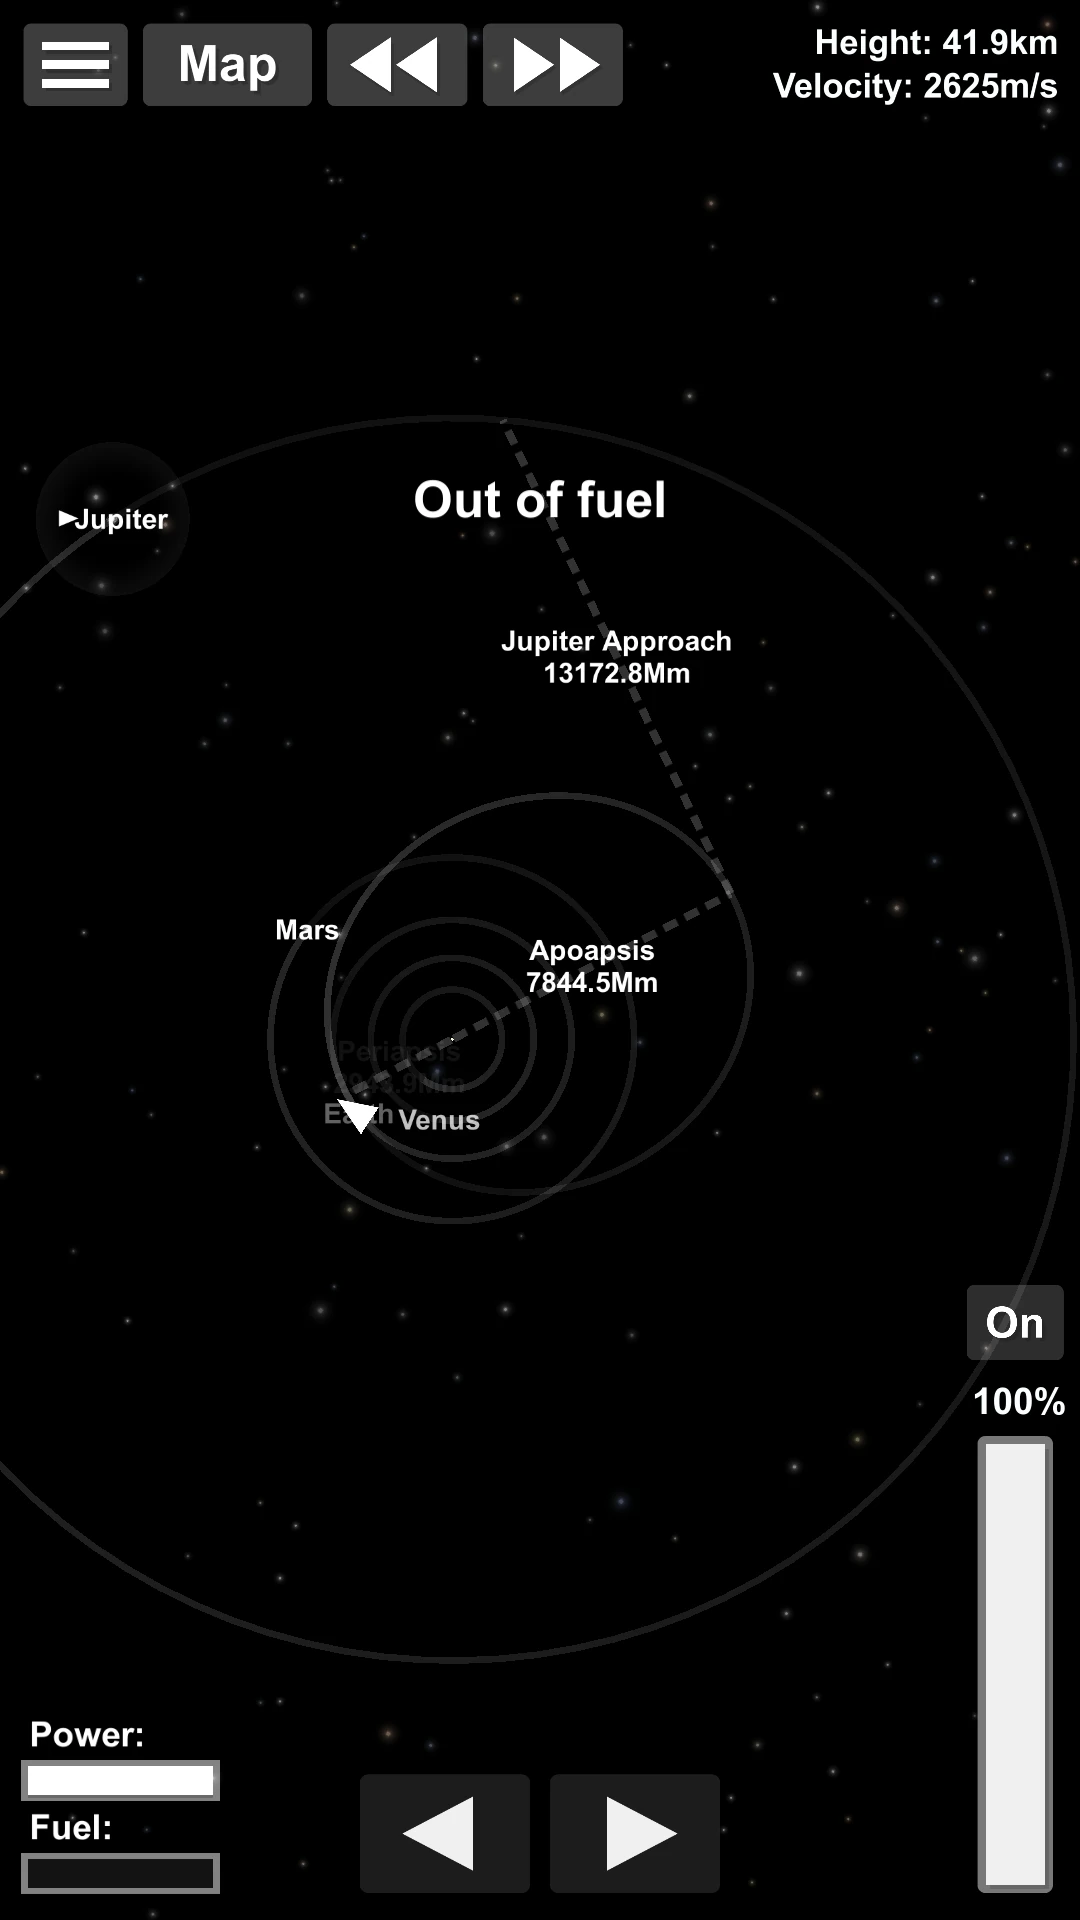
The mission is a big fail
So now, let's try with that technique.
The VEEGA path[]
Level: TRICKY
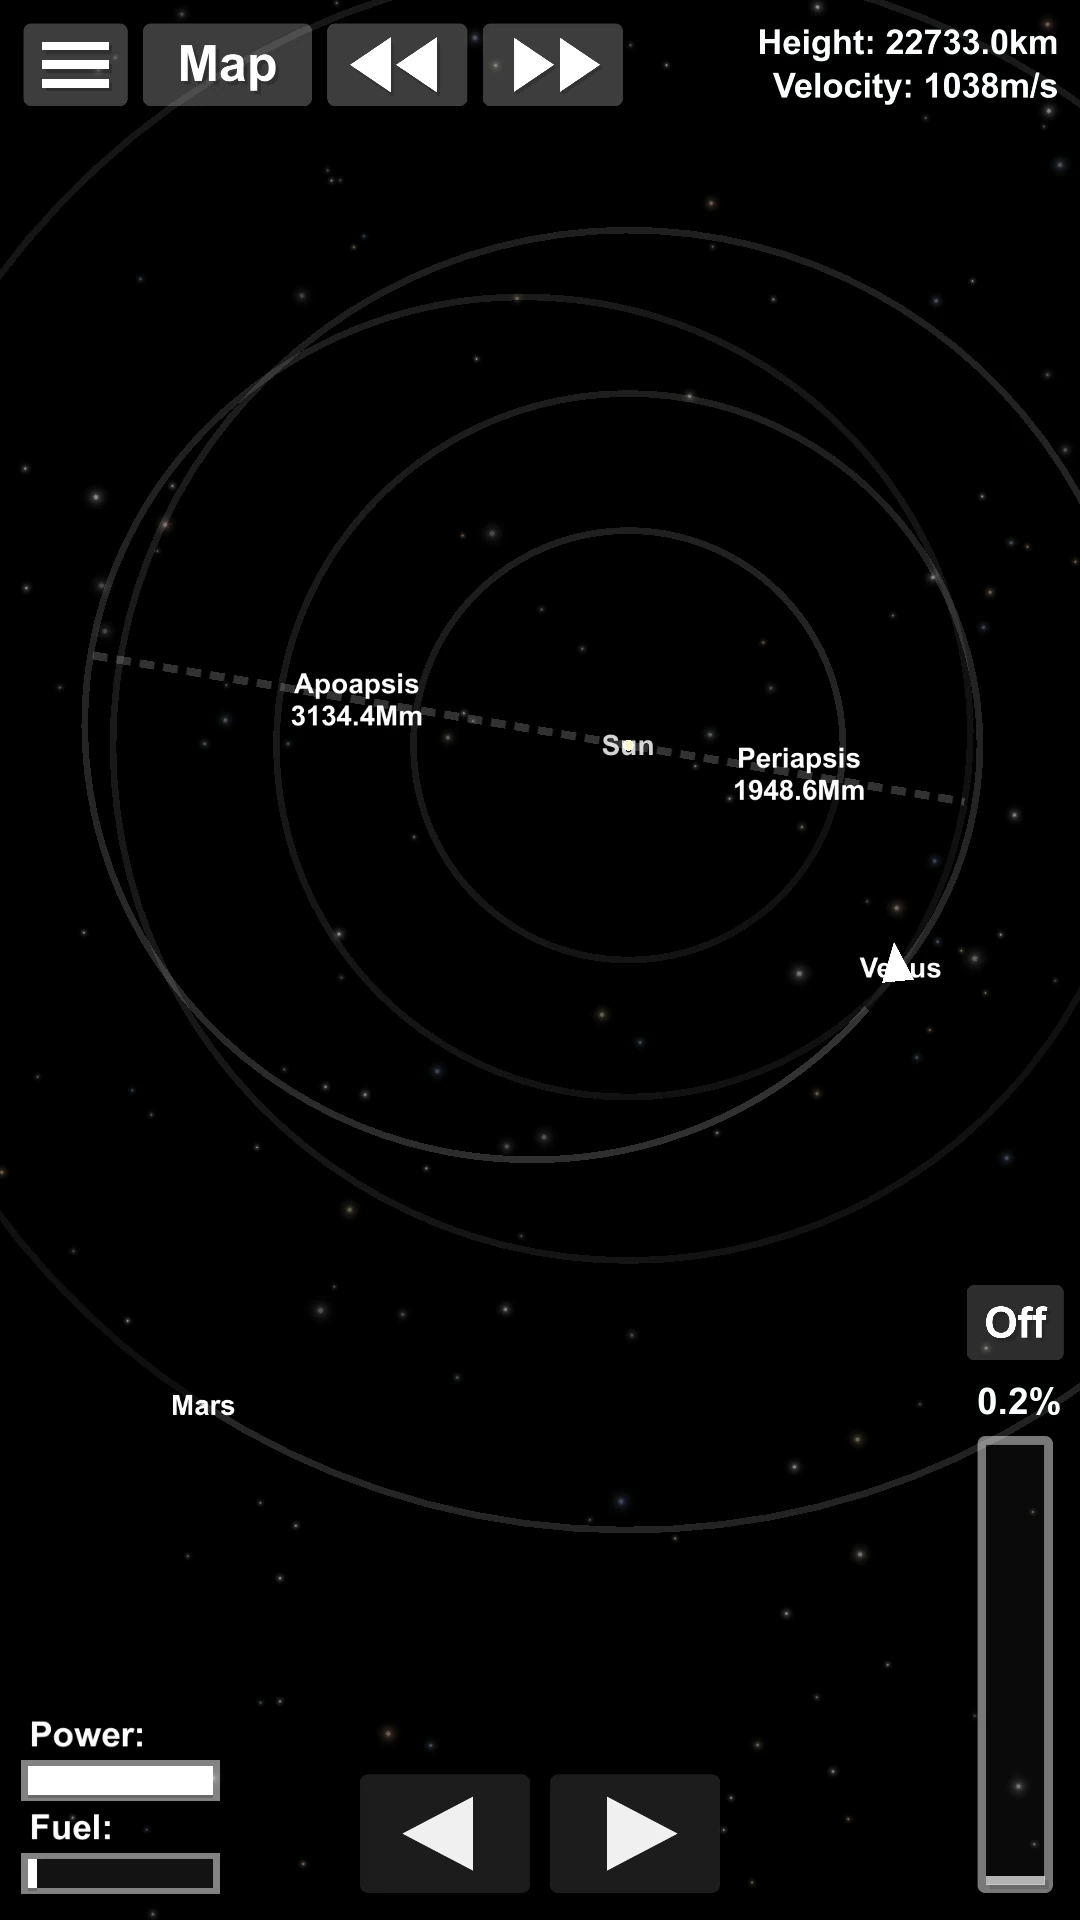
So for this technique, our first target is Venus:
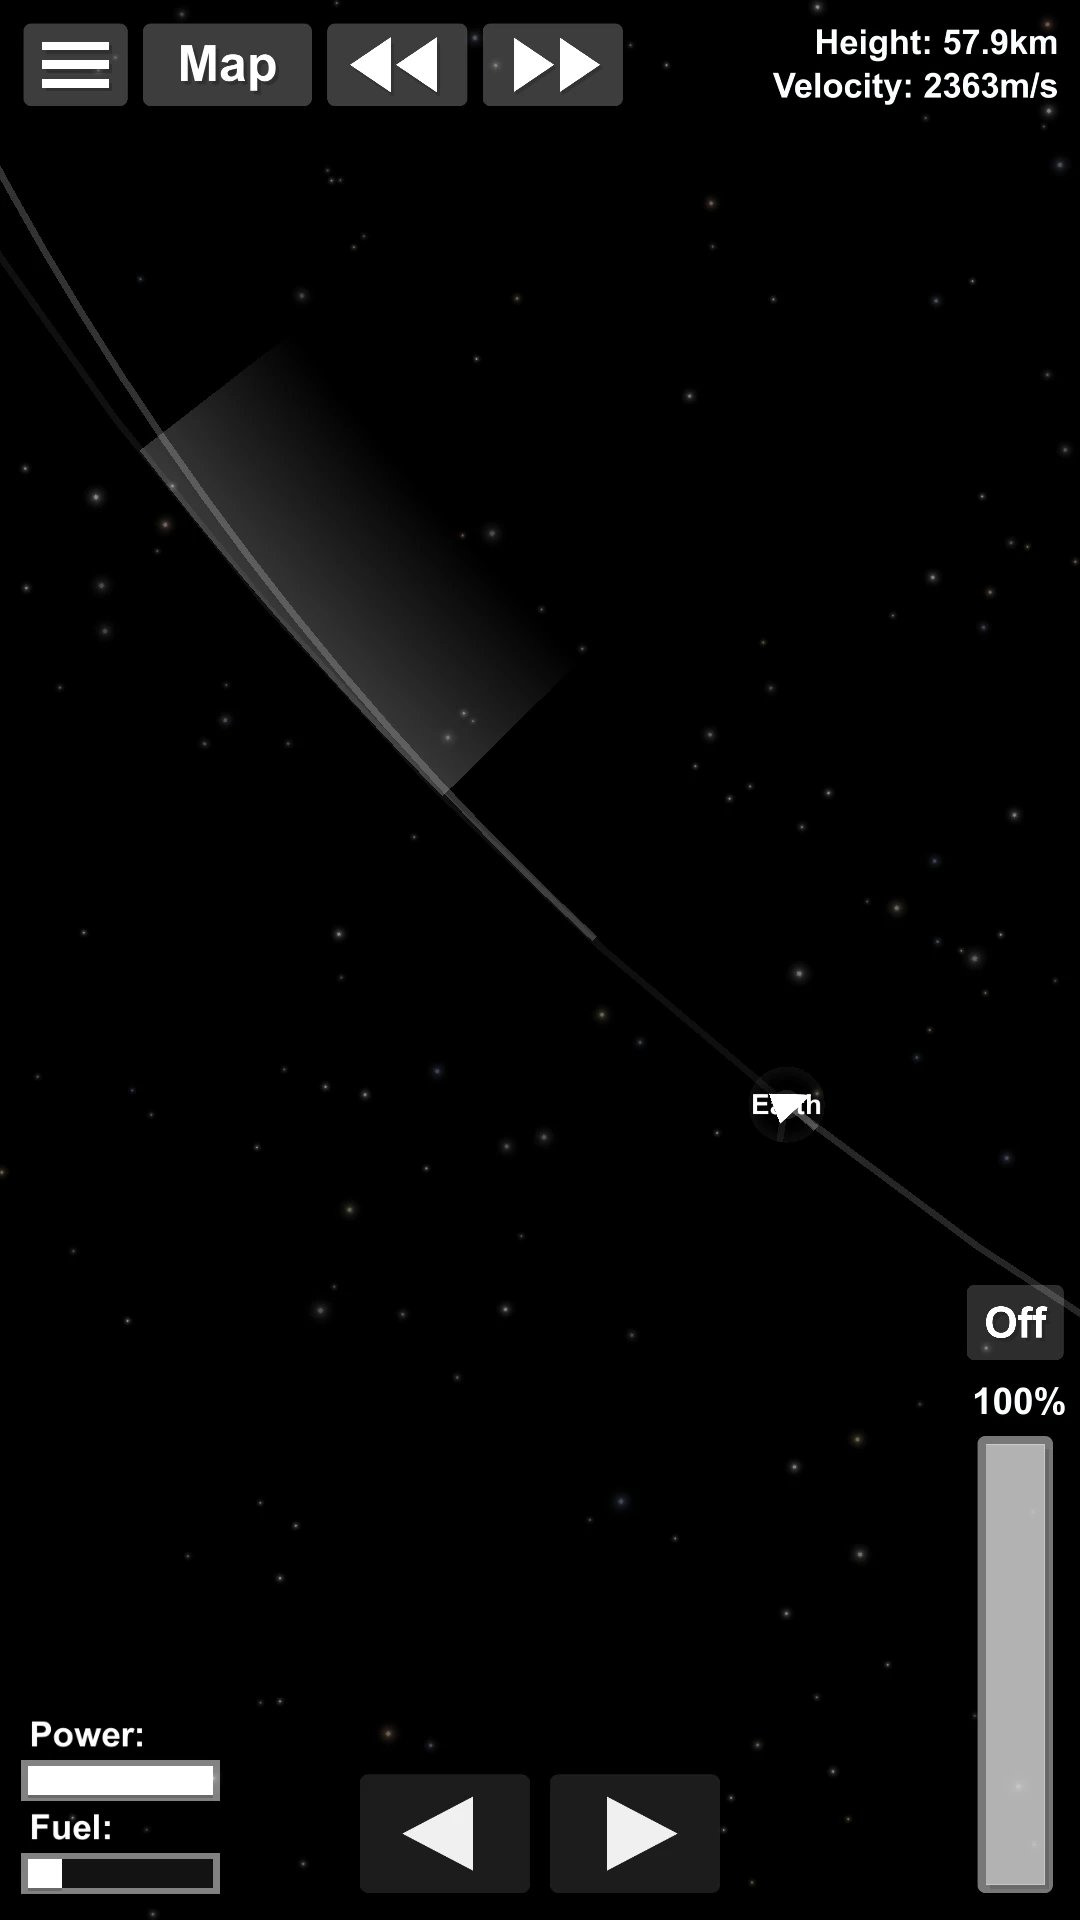
As for the trip to Mercury, we didn't burn in the transfer window, but after this one. As you can see, the rocket burnt after one transfer window width. This is important, otherwise you won't even be able to raise your orbit afterwards!
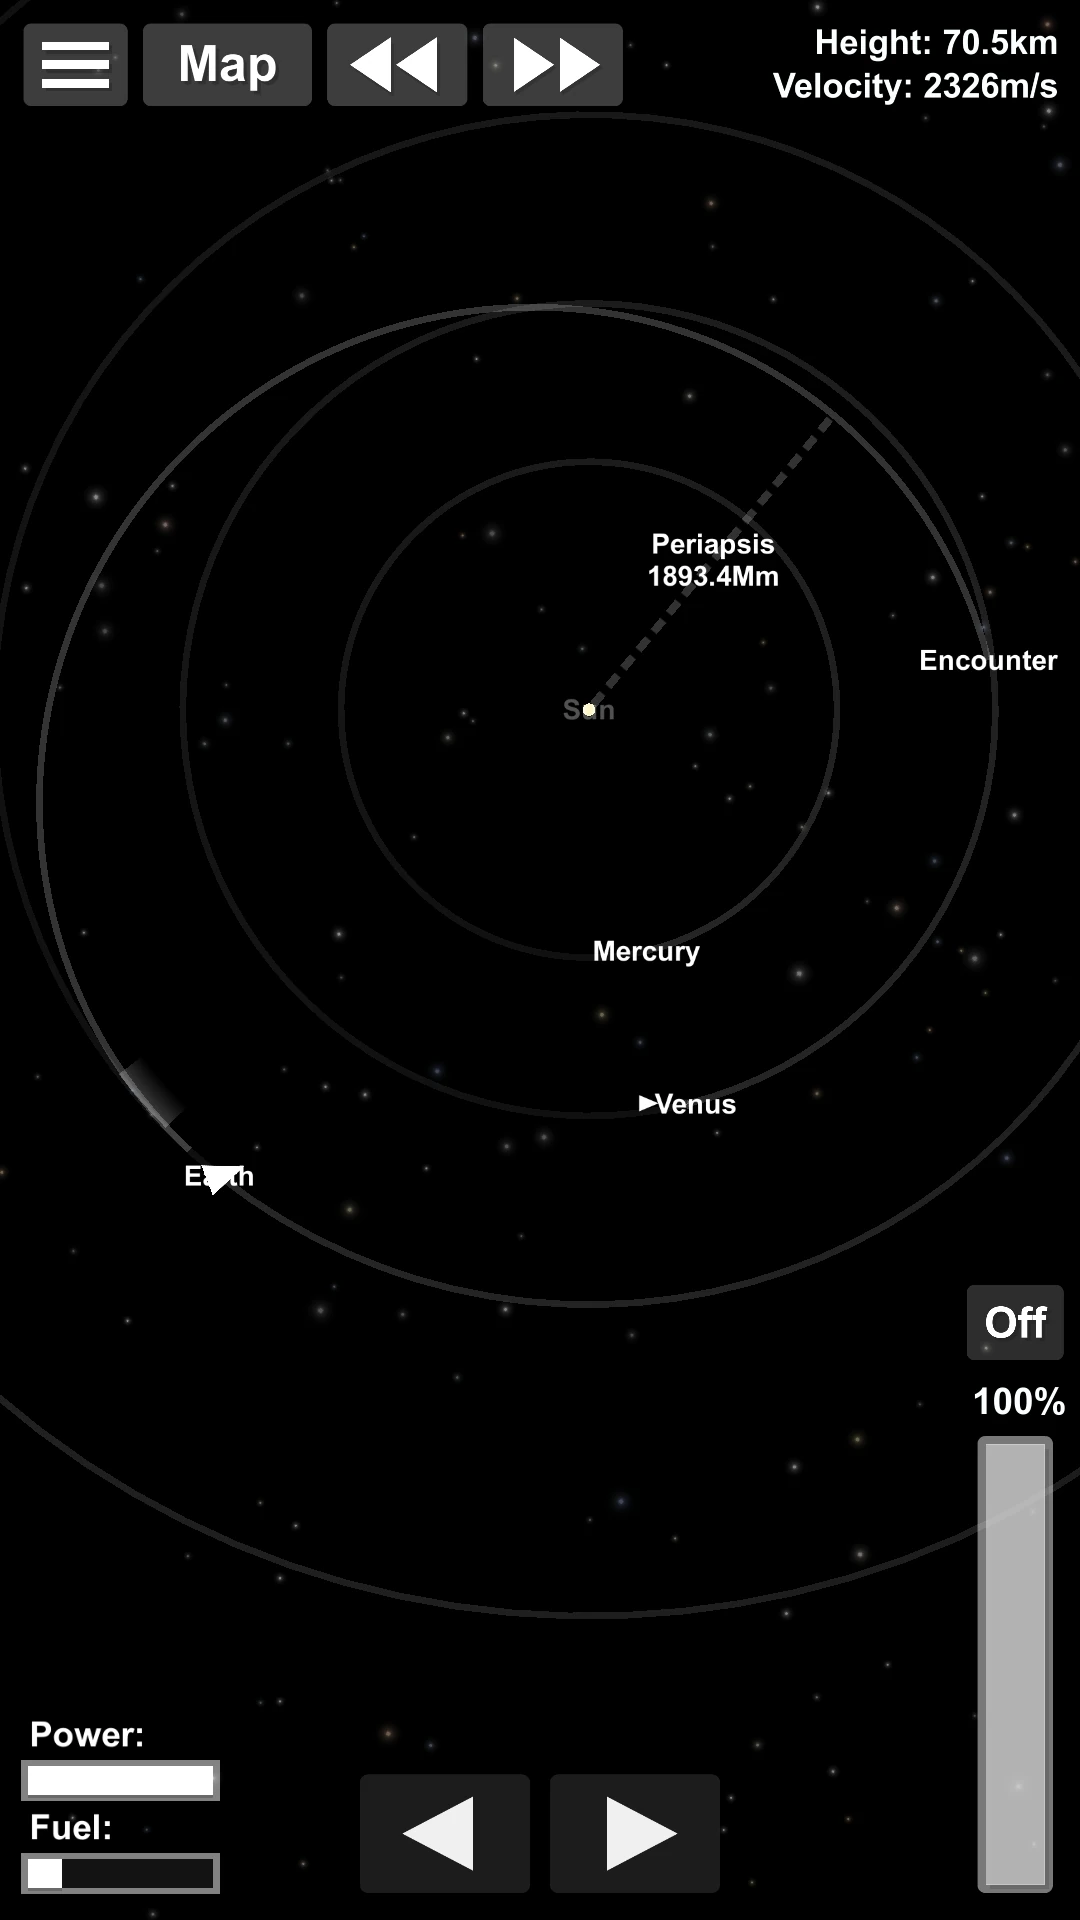
In this case, you may aim for a prograde flyby, with your periapsis close to the minimum. Then when you enter Venus' SOI, set the Earth as a target and adjust your trajectory so that you encounter Earth again:

You may be able to do this by only adjusting the periapsis.
Ideally, your periapsis above Earth should be around 250 km. Then wait until you enter the Earth's SOI:

Now, here is the tricky part: you must adjust your periapsis so that your "periapsis + apoapsis" value is equal to 10959.6 Mm. This generally happens when your apoapsis is around 8335 Mm, so you can first aim for that, and then make the necessary adjustments. If you don't match the exact value, you may have to perform a small correction later. This is affordable, but obviously, it's better to be as close as possible.
This value is important because it ensures that you'll meet Earth again after two Sun orbits. The closest approach line mechanism won't anticipate that, so it's better to rely on a calculated value.
Then, as promised, after 2 turns you encounter Earth again:

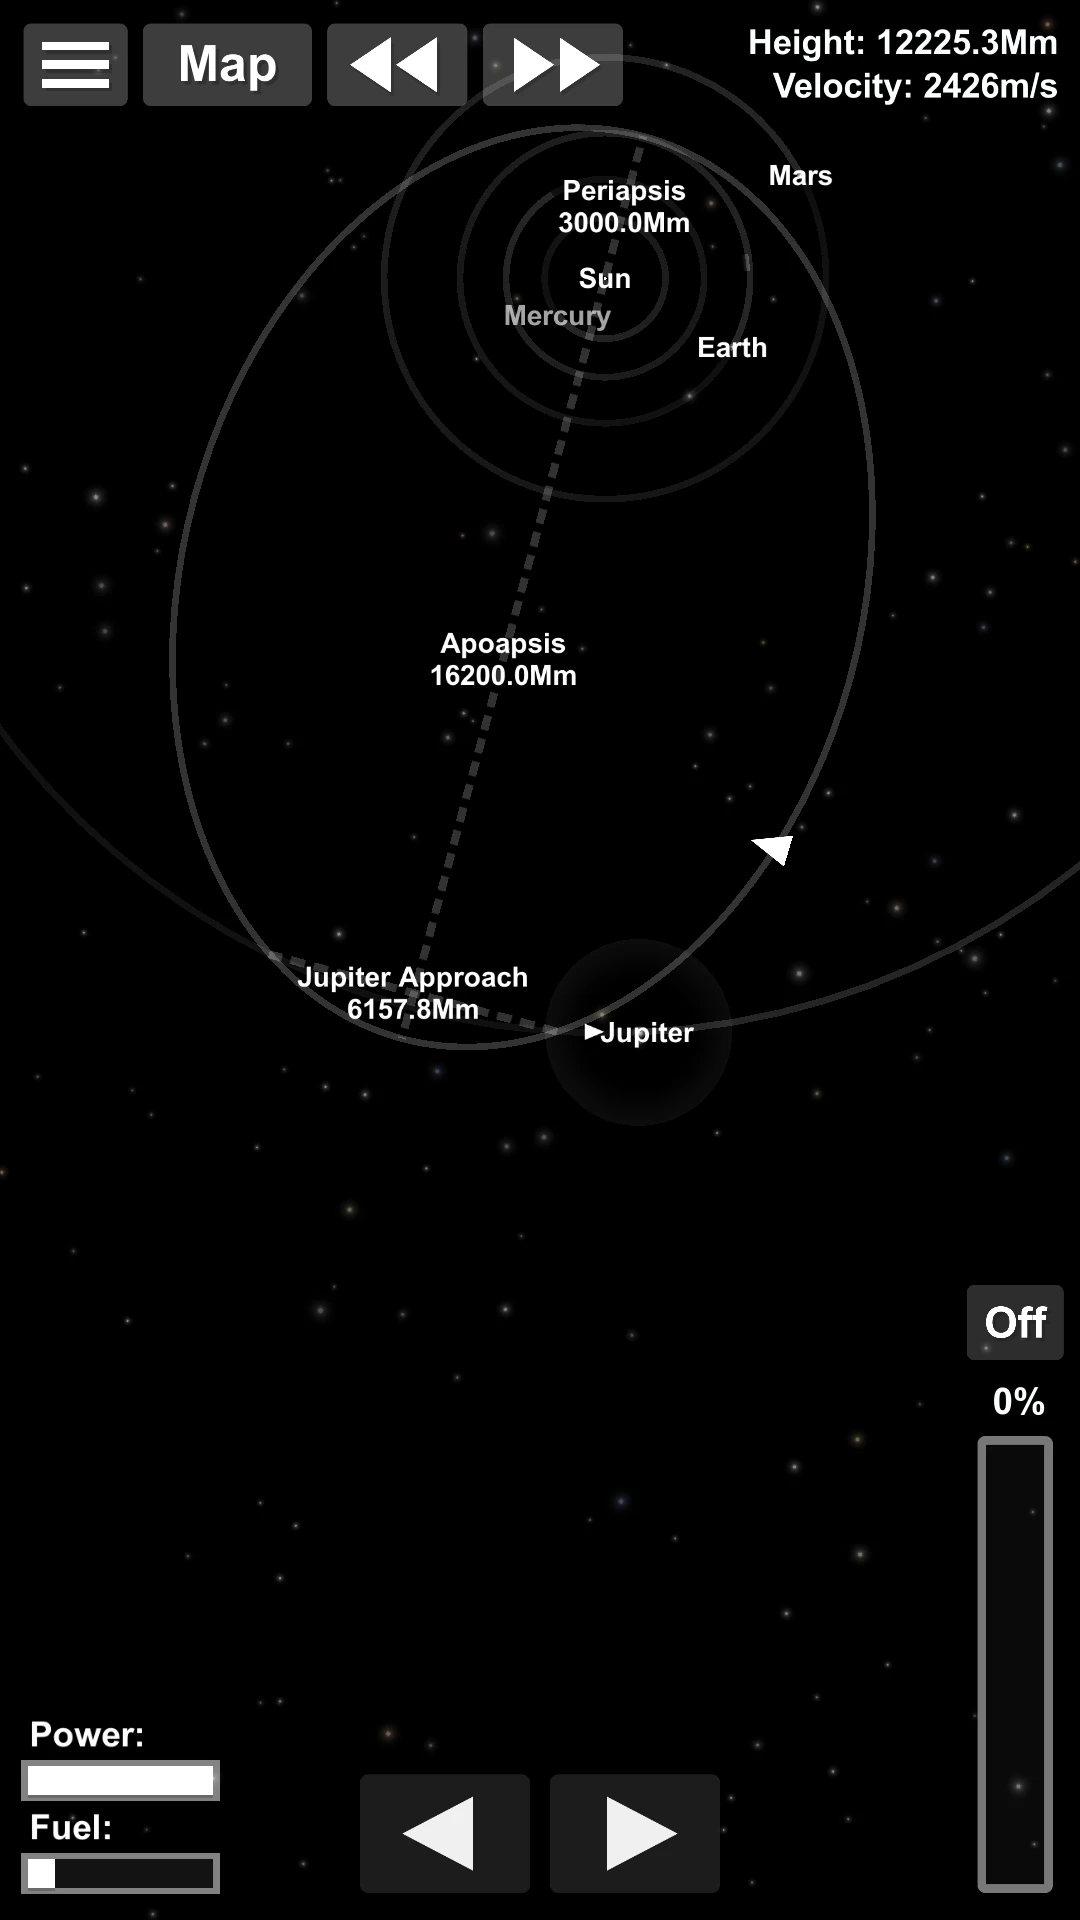
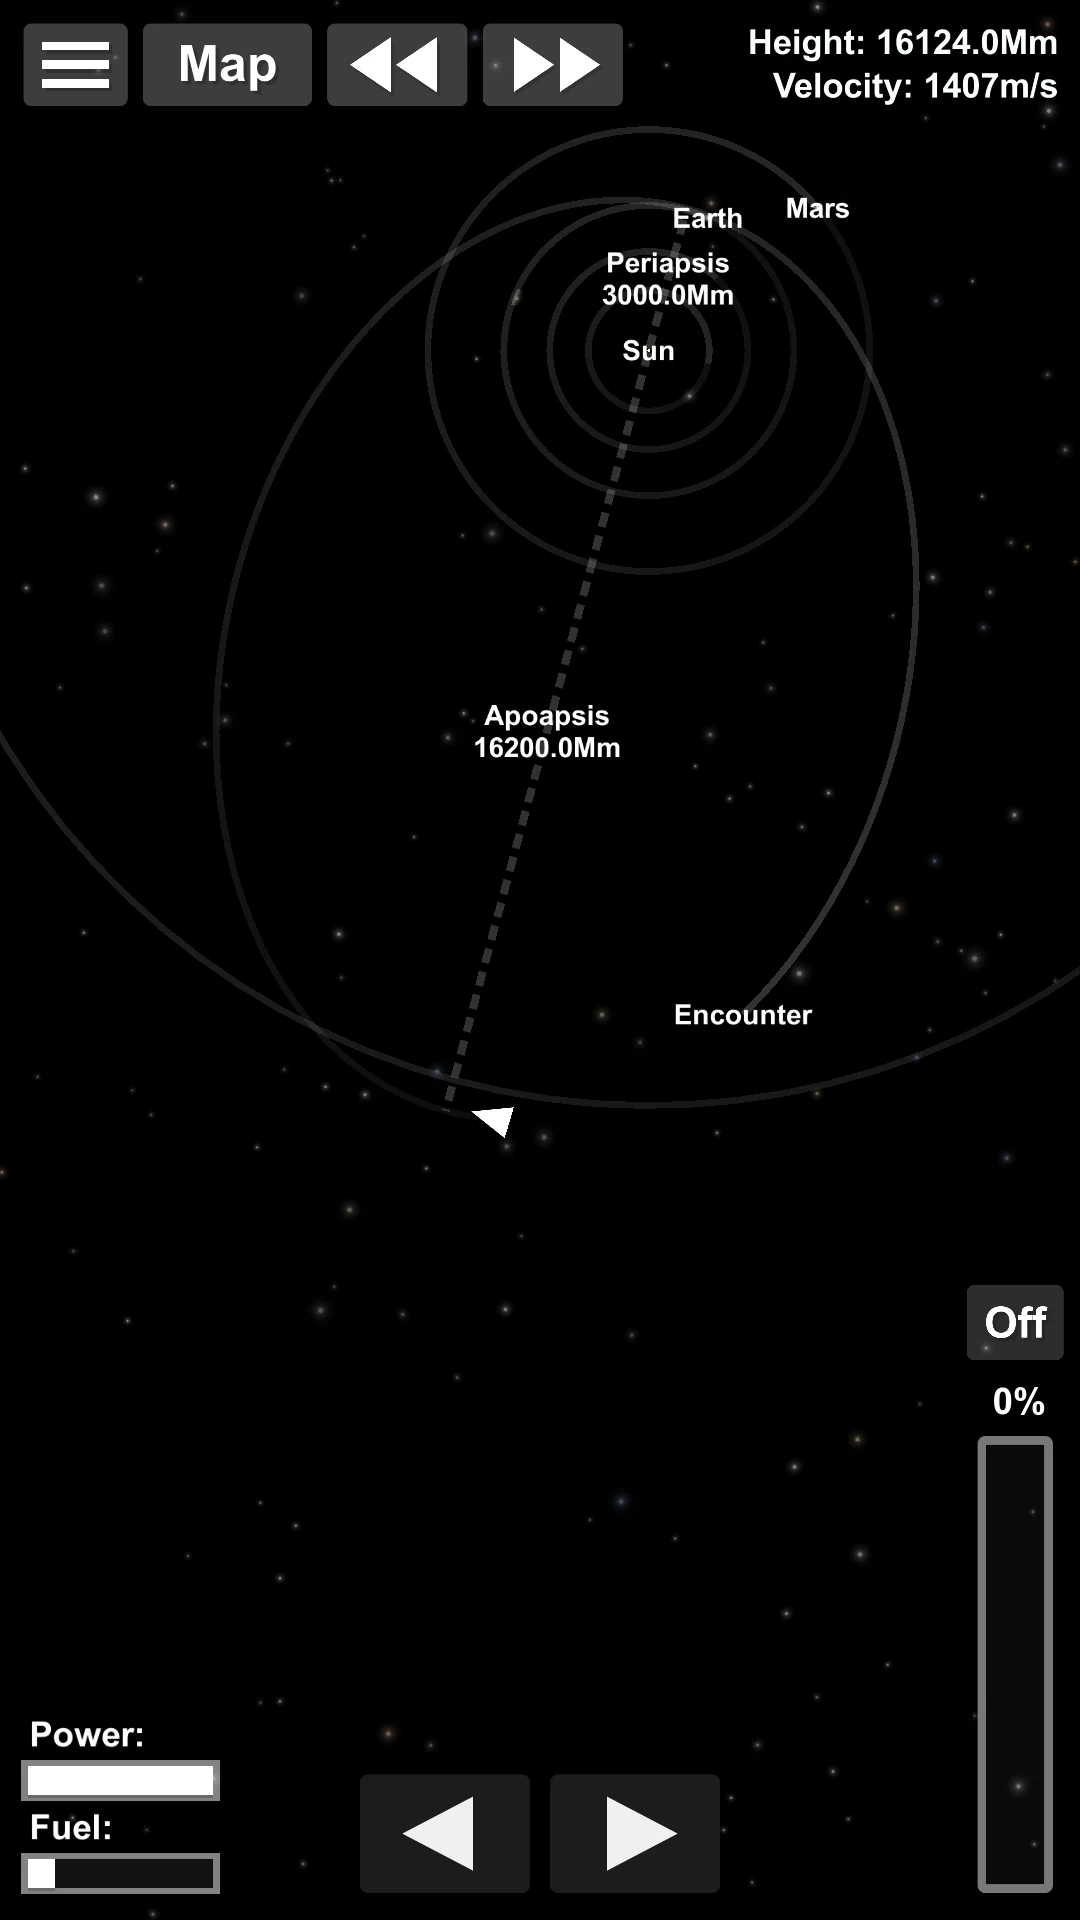
Ideally, before entering the Earth's SOI, you should adjust your periapsis so that it's around 600 km. Now, the objective is to set the apoapsis of your exiting trajectory at 16200 Mm (cool, a round value).
OK, now we are on a transfer trajectory to Jupiter. When you reach the apoapsis, burn prograde to raise your periapsis at 3000 Mm. This will ensure you won't meet Earth again (you still have to watch out for Mars though) and you'll get slightly closer to Jupiter every two turns, until you get an encounter:
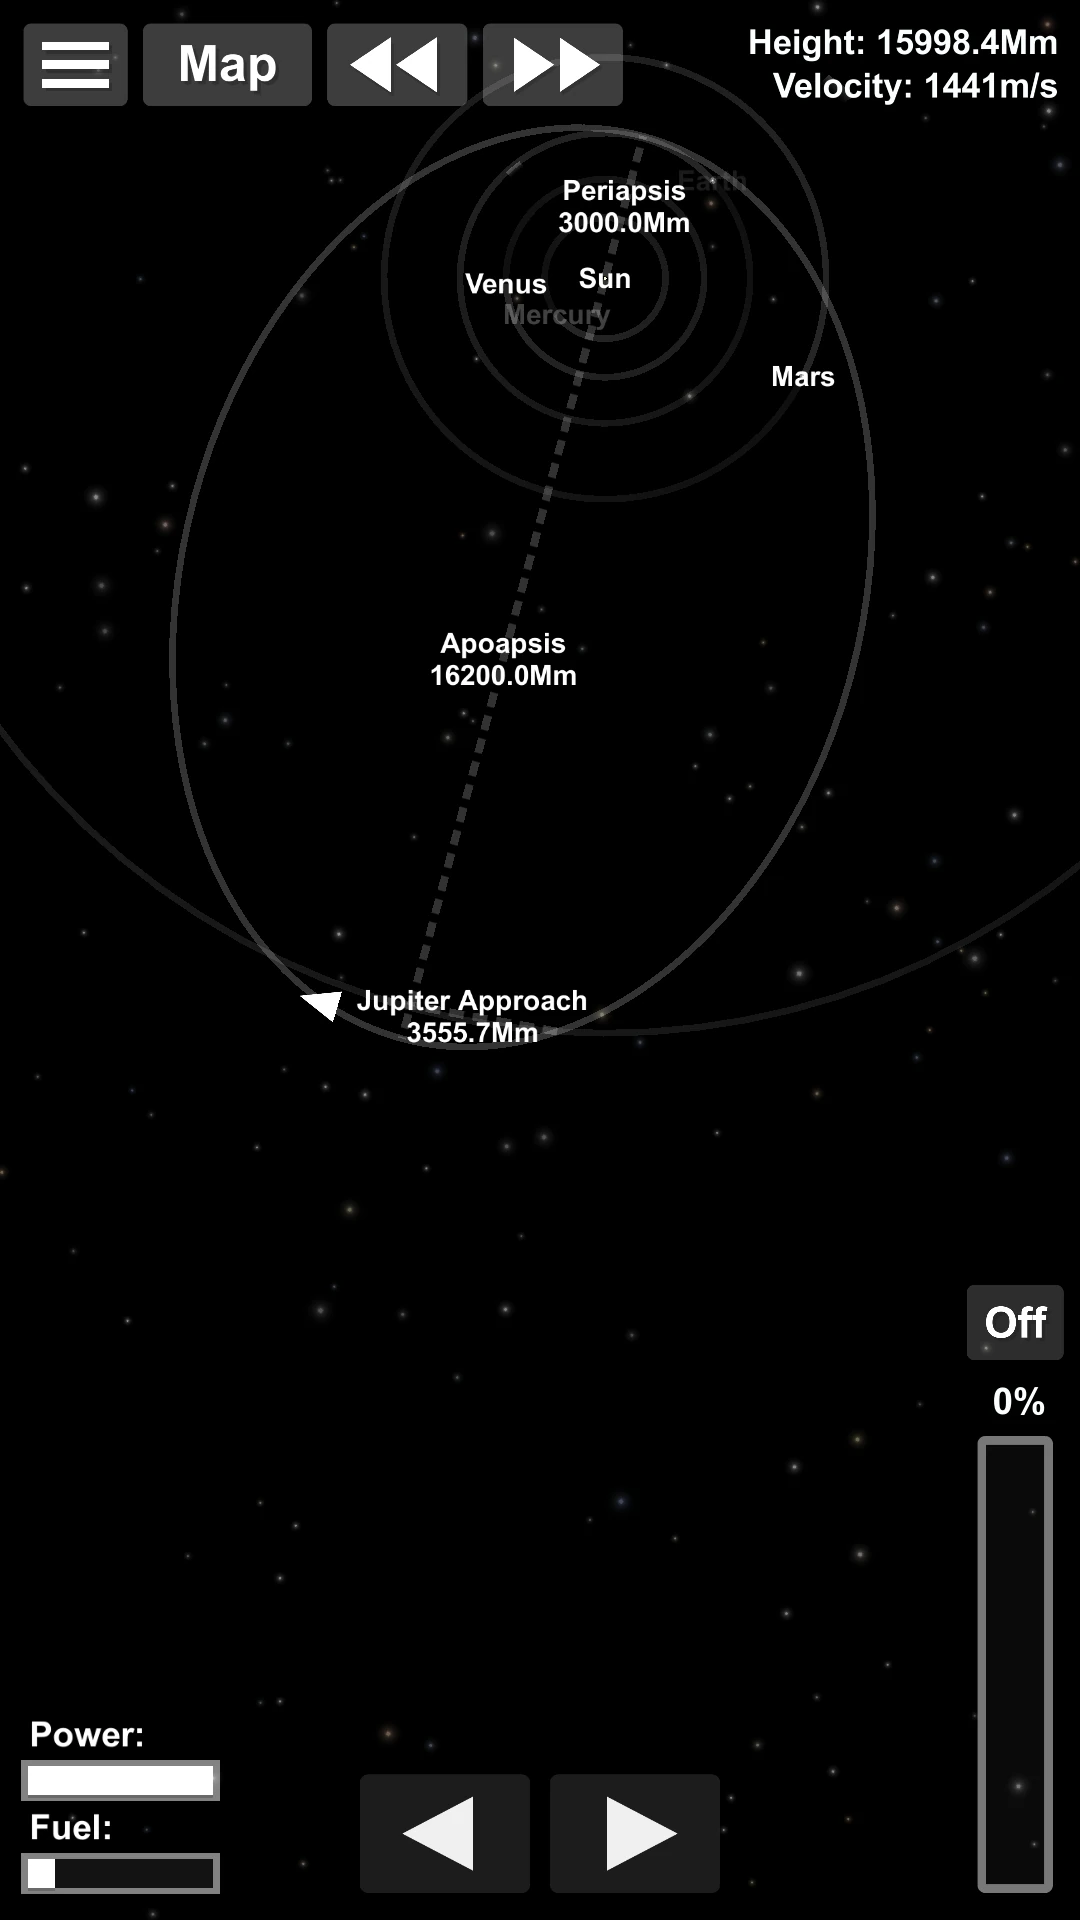
And the rocket still has some fuel left! Remember the direct transfer attempt in comparison?
In case you get an unexpected encounter with Mars in the process, you may just slightly modify your trajectory to avoid it (if you do it early enough this will cost practically nothing), and come back to your initial trajectory after one turn, once the "danger" has passed.
Even if it's classified as tricky, that technique is quite simple with some practice. It will save around 400–500 m/s, which is quite valuable with a heavy rocket. Especially that your jovian missions will generally be heavy due to the high gravity of that planet.
If that's OK, then you know everything now! The rest is practice!
Gravity assists in real missions[]
The first rocket ever to experience a gravity assist was the Soviet probe Luna II. Actually, it was meant to land on the Moon, but it missed its target and ended-up as the first interplanetary man-made object. The Moon's gravity made it escape the Solar System.
Mercury[]
Mercury has a small mass. It was used by MESSENGER to get to the orbit of Mercury, decrease its velocity and in the end to orbit on Mercury. It will be used again by BepiColombo for the same reason.
Venus[]
Venus is nearly as massive as Earth and all missions heading to Mercury or the Sun used at least one Venus gravity assist. The record will be held by Parker Solar Probe, which will make 9 Mercury flybys. In the future, Venus flybys will be essential for cargo rocketing between Mercury and the other planets.
Earth[]
Earth is currently largely used by rockets trying to go to various targets. It was used by Juno and Galileo to reach Jupiter, by Rosetta to reach its comet and by OSIRIS-REx to reach Bennu, a near-Earth object. In the future, Earth flybys will be essential for rockets transiting between the inner Solar System and the gas giants.
Moon[]
The Moon can support a small gravity assist. It was used by the STEREO-A and STEREO-B probes to escape into heliocentric orbit.
Mars[]
Mars has a small mass and therefore can be used for small increases of speed. Mars was used by the Rosetta probe (which also used Earth gravity assists) to get nearly as far as Jupiter. It was also used by Dawn to get to Ceres.
Martian moons[]
Martian moons are too small and have no gravity for a gravity assist.
Ceres[]
Ceres and other asteroids are too small for a gravity assist. They will, at least, change trajectory of a rocket by some degrees.
Jupiter[]
Jupiter is called the train of the Solar System. Its powerful gravity is strong enough to pull a rocket on a Sun escape trajectory or on a Sun impact trajectory. All missions to the outer planets used a Jupiter flyby.
Jovian moons[]
Jovian moons are large enough to help a rocket to change its trajectory slightly and navigate from one moon to another. Galileo used this for its advantage.
Saturn[]
Saturn is large enough to send a rocket on a Sun escape trajectory.
Saturnian moons[]
Saturnian moons had been used by Cassini for gravity assists, mainly Titan.
Uranus, Neptune and its moons[]
Uranus & Neptune are massive enough to change velocity of a rocket heading to the Kuiper Belt or back.
Uranian & Neptunian moons provide enough gravity assist for rockets traveling between them. This will be important for trade routes.
Other[]
Kuiper Belt objects have too small mass to be largely used for gravity assists.
Conclusion[]
It is important to notice that gravity assists require time and good alignment. They can be very useful for cargo rockets, but passenger rockets will require much faster routes at the expense of fuel. Technically, it is possible to send a rocket to Pluto using only fuel needed to reach Venus. However, as practice shown us many times, even exploration rockets are sometimes sent on faster routes at the expense of fuel. The best example is New Horizons, which was sent from Earth directly on a Sun escaping trajectory and only benefited from a Jupiter flyby.